Educate

Elizabeth Hawley 1923 – 2018

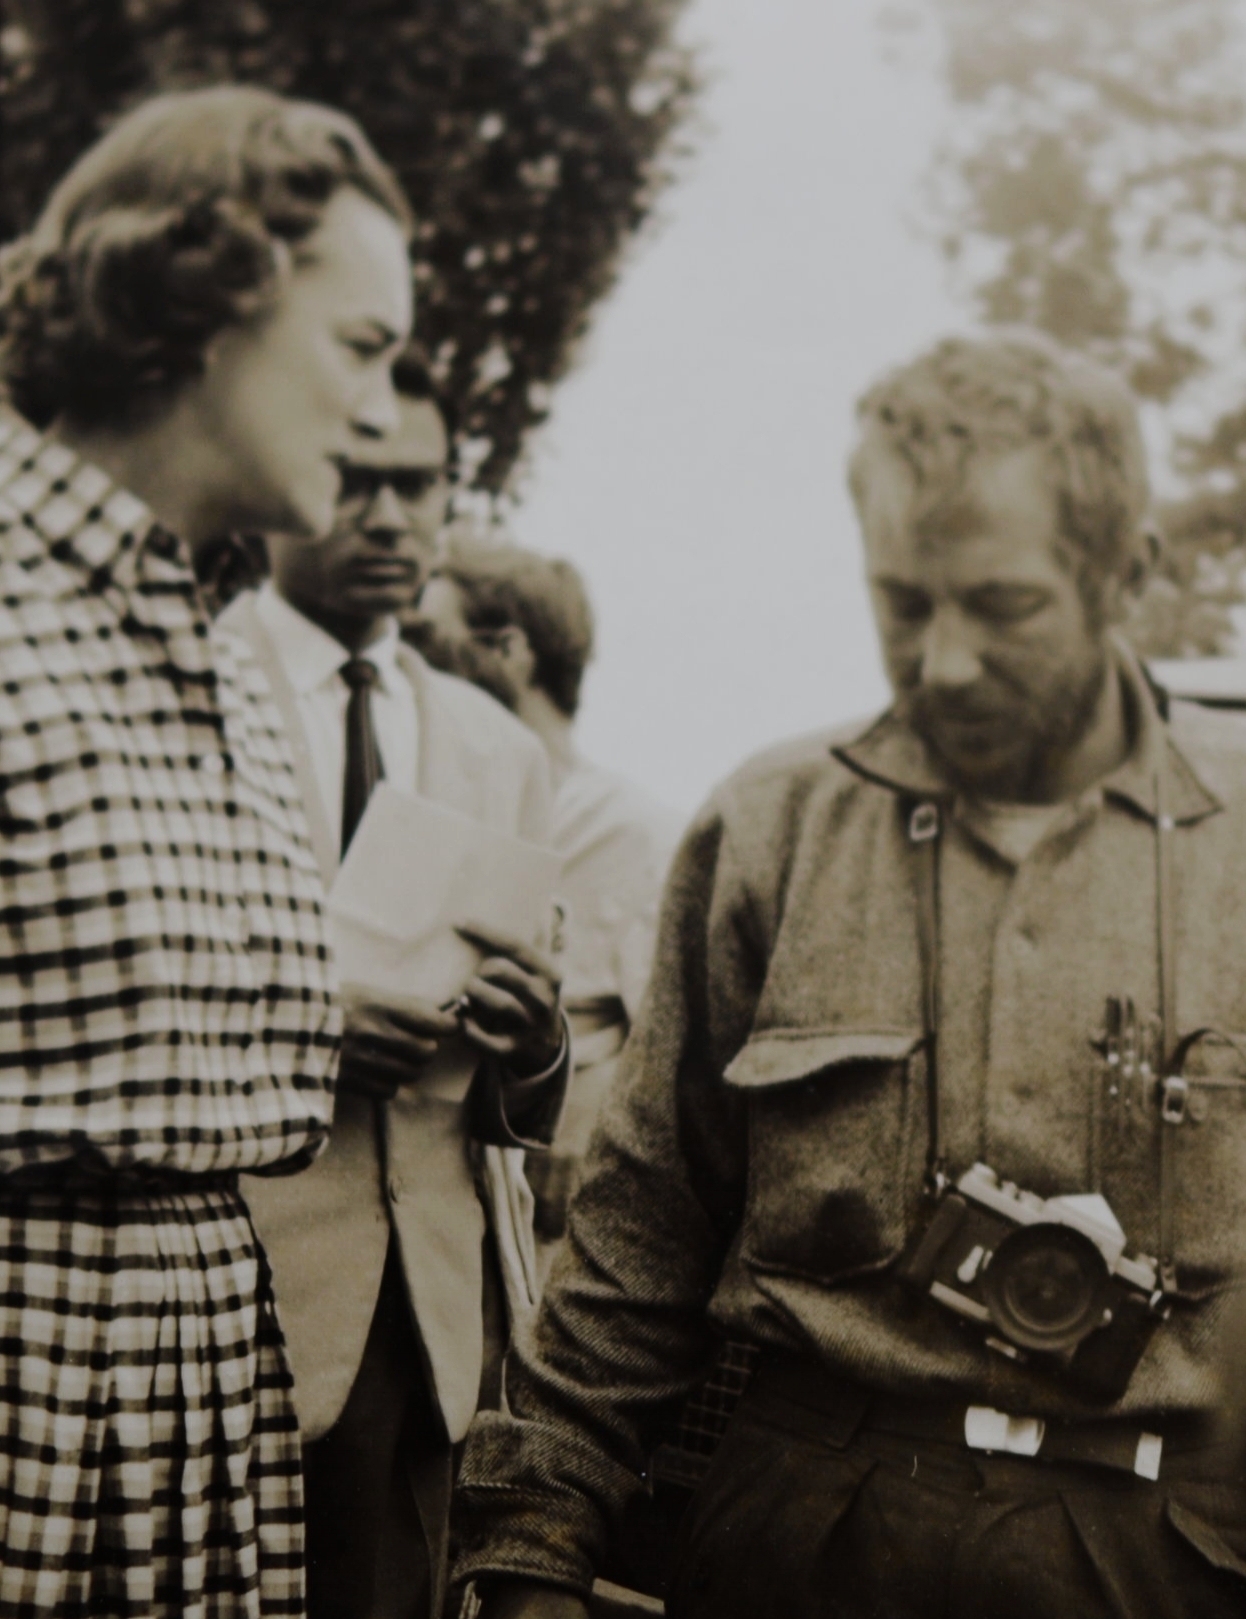
Elizabeth Hawley, known as the Chronicler of the Himalayas, kept meticulous records of climbs in the Nepalese Himalaya for over half a century. Those records make up the Himalayan Database. She was a remarkable woman and will be missed.

Miss Hawley has donated her archives to the American Alpine Club Library, where they will be preserved for future generations. Already residing in the archives are Miss Hawley's correspondence, postcard collection and the newly arrived 1963 American Everest File. Her files and personal library collection will arrive in the coming months.


Below you will find tributes from Lisa Choegyal, good friend of Miss Hawley, and Richard Salisbury, friend, co-author and builder of the Himalayan Database.

By Lisa Choegyal
Nepali Times

Elizabeth Hawley, who died in Kathmandu on 26 January 2018 aged 94 years, was an American journalist living in Nepal since 1960, regarded as the undisputed authority on mountaineering in Nepal. Born 9 November 1923 in Chicago, Illinois and educated at the University of Michigan, she was famed worldwide as a “one-woman mountaineering institution”, systematically compiling a detailed Himalayan database of expeditions still maintained today by her team of volunteers, and published by the American Alpine Club.

Respected for her astute political antennae and famously formidable, Miss Hawley represented Time Life then Reuters since 1960 as Nepal correspondent for 25 years. She is credited with mentoring reporters and setting journalistic standards in Nepal, competing to file stories from the communications-challenged Nepal of the 1960s. She worked with the pioneer adventure tourism operators, Tiger Tops, from its inception in 1965 with John Copeman, until she retired as AV Jim Edward’s trusted advisor in 2007.

For Sir Edmund Hillary, she managed the Himalayan Trust since it started in the mid-1960s, dispensing funds to build hospitals, schools, bridges, forest nurseries and scholarships for the people of the Everest region. Generations of Sherpas remember being overawed by the rigor of Miss Hawley’s interviews, and quake at the memory of her cross-examinations when collecting their scholarship funds. Sir Edmund Hillary described Elizabeth Hawley as “a most remarkable person” and “a woman of great courage and determination.” She served as New Zealand Honorary Consul to Nepal for 20 years until retiring in 2010.

Elizabeth first came to Nepal via India for a couple of weeks in February 1959. She was on a two-year round the world trip that took her to Eastern Europe, the Middle East and South Asia. Bored with her job as researcher-reporter with Fortune magazine in New York, she had cashed her savings to travel as long as they lasted. Nepal had been on her mind since reading a 1955 New York Times article about the first tourists who visited the then-Kingdom.

Because of her media contacts, the Time Life Delhi bureau chief asked her to report on Nepal’s politics. It was an interesting time - as one of only four foreign journalists, she was present when King Mahendra handed over the first parliamentary constitution, which paved the way for democracy in Nepal. Fascinated by Nepal’s politics and the idea of an isolated country emerging into the modern 20th century, she returned in 1960 and never left, living in the same Dilli Bazaar apartment, the same powder blue Volkswagen beetle car, and generations of faithful retainers.

A diminutive figure of slight build with a keen look, Elizabeth was bemused at the universal attention she received. Her Himalayan Database expedition records are trusted by mountaineers, newswires, scholars, and climbing publications worldwide, published by Richard Salisbury and the American Alpine Club. She was one of only 25 honorary members of the Alpine Club of London, and has been formally recognized by the New Zealand Alpine Club and the Nepal Mountaineering Association. In 2004 she received the Queen's Service Medal for Public Services for her work as New Zealand honorary consul and executive officer of Sir Edmund Hillary’s Himalayan Trust. She was awarded the King Albert I Memorial Foundation medal and was the first recipient of the Sagarmatha National Award from the Government of Nepal.

Elizabeth’s career in the collection of mountaineering data started by accident: “I’ve never climbed a mountain, or even done much trekking.” As part of her Reuters’ job, she began to report on mountaineering activities and in those pioneering days of first ascents and mountain exploration, there was strong media interest in Himalayan expeditions. She relied heavily on the knowledge of mountaineer Col Jimmy Roberts, founder of Mountain Travel.


Since 1963 she has met every expedition to the Nepal Himalaya both before and after their ascents, including those who climbed from Tibet. Her records contain detailed information about more than 20,000 ascents of about 460 Nepali peaks, including those that border with China and India. Over the course of some 7,000 expedition interviews, her research work has sparked and resolved controversies. Elizabeth has seen the Nepal mountaineering scene transformed from an exclusive club to a mainstream obsession.

Elizabeth did not suffer fools gladly. Though some mountaineers were intimidated by her interrogations - sometimes jokingly referred to as an expedition's "second summit," - serious alpinists greatly admired her. "If I need information about climbing 8,000-meter peaks, I used to go to her," says Italian climbing legend Reinhold Messner. Nepali trek operator and environmentalist Dawa Steven Sherpa underlines the point: "Although it's the authorities that should have been doing this, they're not as strict or accurate as Miss Hawley. One of her biggest contributions is keeping mountaineers honest."

Elizabeth applied her trademark scrupulous precision to summarizing the political and development events in Nepal in her monthly diary, published in 2015 in two volumes as “The Nepal Scene: Chronicles of Elizabeth Hawley 1988-2007”. They stand as a faithful and unique historical record of the extraordinary changes that took place in Nepal over nearly two decades.

Her enviable journalistic sources were based on long friendships with the political, panchayat and Rana elite. She had the confidence of a wide range of prominent Nepalis, and shared a hairdresser with the (then) Queen. Educated as an historian, Elizabeth regarded herself as a reporter not a writer, stringently recording Nepal’s political and mountaineering facts with minimal opinion or analysis. Although there is no disguising her liberal bent and her admiration for the force of democracy. Former American Ambassador Peter Bodde said, Elizabeth Hawley was one of Nepal’s “living treasures” and “her contribution to the depth of knowledge and understanding between Nepal and the US was immense.”

Elizabeth Hawley’s achievements have featured in many books and articles about Nepal, and her biography by Bernadette McDonald, I’ll Call You in Kathmandu, was published in 2005, then updated and reprinted as Keeper of the Mountains. In 2013, to mark the 60th anniversary of the first ascent of Everest, Elizabeth was featured in the award-winning US television documentary of the same name, produced by Allison Otto. On screen in Keeper of the Mountains, her straightforward manner and fearless modesty made her something of a cult classic. In 2014 the Nepal government named a 6,182 meters (20,330 feet) peak in honour of her contribution to mountaineering. Elizabeth was not impressed:

"I thought it was just a joke. Mountains should not be named after people."

Miss Elizabeth Hawley is the last of the first generation of foreigners who made their life in Nepal, single and determinedly independent. She is survived by her nephew Michael Hawley Leonard and has bequeathed her library and records to the American Alpine Club. As both a successful woman in a man’s world and a highly visible foreigner recording Nepal’s history, we are all in her debt. She defied the conventions of her time, and determined to live life on her own terms and in her own incomparable style.


Elizabeth Hawley and the Himilayan Database

Remembrance of Elizabeth Hawley from Richard Salisbury, Ann Arbor, Michigan, 4 February 2018

I first met Liz Hawley in 1991 as the leader of the American Annapurna IV expedition when she came to interview me at the Malla Hotel. She was armed with the results of all of the previous expeditions to Annapurna IV, while I had prepared a spreadsheet taken from past American Alpine Journals showing the arrival and summit dates of the previous teams in order to make an estimate of the amount of supplies that would be needed for the climb.

Given what we both had, I suggested to Liz that we collaborate on building a database for her records. Liz initially declined saying that she was already working with a Nepali computer student to do this. But a year later in 1992, she contacted me telling me that her student had run off to graduate school in Arkansas and probably would never return to Nepal.

Thus began a multi-year project to design and enter her records into the database that the American Alpine Club published in 2004 as the Himalayan Database. Over 10,000 hours were spent entering the vast amount of information Liz had collected and stored in her wall-to-wall cabinets since she met the first American Everest expedition in 1963.

When the database was published, I hoped that we might be able to continue updating for 4 or 5 years, as Liz was then 80 years old. But Liz continued to thrive and we kept going strong ever since keeping the database up-to-date with all of the new teams coming to Nepal. With Billi Bierling now at the helm, we expect to continue for many years into the future.

I feel blessed to have had such a wonderful working relationship with Liz for 25 years and will greatly miss seeing her when I again come to Kathmandu later this year.

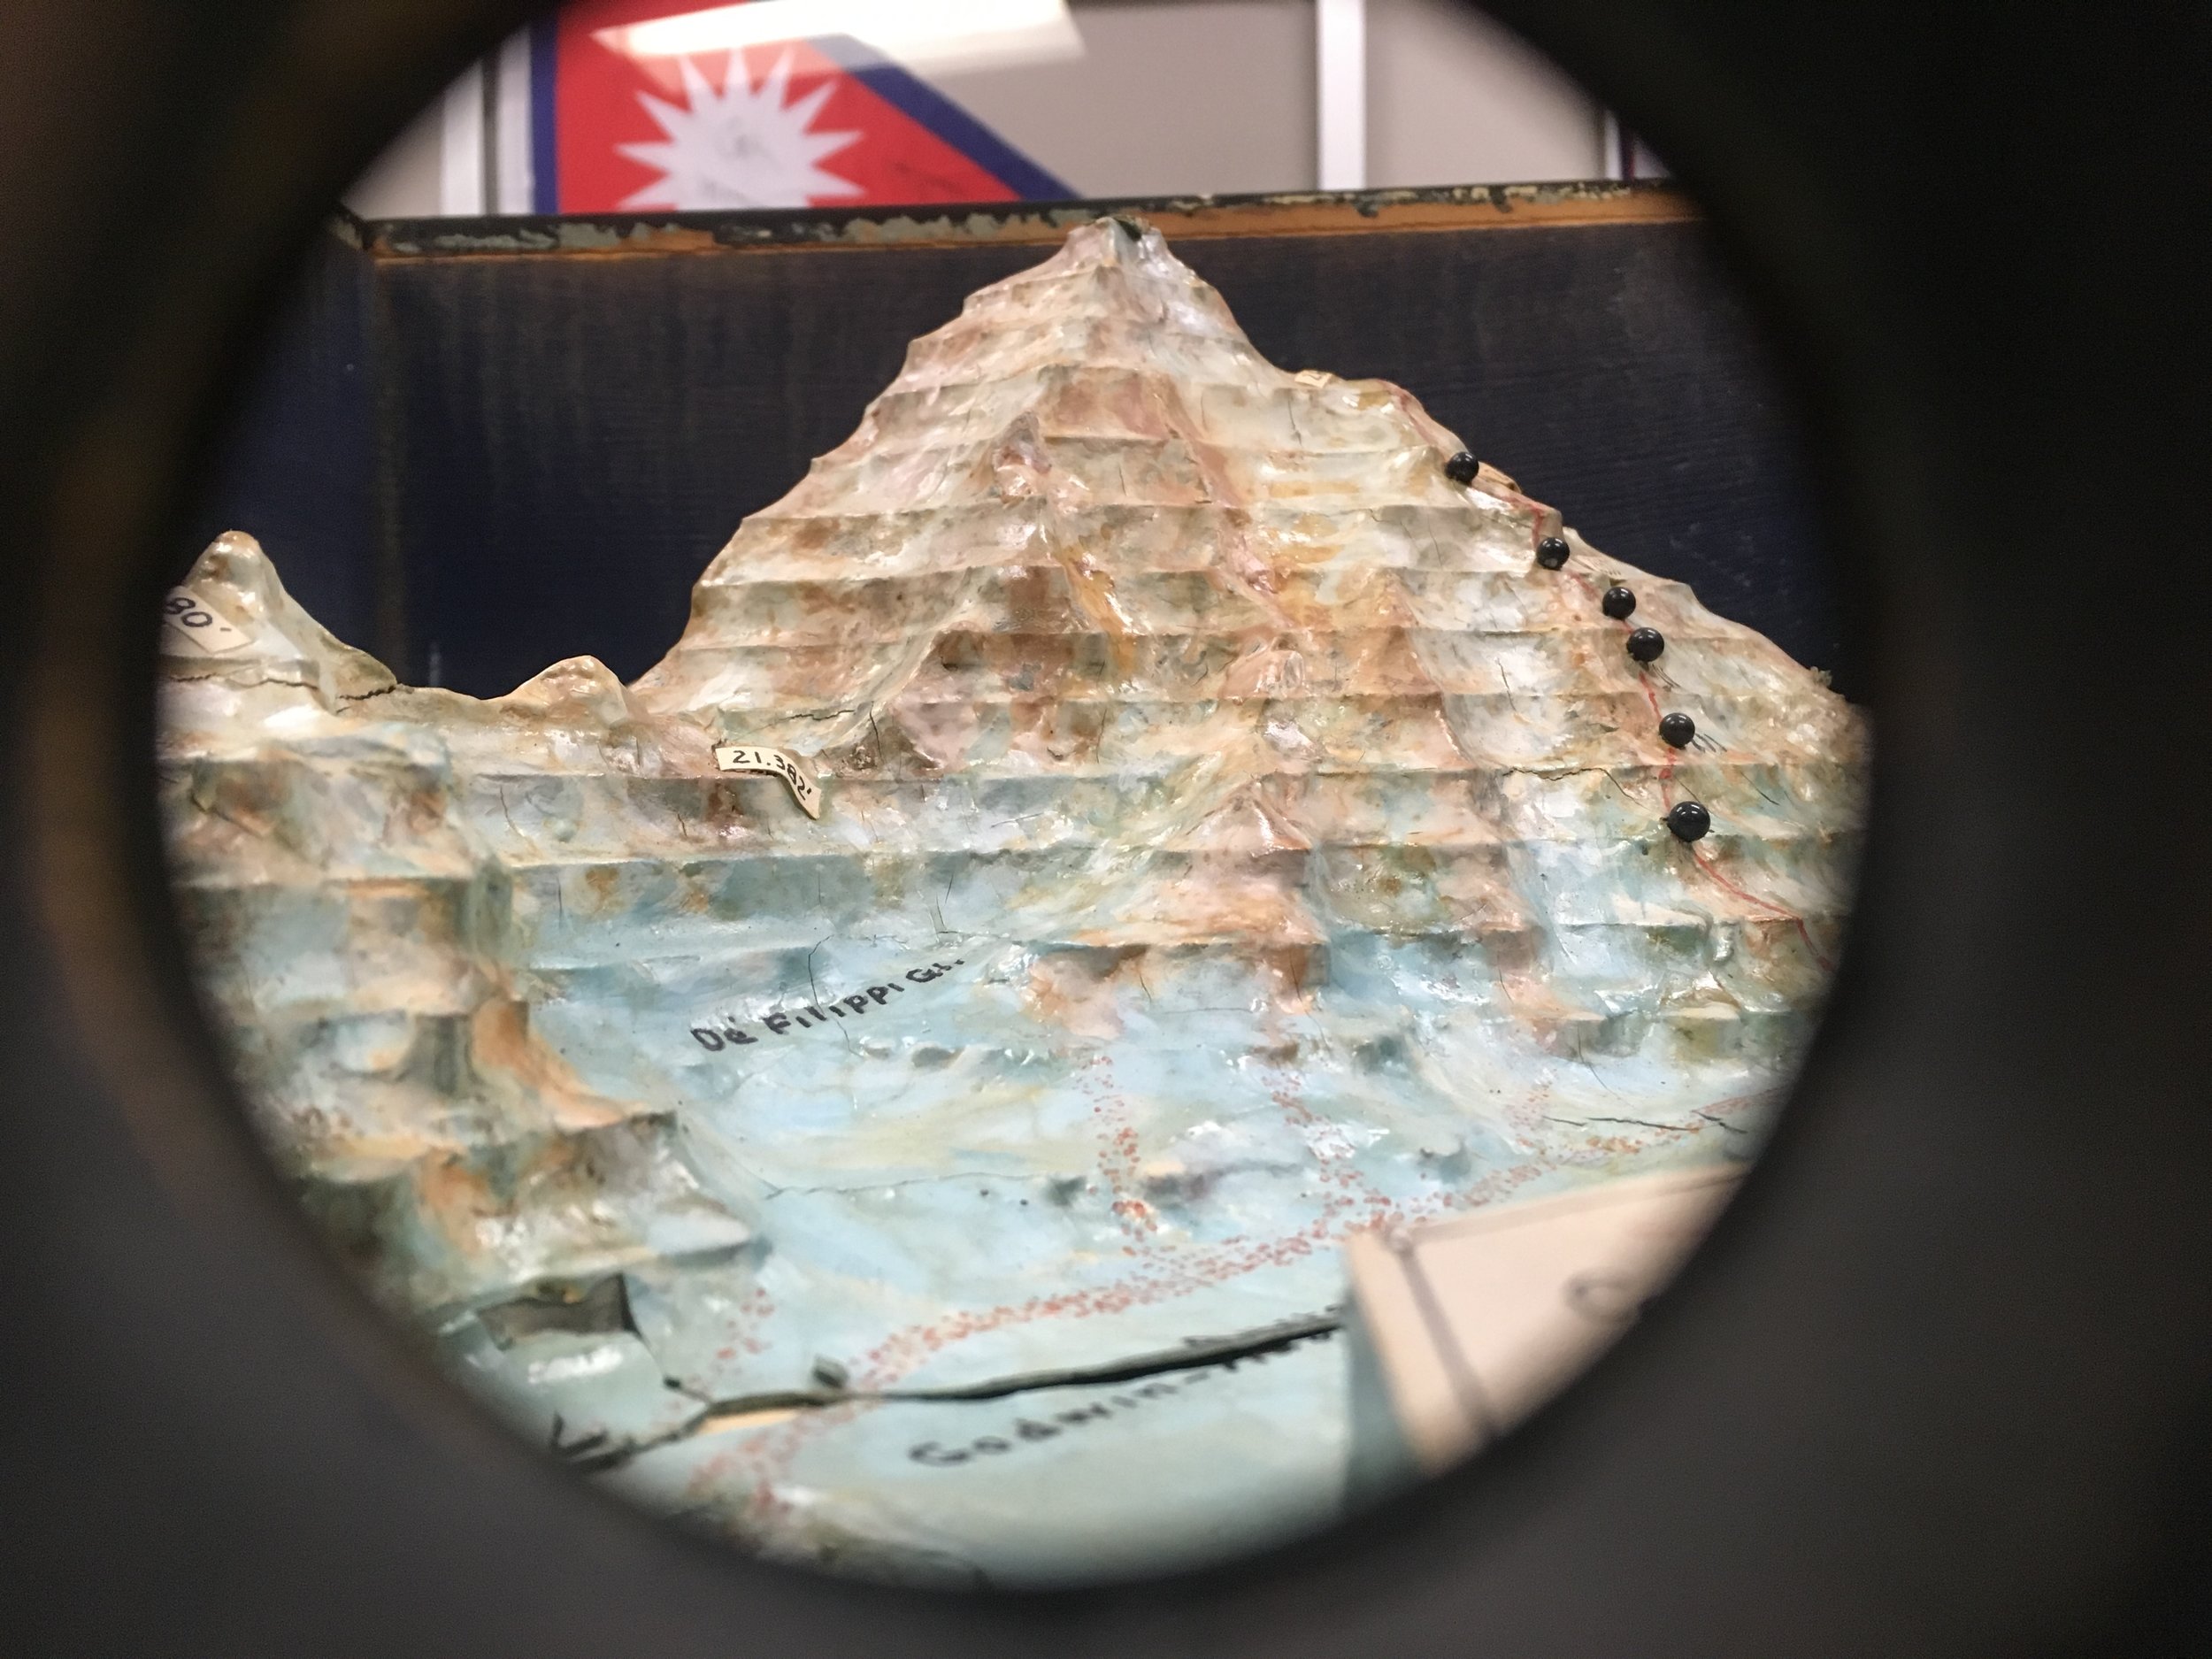
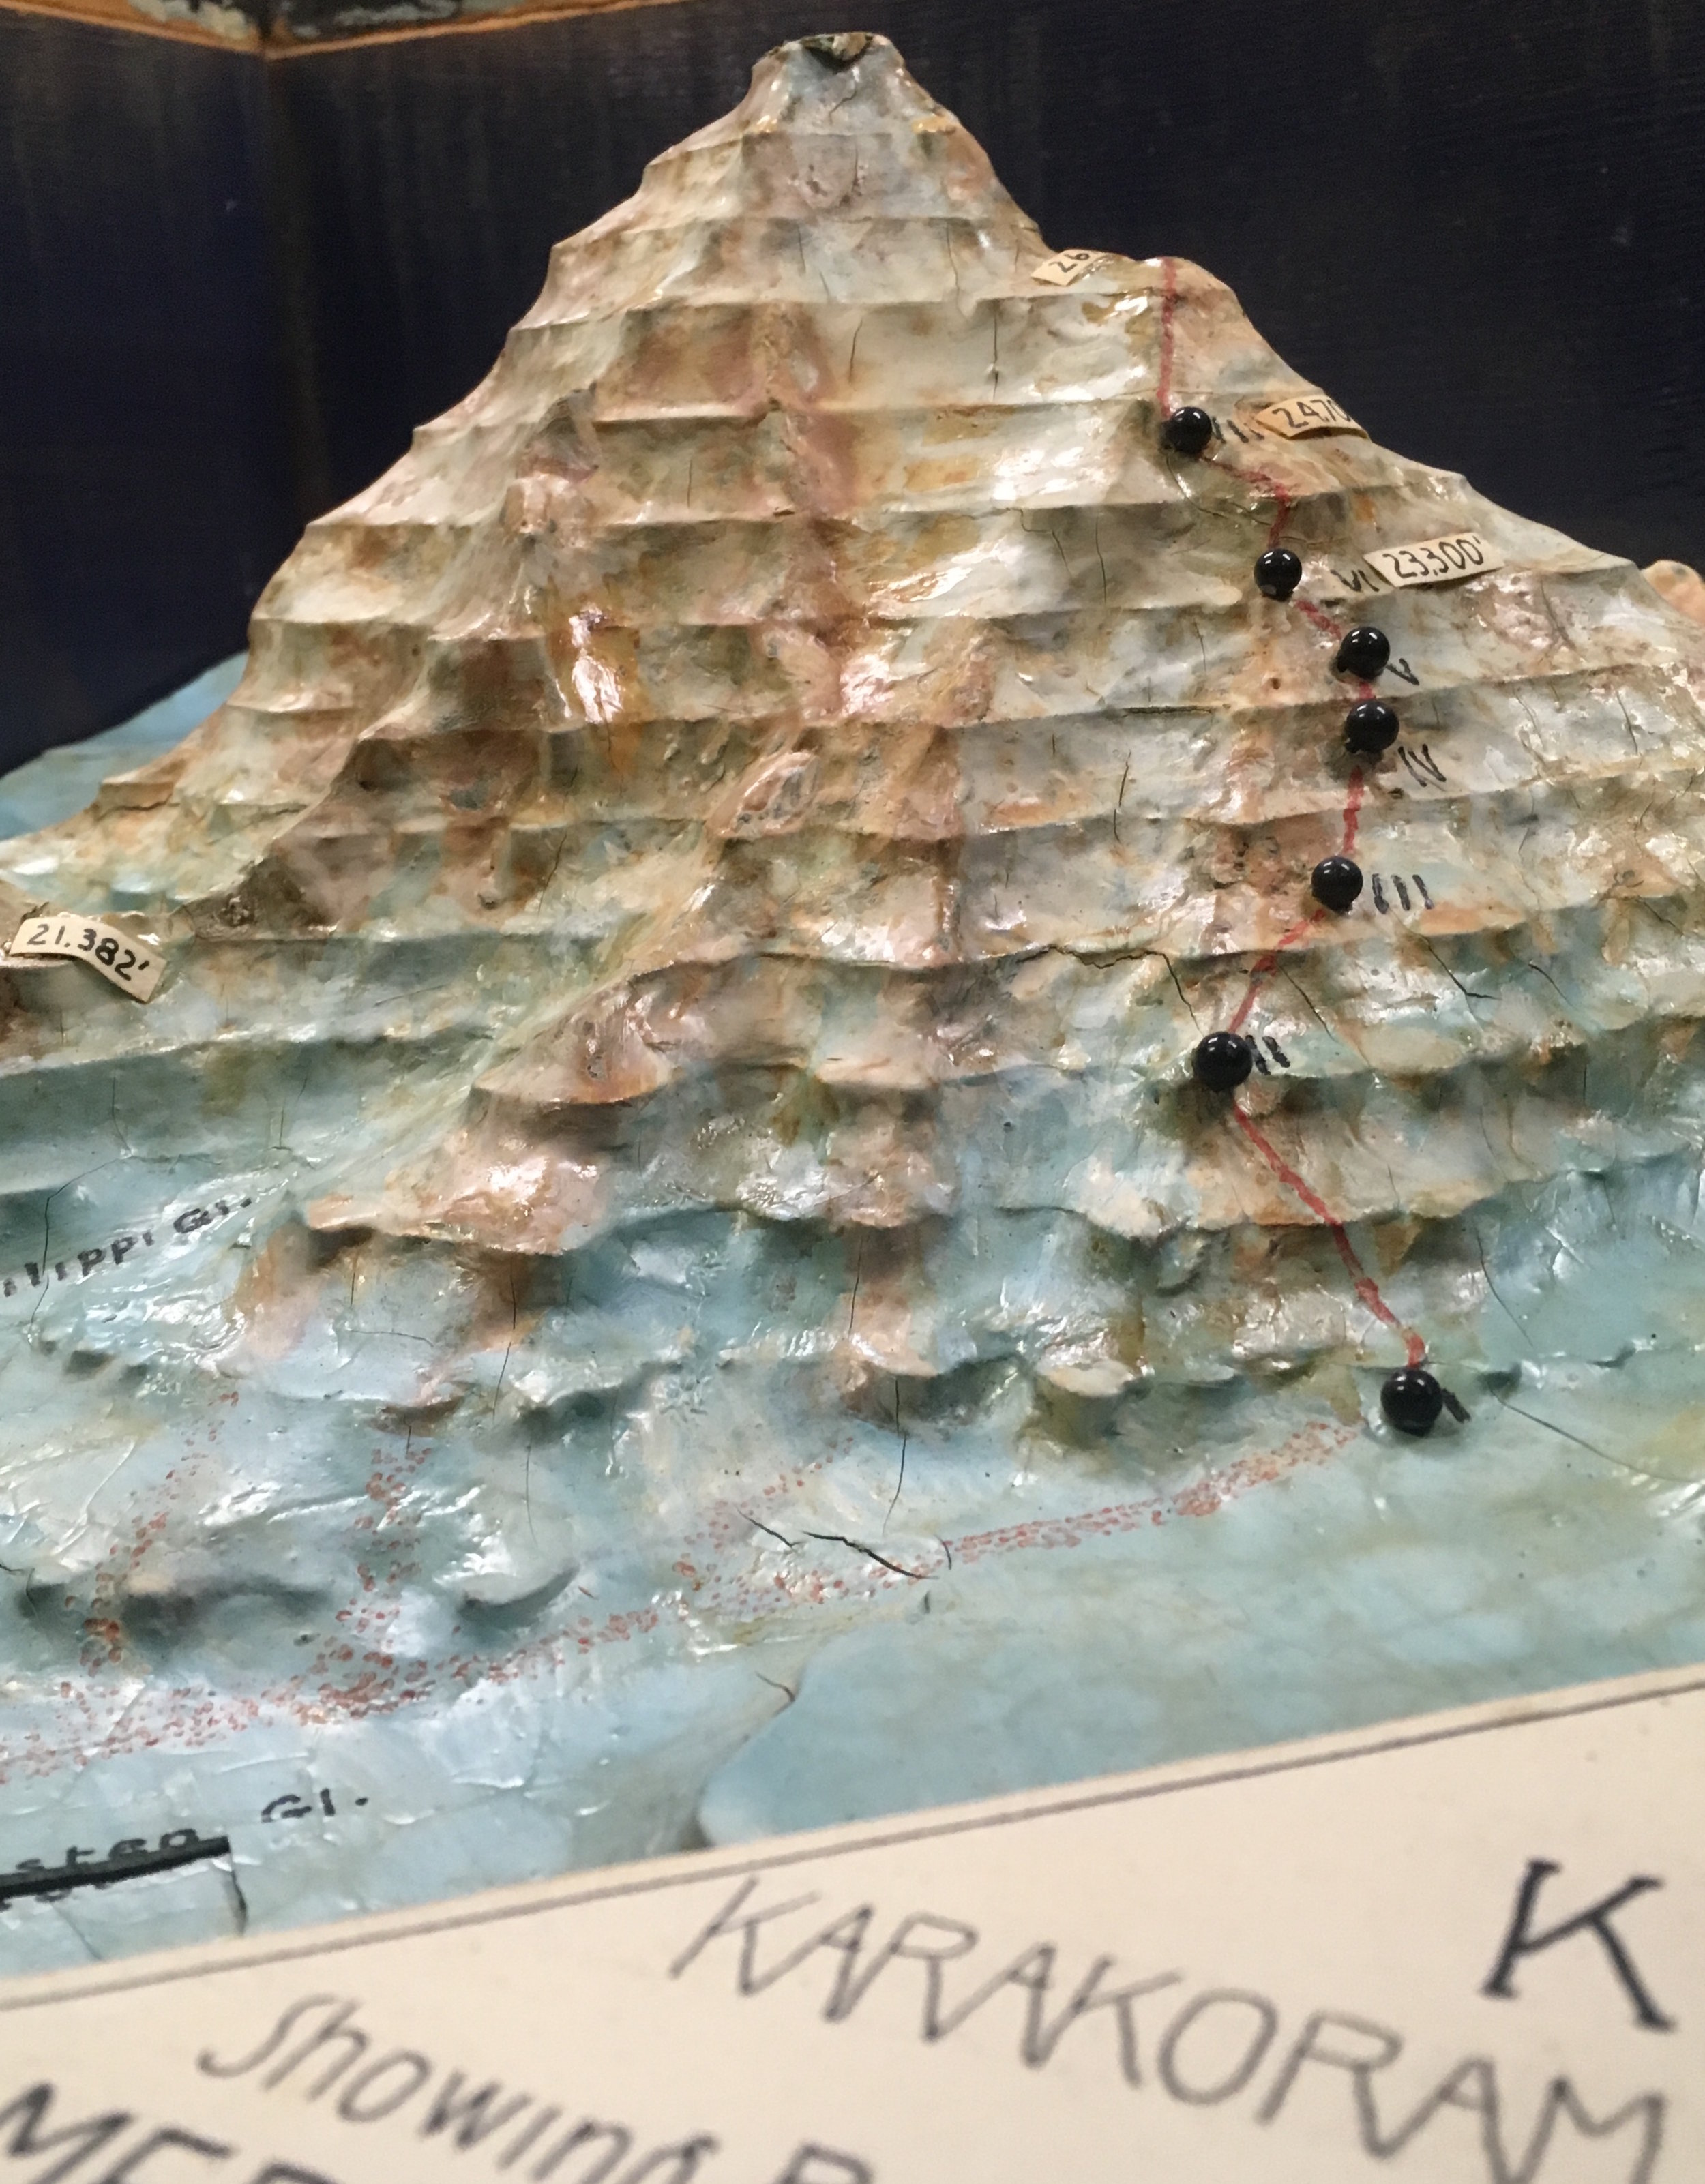
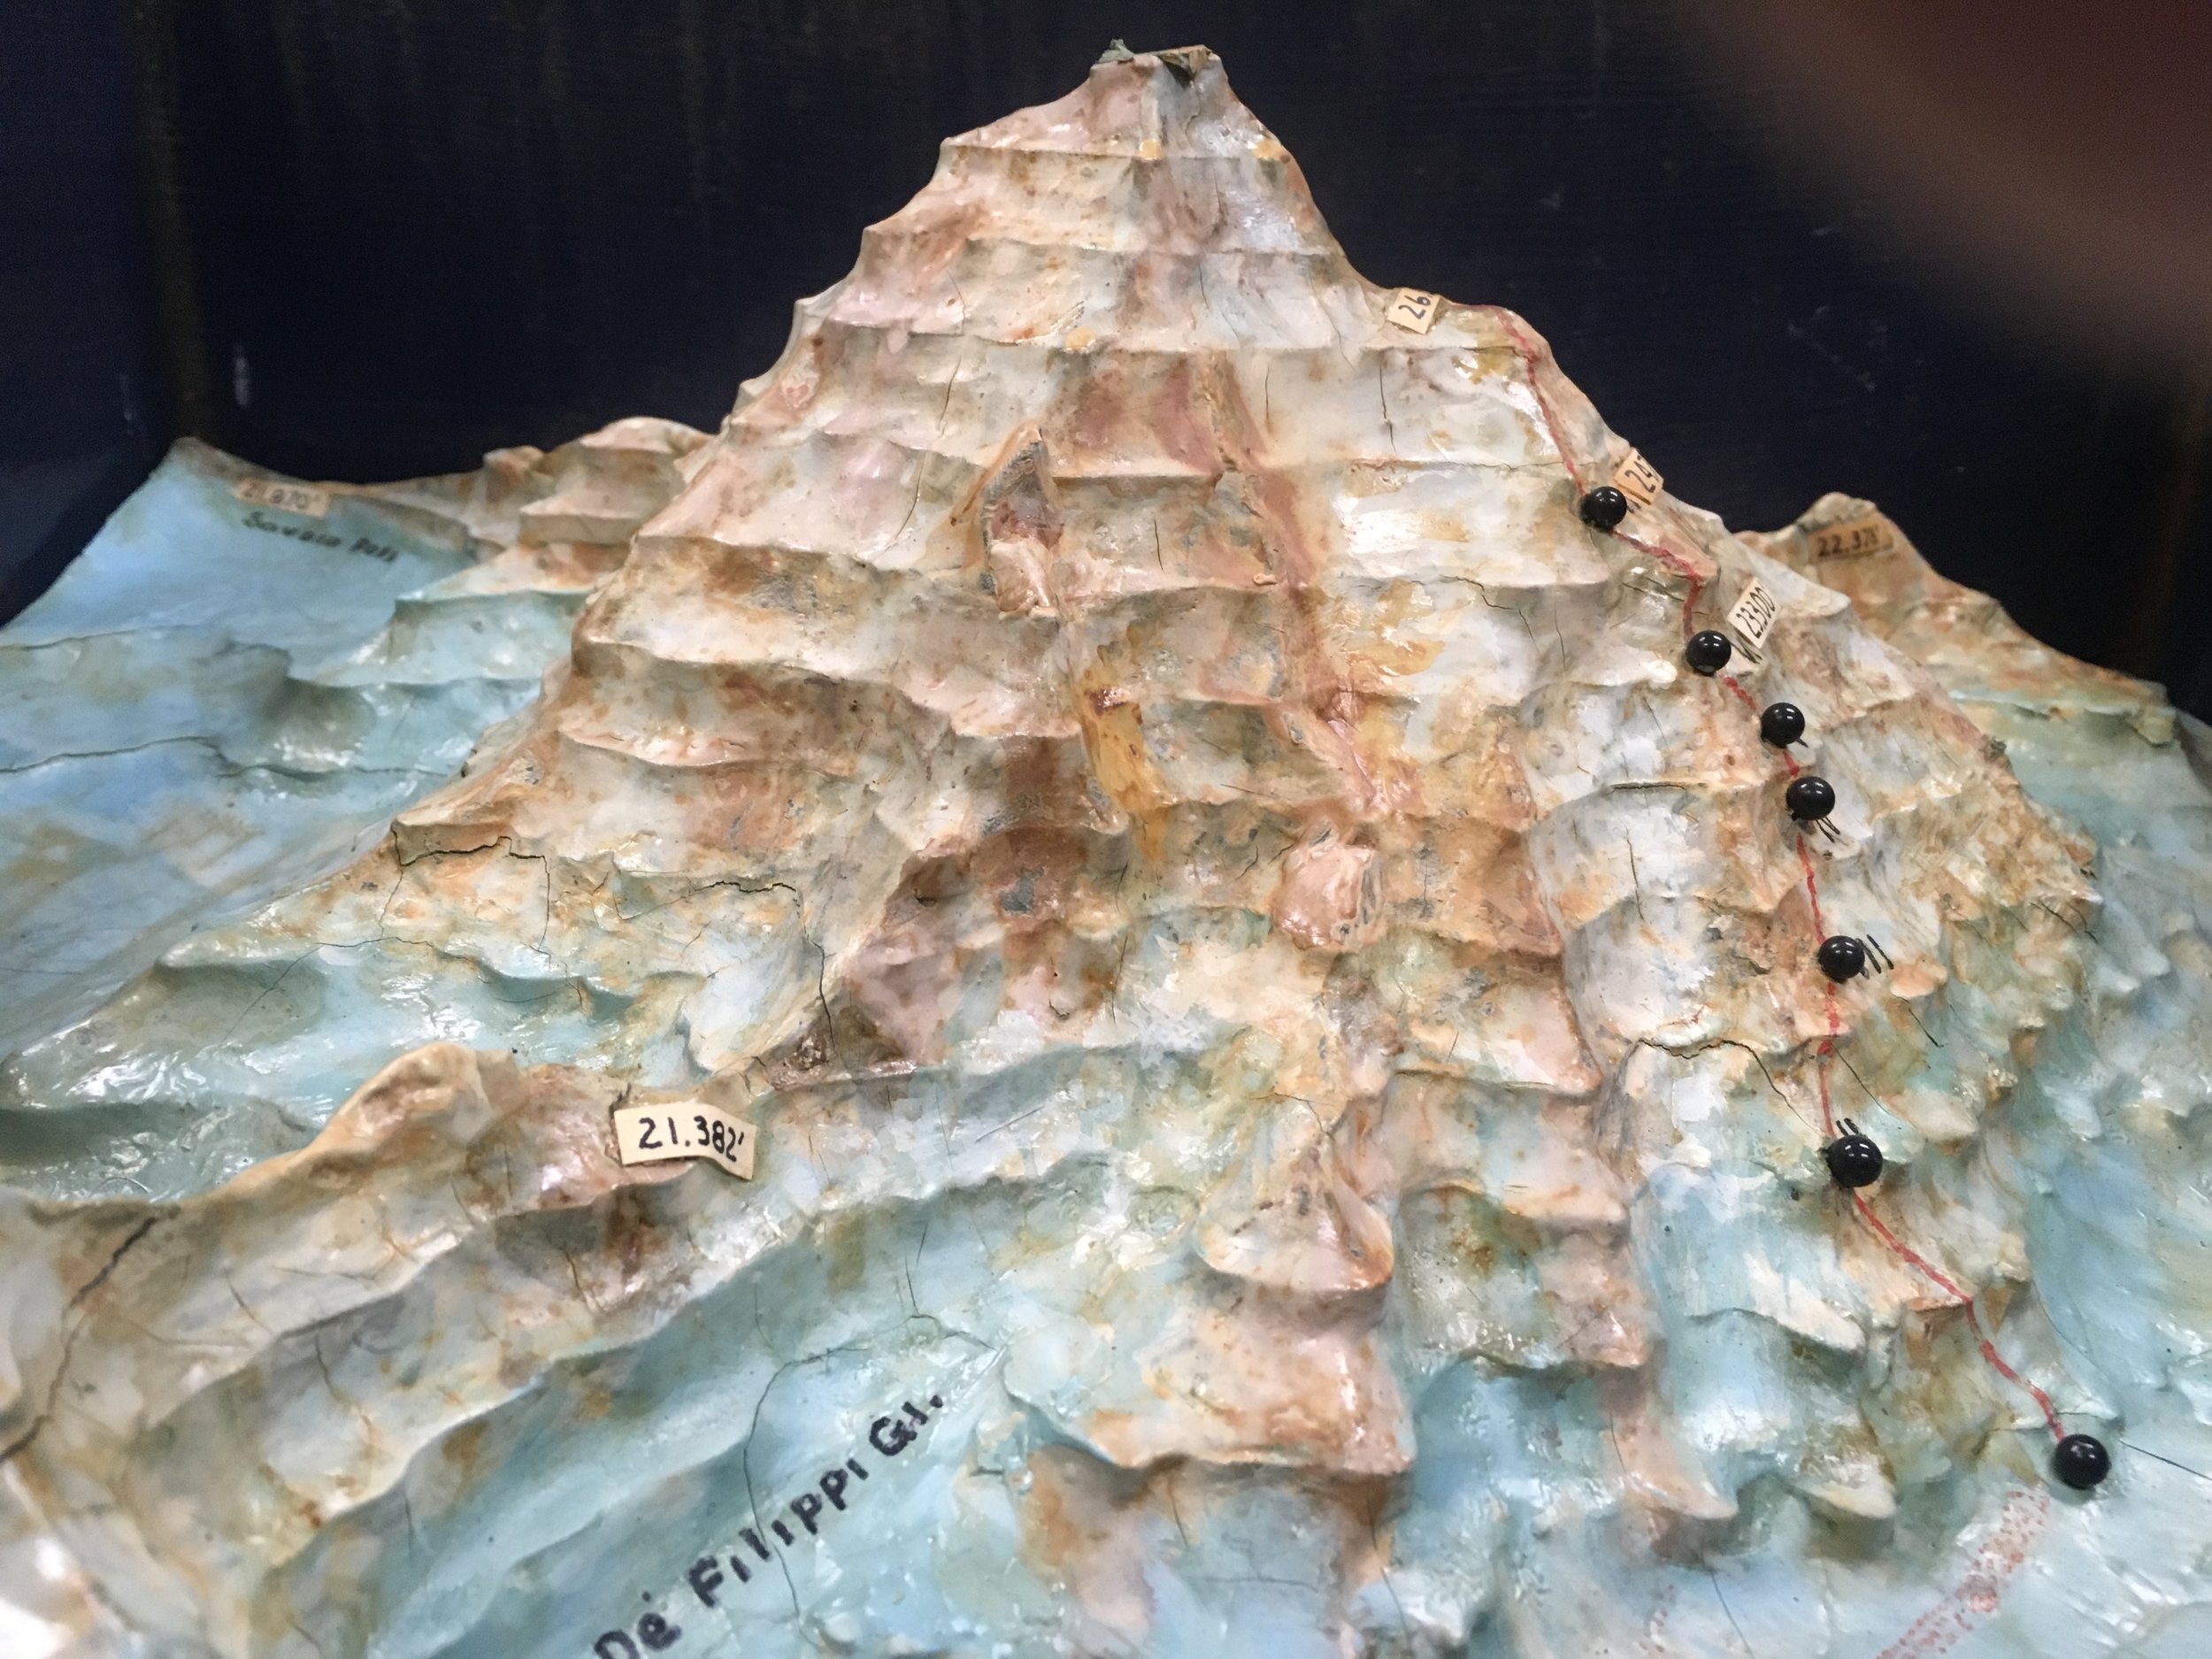
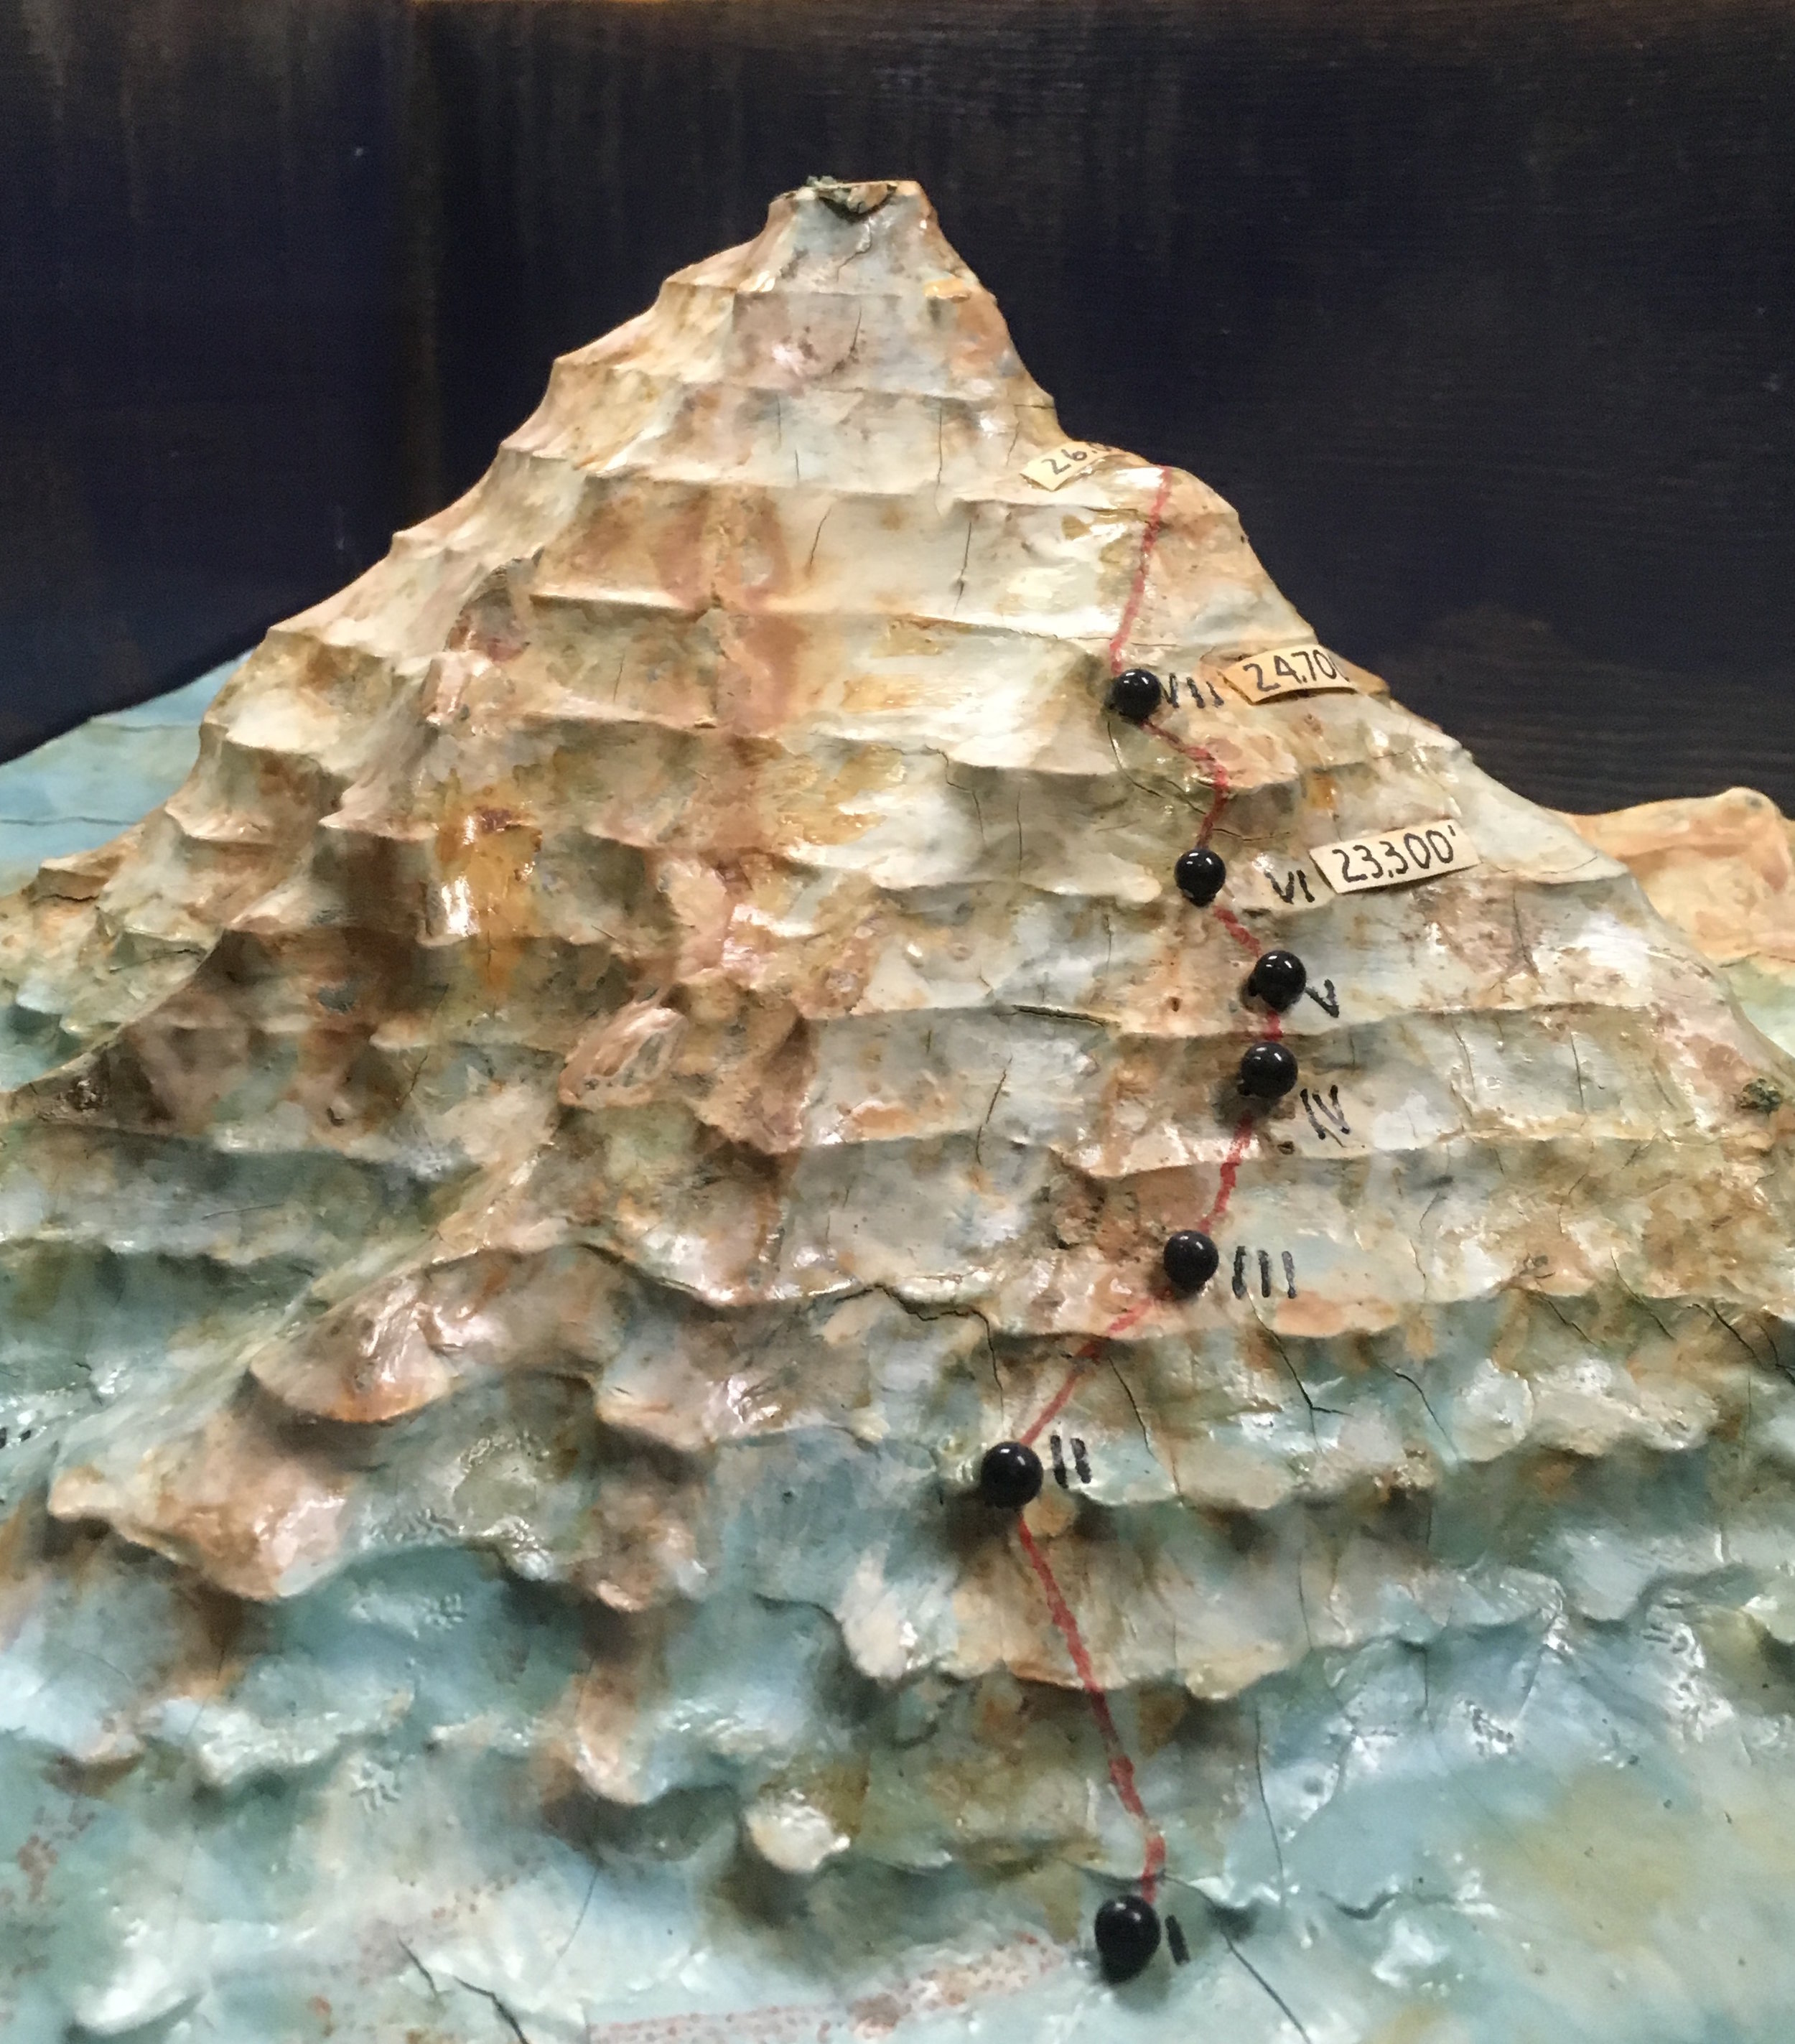
K2 1938: The First American Karakoram Expedition

by Eric Rueth

On February 24, The American Alpine Club will celebrate the first American ascent of the world’s second-highest peak, K2, at our Annual Benefit Dinner in Boston. It’s been 40 years since Jim Whittaker led an American expedition to the Savage Mountain but the history of American expeditions to the mountain goes back much farther and is one mired in adventure, tragedy and heroism.

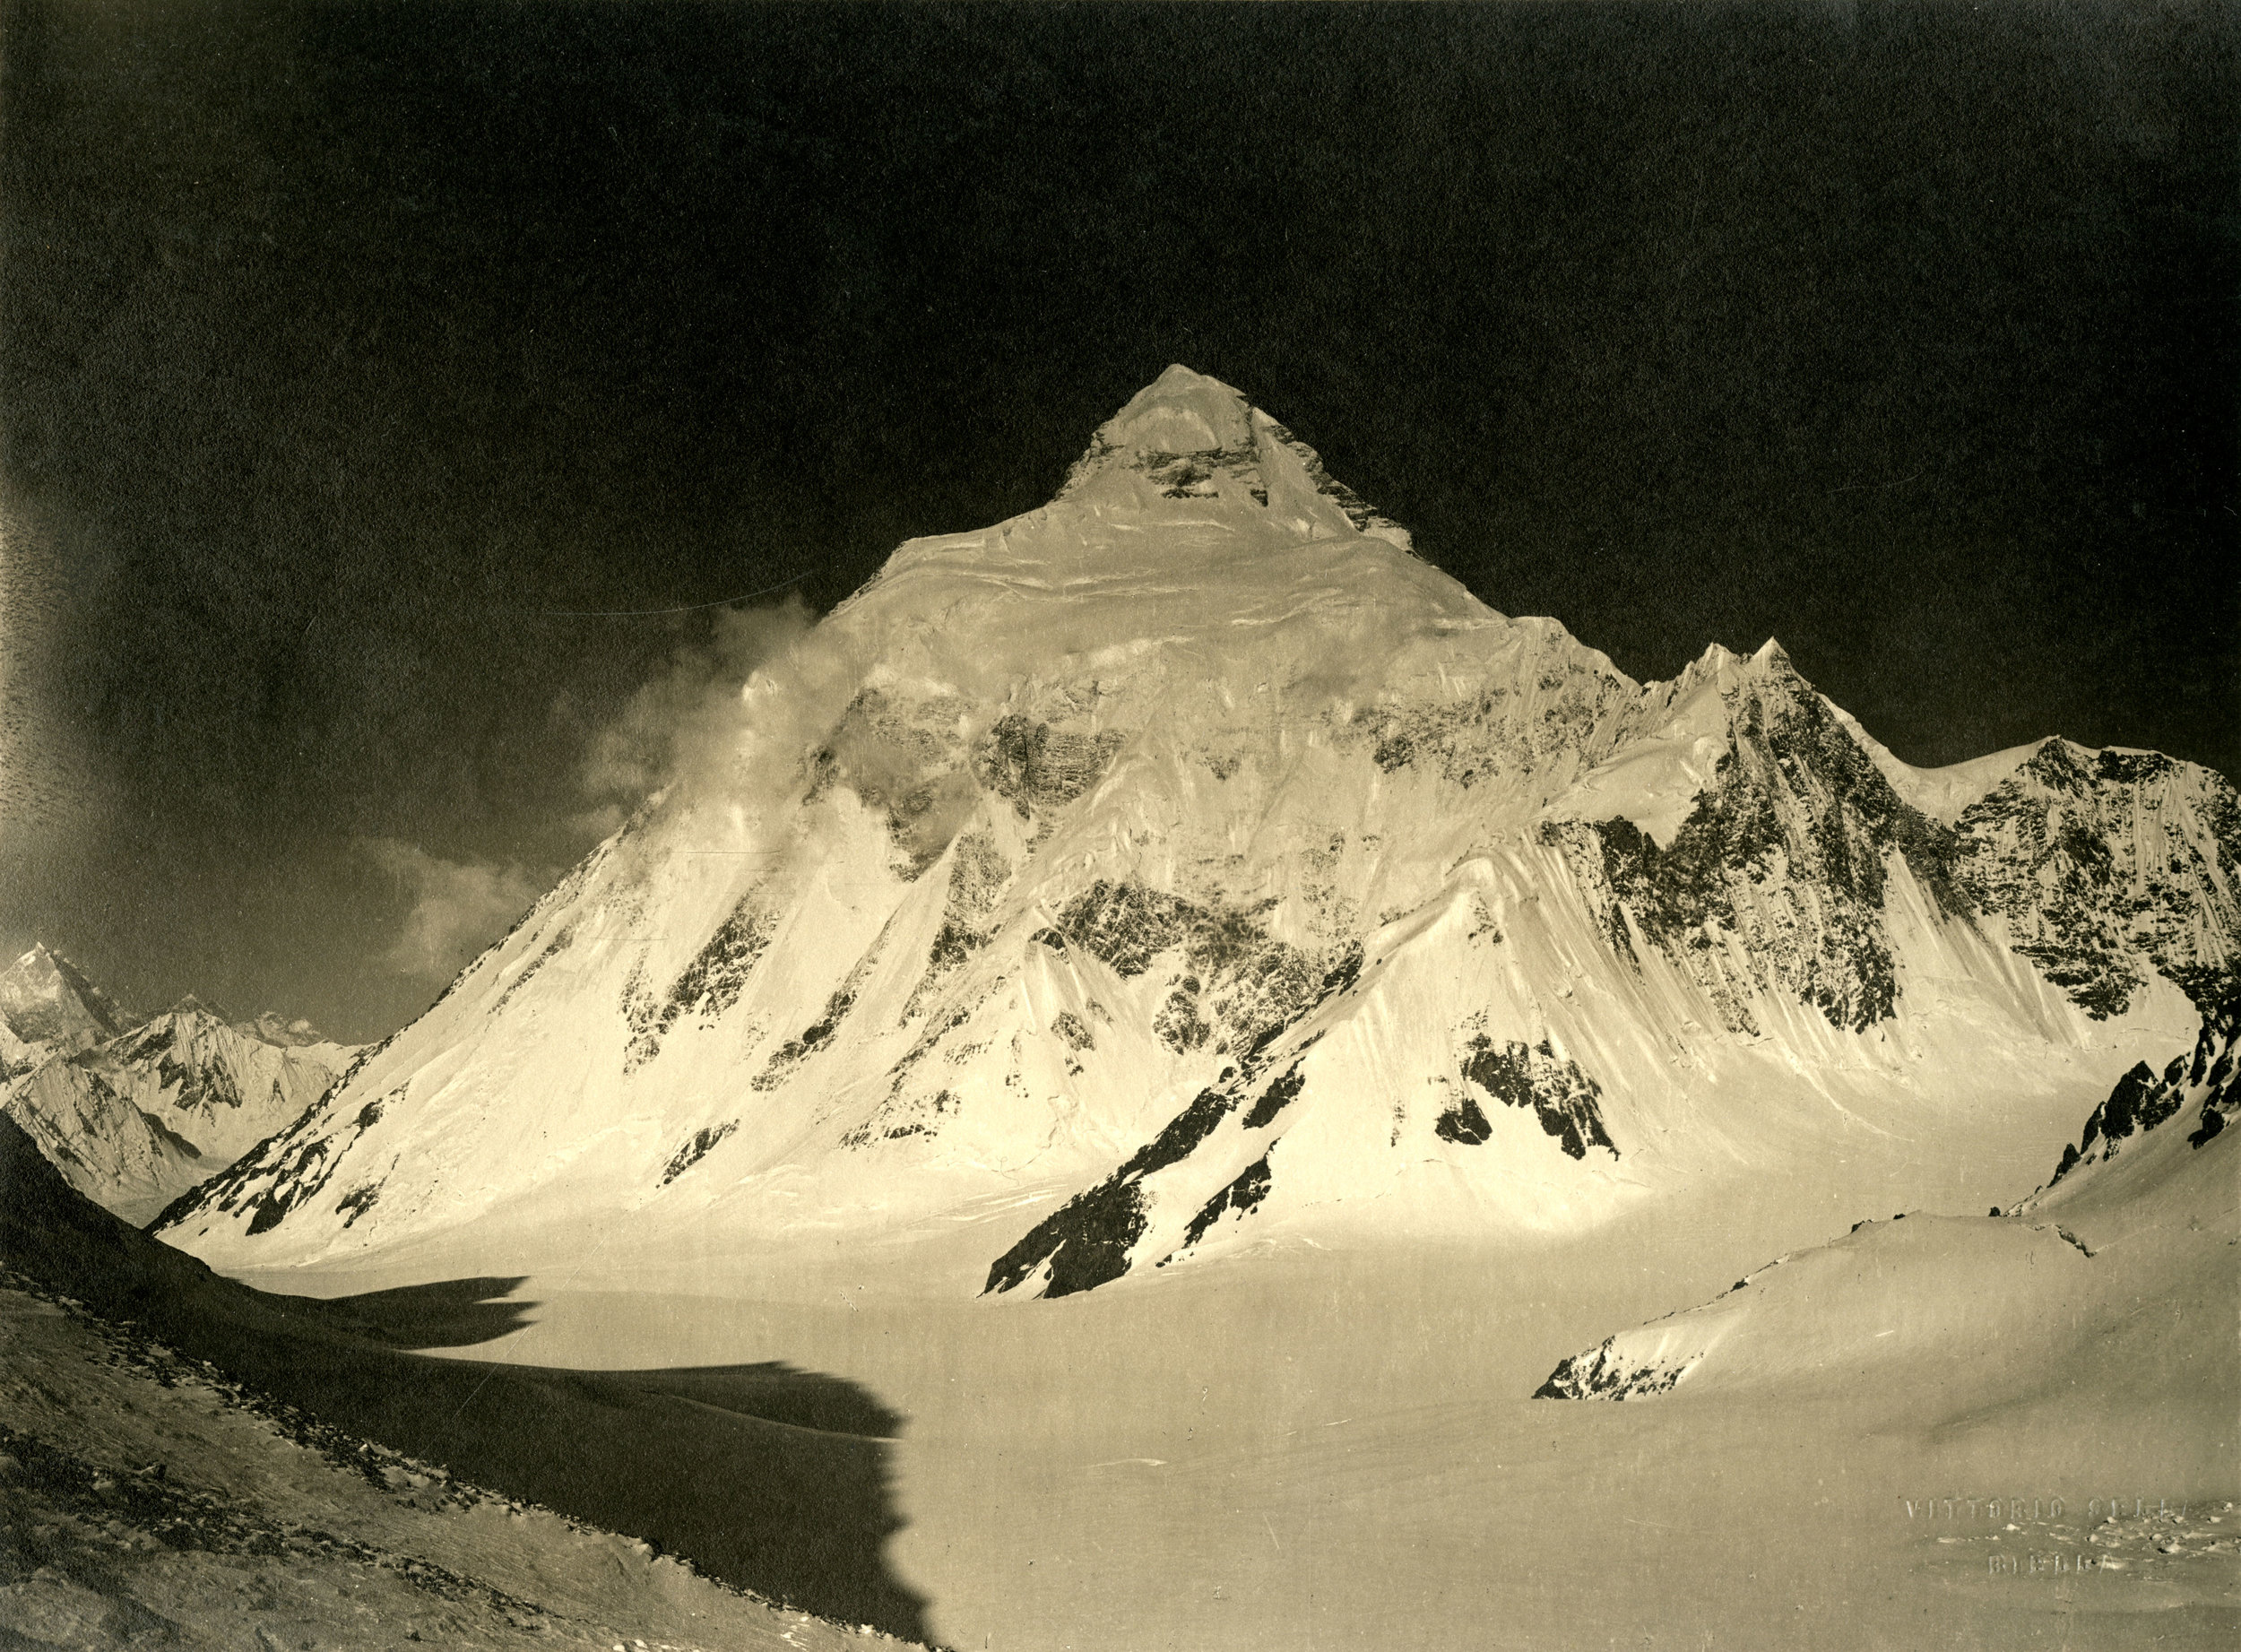
Photograph of K2 from the Baltoro Glacier, taken by Vittorio Sella in 1909. Vittorio Sella Collection

The first American expedition to K2 took place in 1938. This was not only the first American expedition to the mountain but the 3rd ever attempt on the mountain and the first since the Duke of Abruzzi attempted K2 in 1909. The American Alpine Club had acquired permits to K2 for 1938 and 1939. With permits for back-to-back years, the main focus for the 1938 expedition was to reconnoiter the mountain and three ridges to determine the best route to the top. Of course if the opportunity presented itself they should reach the summit.

After evaluating photographs and surveys of the area from previous expeditions, it was determined that there were five potential routes. This meant there were five routes that had to be explored and hopefully at least one with a viable route to the summit.

The party, given the task that was laid before them, was relatively small. It included Charles Houston, Robert Bates, Paul Petzoldt, Richard Burdsall, Bill House, Captain Norman Streatfeild (British Liaison Officer), 6 Sherpa porters and 3 camp men.

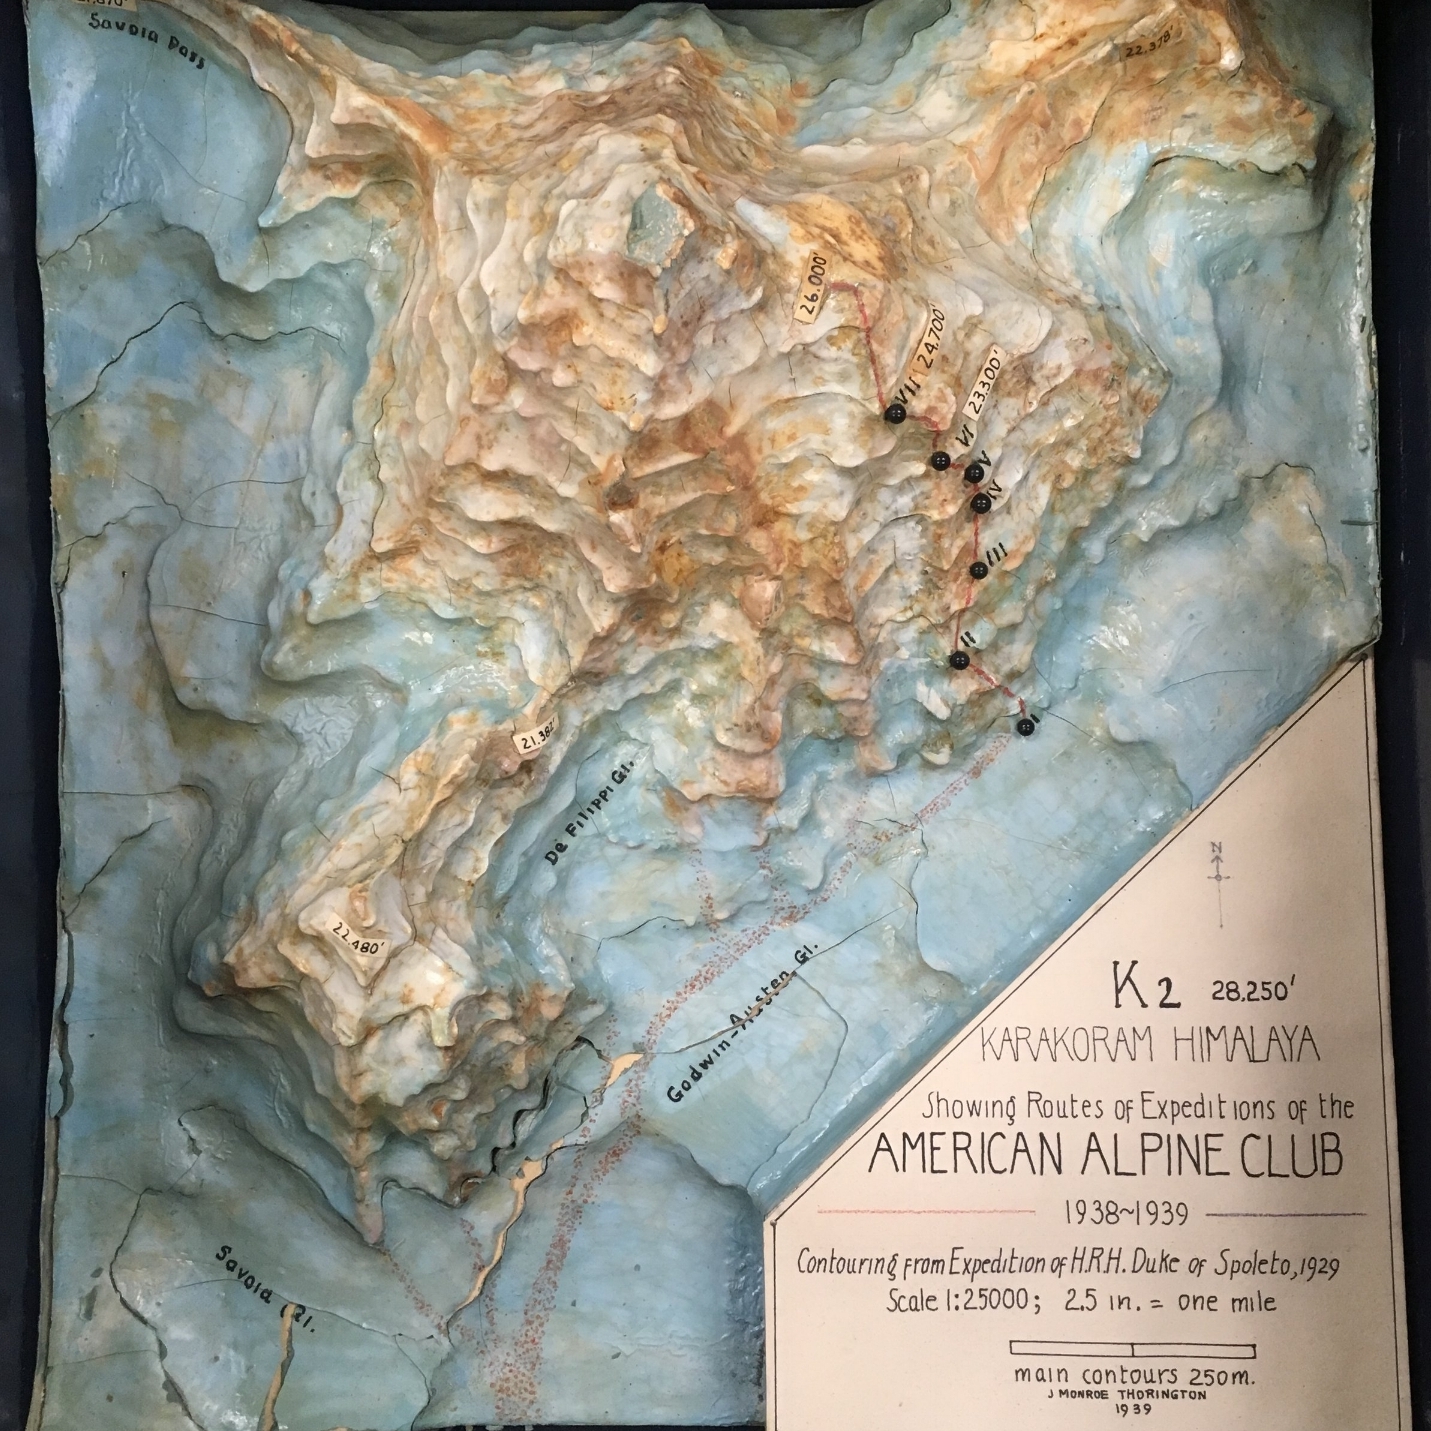
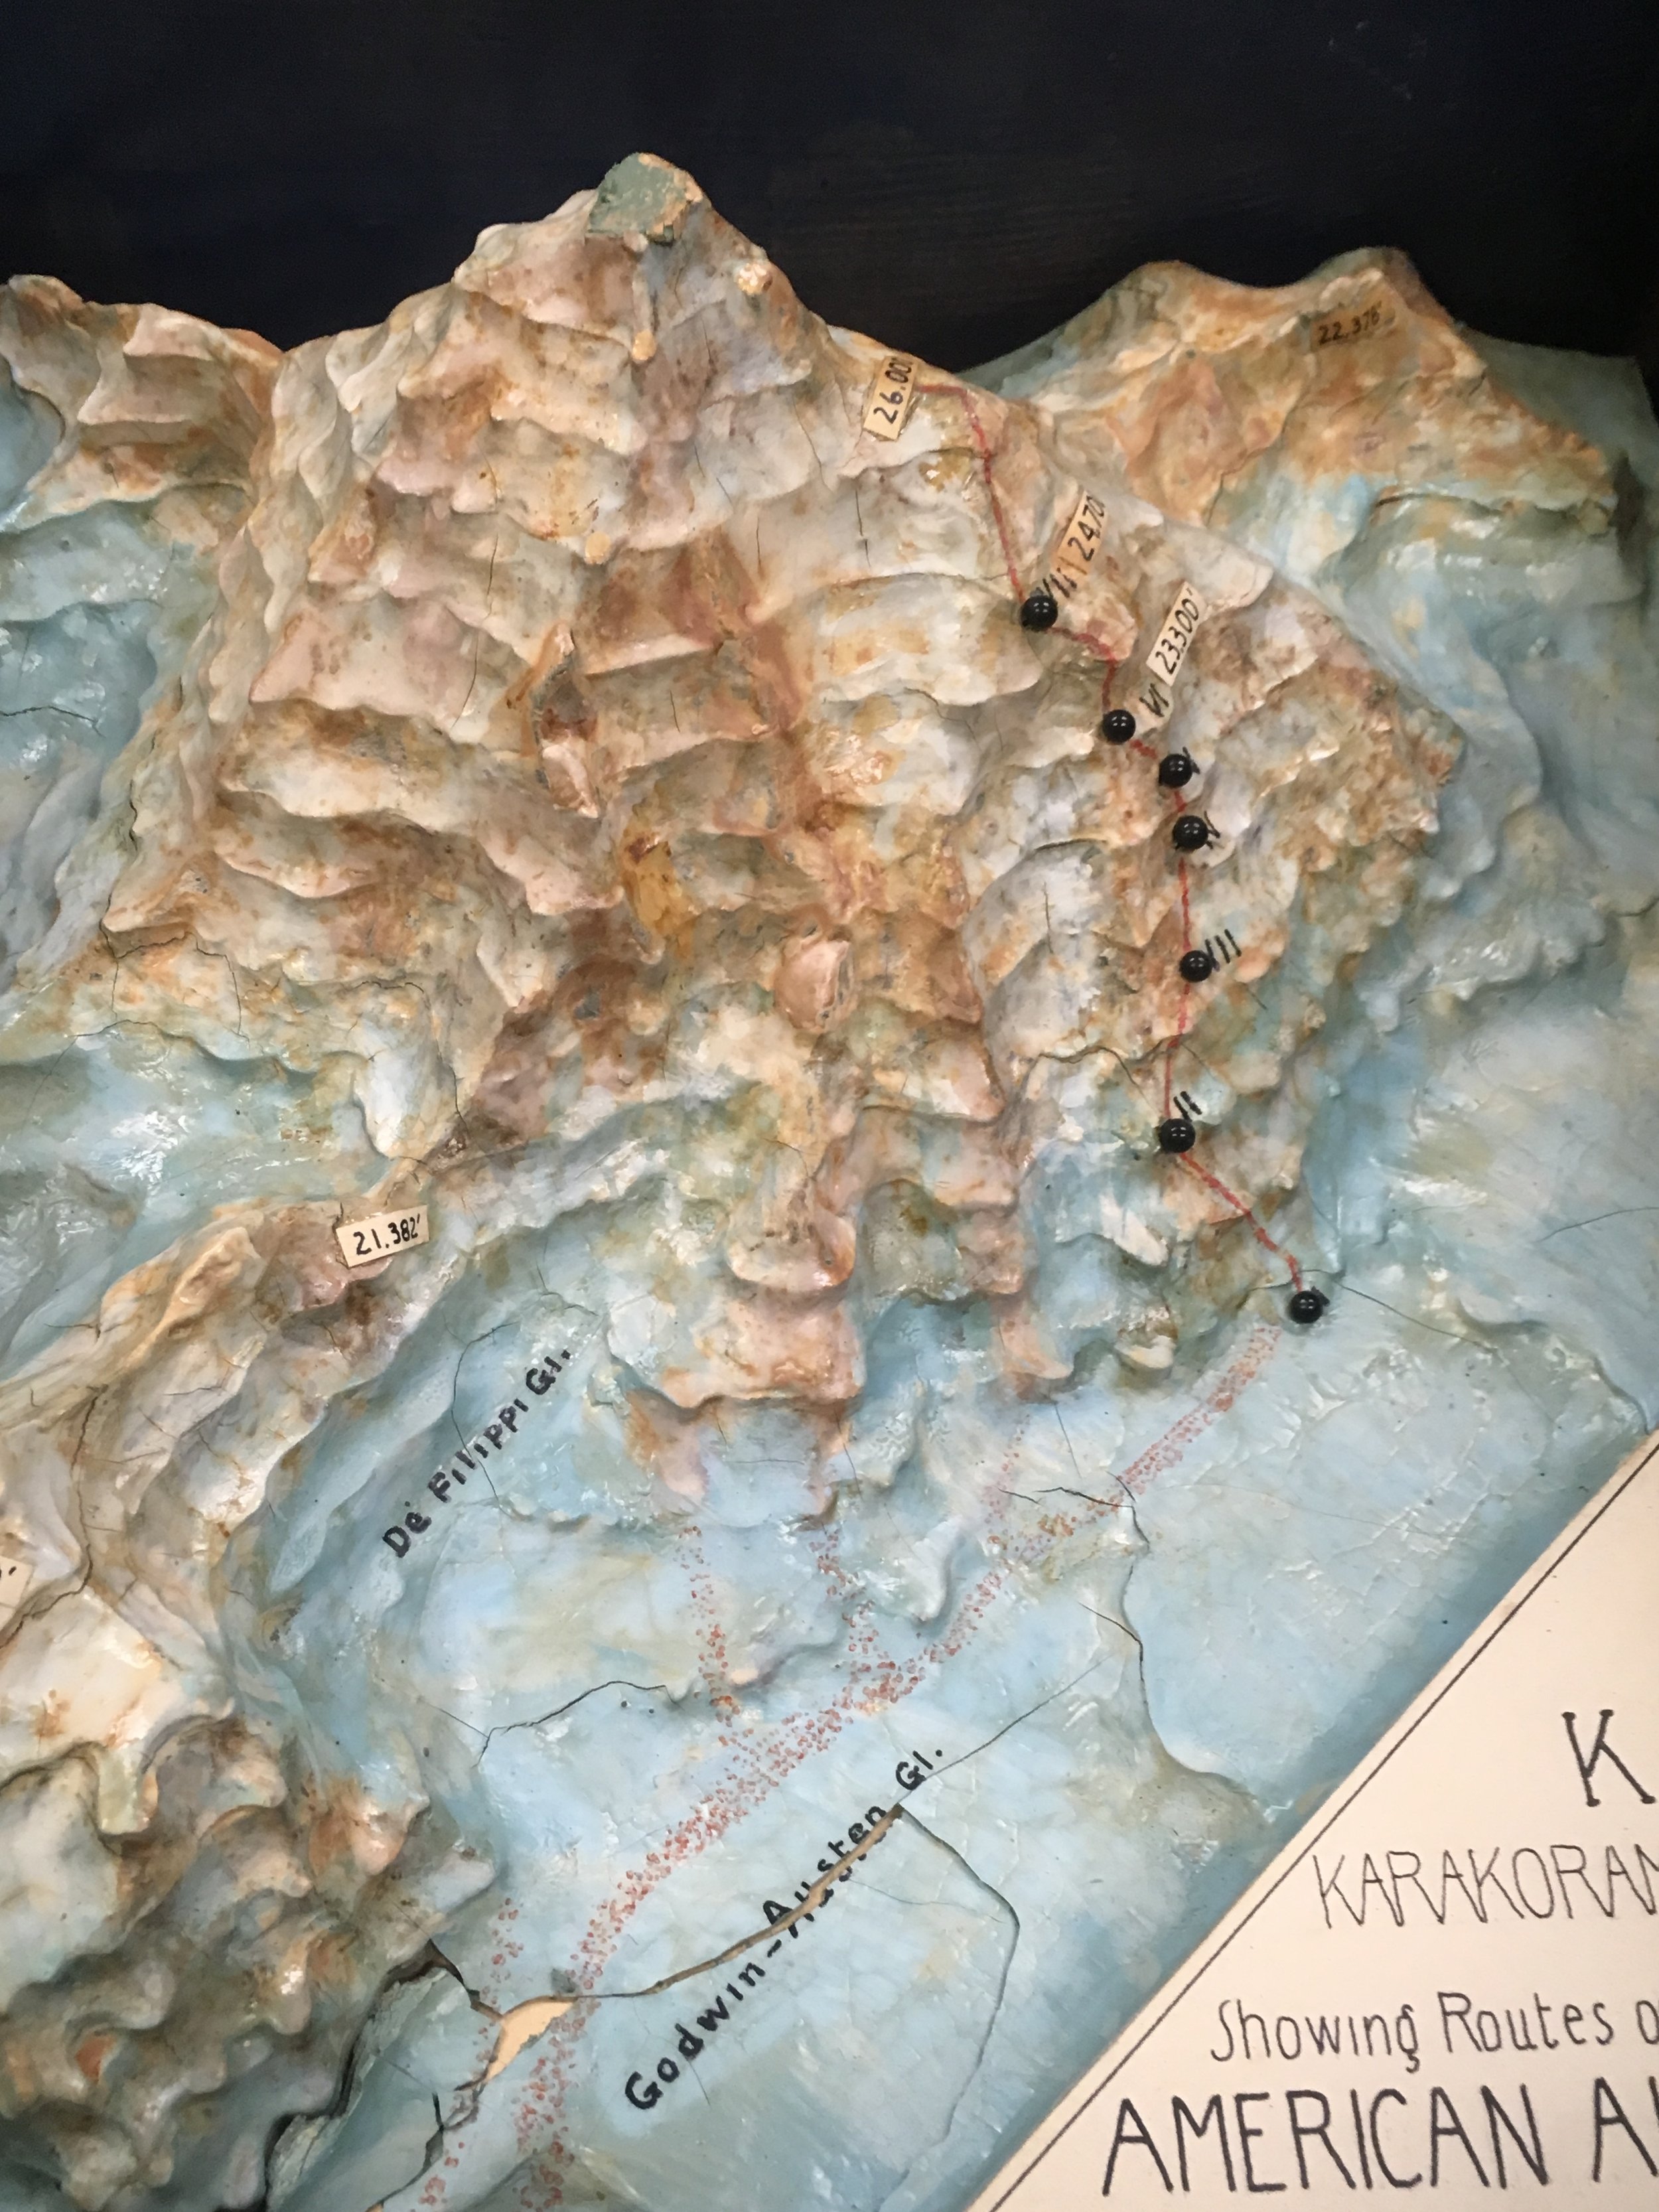
On May 13, 1938 the party departed Srinagar to begin their 362-mile approach. After a month the confluence of the Savoia and the Godwin-Austen glaciers was reached on June 12. The confluence of the glaciers provided a centralized basecamp that allowed the expedition to have relatively easy access to both glaciers for reconnaissance.

Once base camp was established at 16,600 ft., the first task was to reconnoiter the Northwest Ridge. The ridge looked promising in photographs taken by the Duke of Abruzzi’s expedition, and two of his guides had reached the Savoia Pass on the ridge. After navigating over the crevasse covered glacier, Houston and House reached the bergschrund only to find disappointment in the form of hard green ice. It was fewer than 800 feet to better terrain above but they determined that chopping steps into the ice would be too consuming of time and energy and would be a dangerous link in the chain of camps up the mountain if the Northwest ridge offered a viable route. Fortunately, Petzoldt and Burdsall spied a rock route that they believed could unlock the ridge. When House and Petzoldt made an attempt to see if the rock route would go, they were met with unfavorable weather and had to abandon the thought for the moment.

On June 19th the entire party convened at basecamp to discuss what had been discovered thus far and how to proceed. Bates and Burdsall had made a trip down the Godwin-Austen Glacier and through brief clear weather windows were able to completely rule out the south face due to avalanche danger. After a good look at the Abruzzi Ridge, they reported that it didn’t look promising.

The northwest ridge wasn’t out of the question, but the obstacle of ice would be a time consuming one. So, the focus shifted to the east side of the mountain. The expedition would get a close look at the Abruzzi Ridge and the northwest ridge and return to the Savoia glacier if no route seemed better than what had already been discovered on the northwest ridge.

Continuing with the trend, the first views from the east side of K2 were not positive. The northeast ridge is a long knife-edge ridge littered with gendarmes. The south side of the ridge seemed like it could go but would require long stretches of travel through icy gendarmes that could topple over onto anyone traveling beneath them. The north side was prone to avalanches from high up the mountain and neither appeared to offer sites suitable for establishing camps. The Abruzzi Ridge at least looked possible, though difficult.

After the first views of these two ridges it was decided that Houston and House would climb the Abruzzi Ridge to determine the difficulty of climbing. On the first day of exploration of the ridge Houston discovered some small pieces of wood, these were remnants of the Duke of Abruzzi’s highest camp in 1909 and provided a psychological boost to the climbers. As they carried on up the ridge, the climbing grew more difficult and no suitable campsites were found. With the Karakoram’s penchant for sudden poor weather, the lack of adequate campsites was more concerning than the difficulty of climbing.

Photograph of K2 from Windy Gap, taken by Vittorio Sella in 1909. Vittorio Sella Collection

Uncertainty began to set in. Three routes remained as options: the northwest ridge, the northeast ridge and the Abruzzi Ridge. The big problem was that none of the routes seemed particularly better than the others. Each ridge had its own question looming over it. Could the northwest ridge be reached without devoting a lot of time and energy to carve out steps? Was there a potential route hidden on the northeast ridge that would not place the climbers in extreme danger? Were there any suitable locations to place campsites on the Abruzzi Ridge?

The party attempted to answer two of these questions. Bates and House returned to the Savoia Glacier. A few days of roaring avalanches off of the west face of K2, tumbling seracs, traversing ice slopes and heavy snow saw the pair reach a high point of 20,000 ft. before the rock became too steep. They came to the conclusion that reaching the northwest ridge under the current conditions was not possible.

Houston and Streatfeild had an easier time on the northeast ridge; easier in that they realized after several hours of step cutting that the route would not be adequate for carrying loads and the ridge offered little protection for any campsites that could be established.

So the Abruzzi Ridge was all that remained. As the last viable option all efforts and resources would now focus on the Abruzzi Ridge. Camp I was established at its base at 17,700 ft. While the rest of the expedition ferried loads to stockpile Camp I, Petzoldt and House continued scouring the ridge for campsites. After a day of searching and ascending a steep snowfield, hopes were waning and the pair was about to descend back to Camp I. Petzoldt decided to ascend one more pitch to peek around the corner of a crest. When Petzoldt reached the end of the rope, he let out an excited yell. Camp II was found. The campsite at 19,300’ was the first good news of the expedition since arriving the base of the mountain and lifted everyone’s spirits.

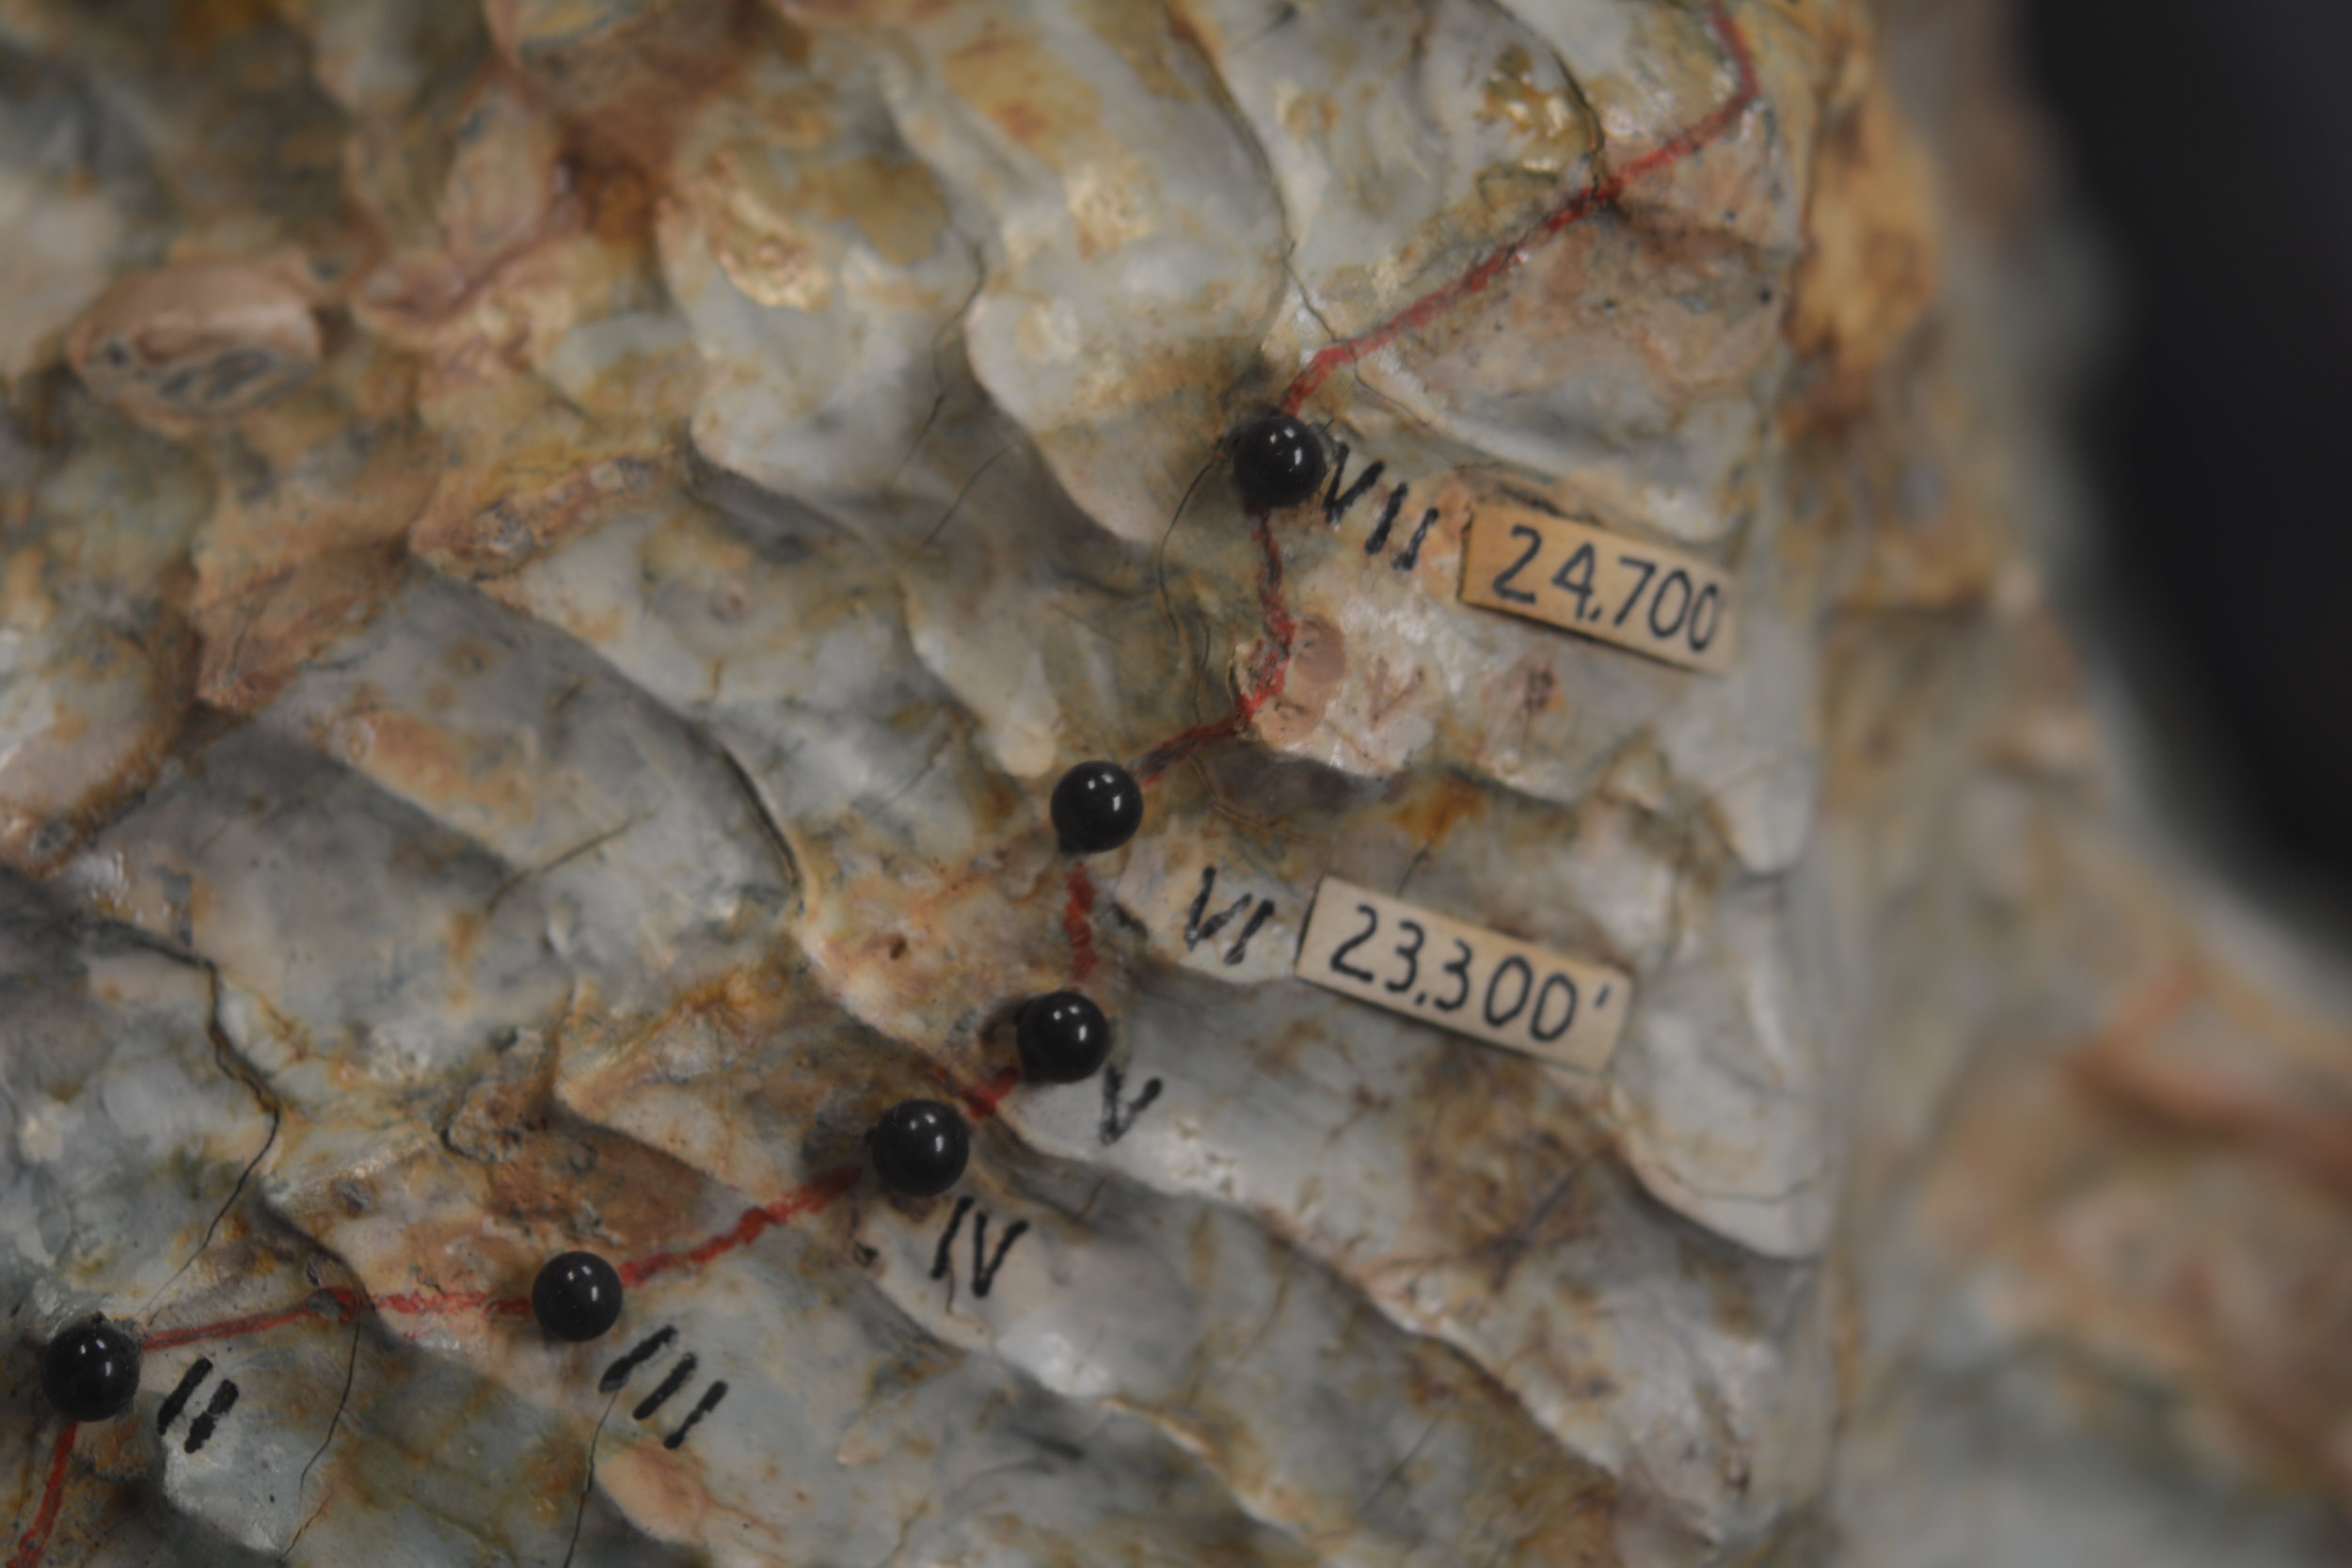
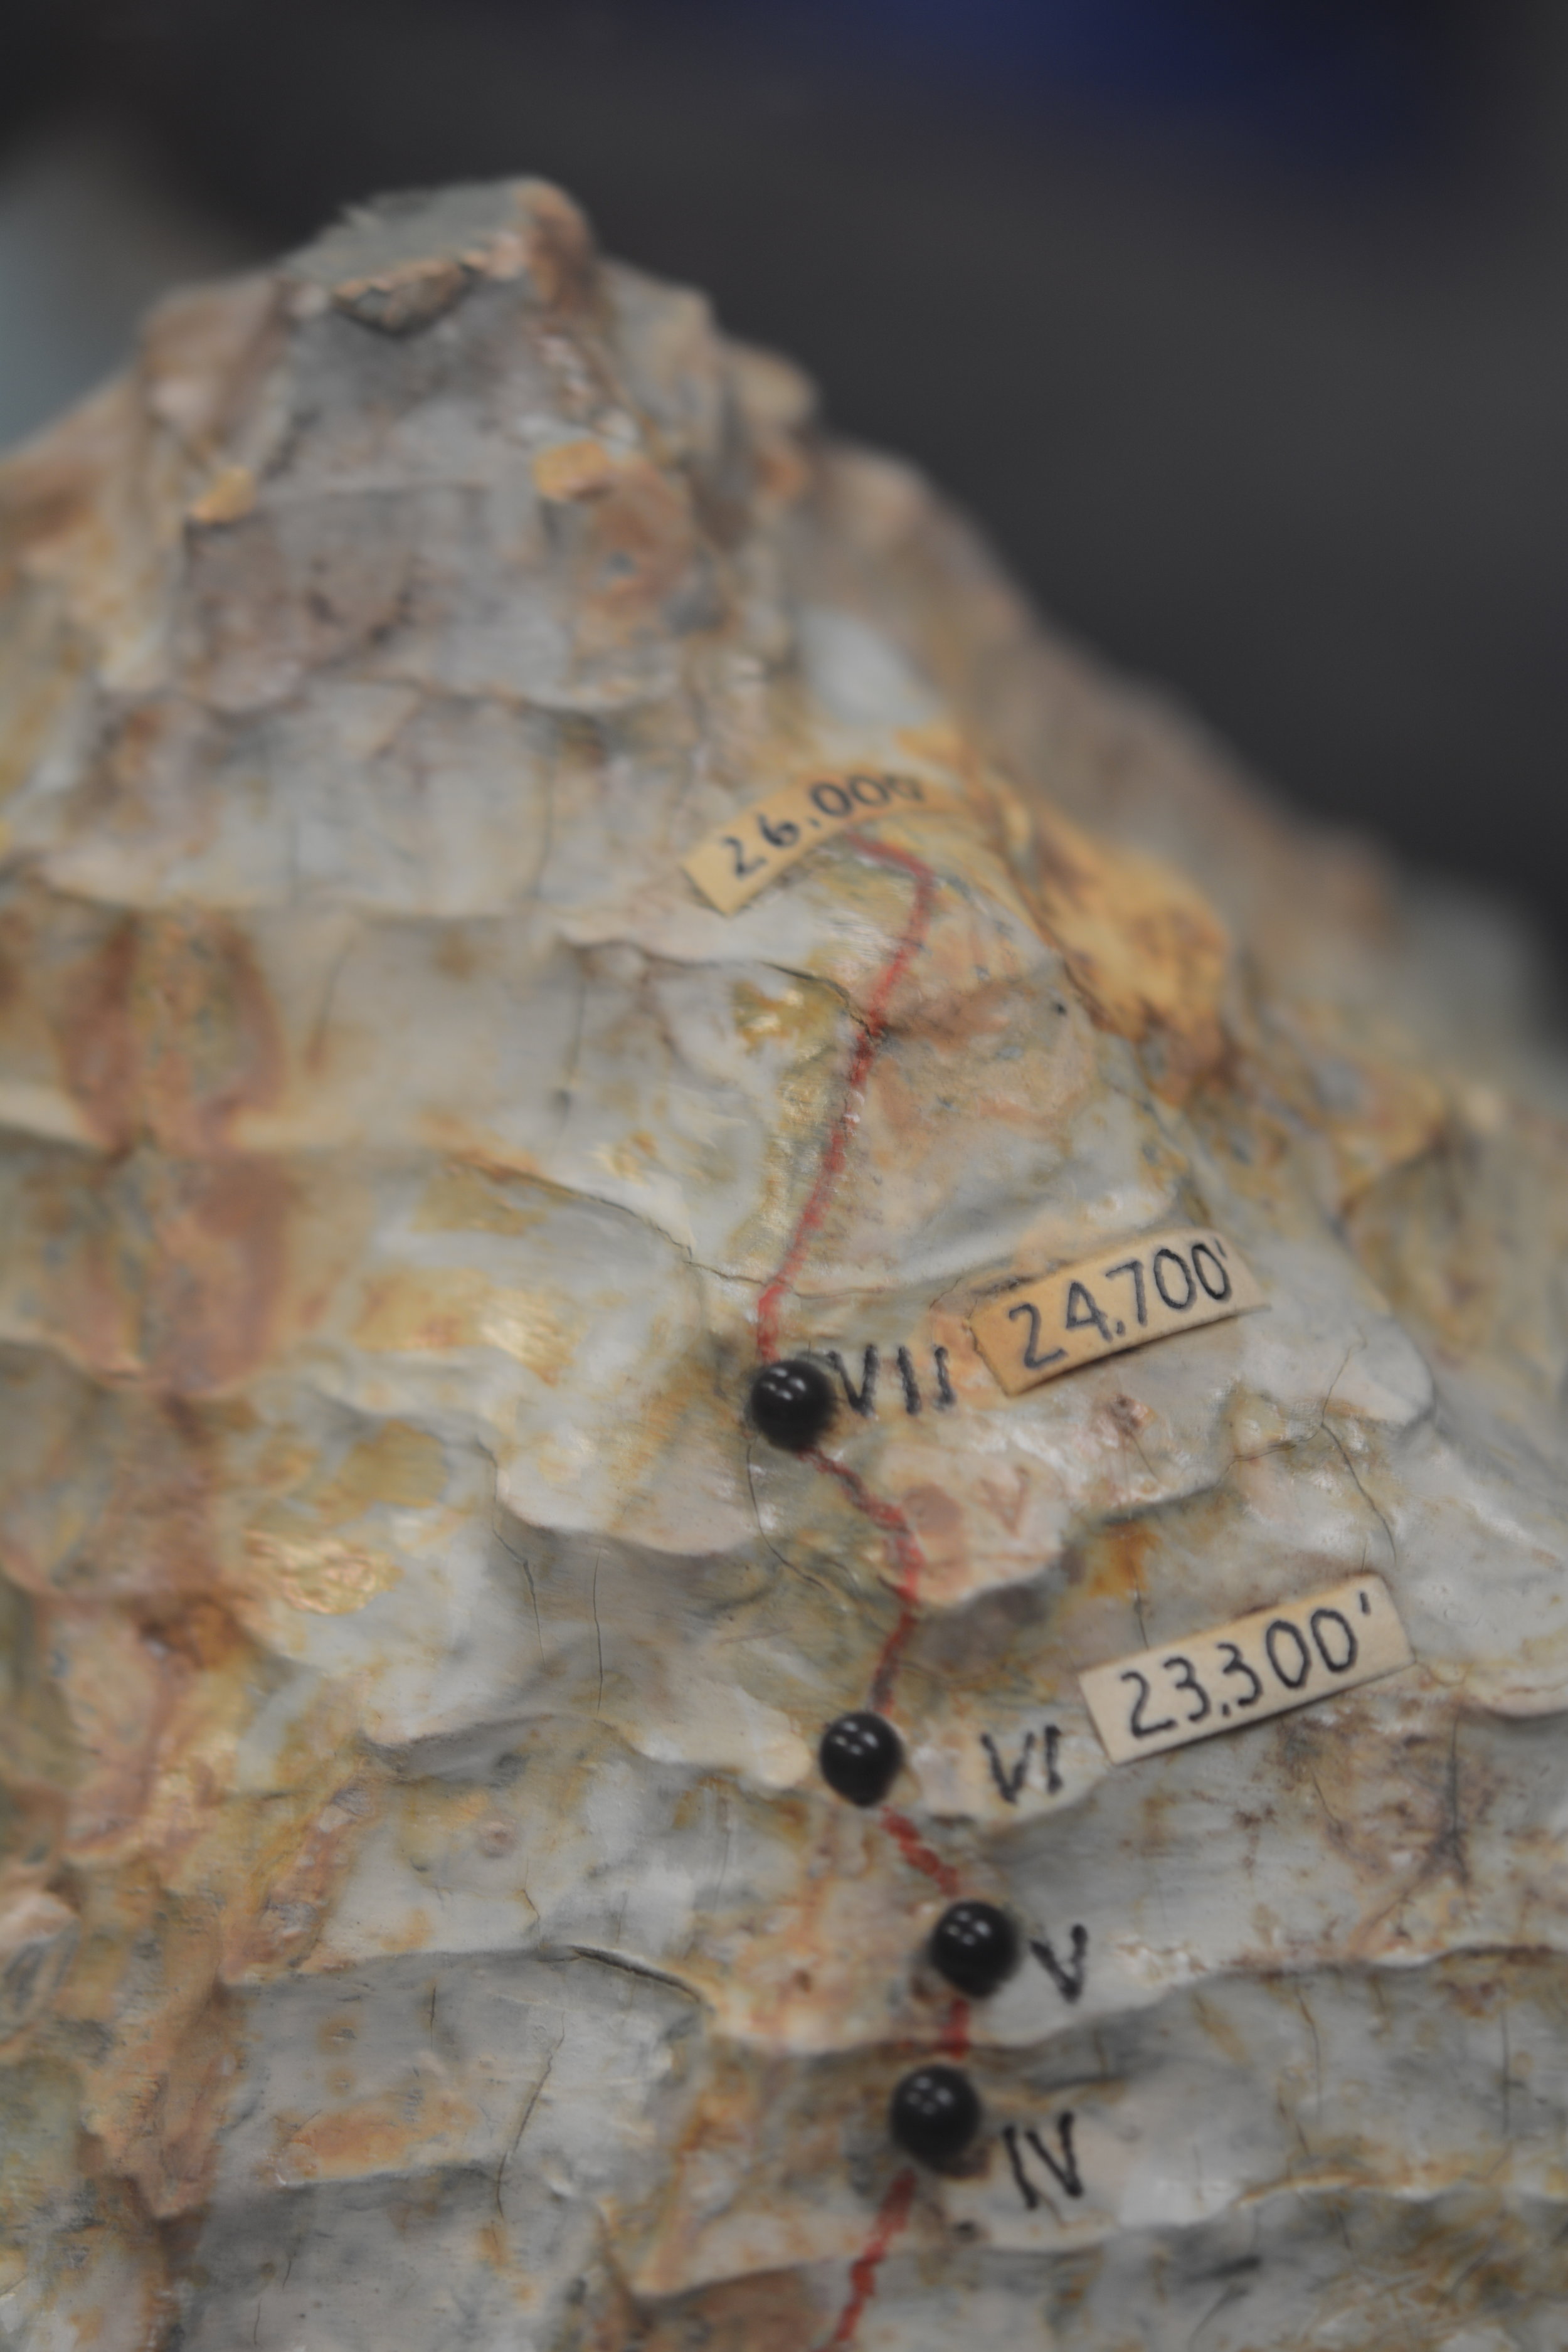
Rock taken from the Abruzzi Ridge. Karakoram translates to, "black gravel." Robert H. Bates Collection

Once Camp II was established and stocked with 10 days worth of supplies Petzoldt and House again led the way in search of the next camp. The ground grew steeper and steeper with any ledges discovered sloping downward. Once again the prospect of finding a campsite seemed slim and hopes began to waver. Around noon, as the going became more and more difficult, the pair noticed two buttresses a few hundred feet above them that may yield suitable terrain. With haste House began the first of two ice traverses that lay between them and the buttress. In an effort to save time House cut as few steps as possible. This time-saving maneuver led to House losing purchase and sliding towards the Godwin-Austen Glacier. Petzoldt was prepared for this possibility and held fast to the rope around House’s waist. After banging into the buttress that Petzoldt belayed from, House attacked the ice slope with new vigor. House completed the traverse placing pitons and running rope along the way. The reward for the day’s climbing was a tiny, uneven platform that sloped off the mountain on three sides.

Before Camp III (20,700 ft.) could be established Petzoldt and House needed to safeguard the route with 900 ft. of rope. The treacherous terrain was difficult for two unloaded men; it would be near impossible and reckless to attempt with a full load of supplies. The task of safeguarding the route took the entirety of the next day and still not satisfied with its security, was reinforced more as light loads were carried towards Camp III the day after that. Before the light loads could be brought all the way to Camp III, a storm began to build. The loads were left below a buttress and the pair descended all the way to Camp I when it appeared that the storm was gaining strength and was potentially going to be a long one.

The storm was not prolonged and the next day was relatively clear. With extreme caution, loads were carried to Camp III and more ropes placed to further secure the treacherous sections of the route. After 4 days of ferrying loads while snow fell and winds howled around them it was time to go higher than Camp III and search for Camp IV.

Petzoldt and Houston led the way in search of Camp IV. The climbing above Camp III grew more technical, the rock grew more rotten and was eventually blocked by a large gendarme. Petzoldt conquered the obstruction via an overhanging crack that led to a ledge with solid holds. A few hundred feet above the recently defeated gendarme another obstruction was reached, this time it was an impassable wall of reddish-brown rock. The duo descended back to the top of the gendarme and decided that it would be the location for Camp IV (21,500 ft.).

Once Camp IV was established it was time to push up the mountain. The new leaders were Houston and House. A location for Camp V was discovered at 22,000 ft., placing it only 500’ higher than Camp IV.

Above Camp IV the rock was near vertical and in worse condition than expected. This section was only climbed after House was able to work his way up an 80-foot chimney. The chimney now bears his name. Camp V was then located across a snowfield and under a rock pinnacle. This 500’ took four hours to achieve and would be an entire days work when moving supplies. House’s Chimney was impossible to climb with a load so a makeshift aerial tramway was constructed to haul the loads up.

After a few days of poor weather and load ferrying, a site for Camp VI was discovered at 23,300’. The climb up to Camp VI took serious skill in route finding and saw Petzoldt and Houston turned back at multiple points. Eventually they discovered a steep snow gully that tested their nerves. The snow was deep and anything that fell down the gully disappeared into nothingness. The snow gully led to more rotten rock, which led to a buttress whose base would be the location for Camp VI.

Above Camp VI lay the black pyramid, a near 1,000-foot buttress of dark rock that loomed over the expedition while they were scouting the ridge a month earlier. If they could make their way up the black pyramid, K2’s 2,200-foot summit cone would be within reach.

Petzoldt and Houston worked their way up the route; Petzoldt, with fine intuition about where the path lay ahead, led over steep technical rock and eventually up another snow gully that led to the top of the pyramid. With the snow shoulder above the black pyramid reached, the Abruzzi Ridge was conquered. A handshake was shared and a “restful cigarette” enjoyed.

Thank you note written by Houston and Petzoldt on a piece of toilet paper. It reads:

"Hi

Thanks a million for the campsite and tent. They were certainly welcome when we came down at 4:15. Very cold.

We went 700 ft. higher over climbing of varying difficulty and spotted c/c weather. Route ahead not too bad. Hope to make top of pyramid today.

We hoped you could make two platforms more on this ledge and one near the big notch [?] feet below here.

Good luck + thanks again

C +P"

Robert H. Bates Collection

The route was pushed higher and a good campsite was found for Camp VII at 24,700 ft. Even after ropes were fixed on the difficult terrain between Camp VI and VII, the route would remain difficult and would be unwise to attempt in bad weather. With supplies dwindling it was time to make a decision.

The expedition conceded to K2 and the mountain remained unclimbed. With supplies dwindling and difficult terrain between camps a prolonged storm would potentially be catastrophic to the group, added onto that the porters were due to arrive in seven days.

Before retreating down the mountain, one final push would be made. Houston and Petzoldt would make a dash as high up the mountain as they could reach. A Spartan Camp VII was established with just enough supplies for Houston and Petzoldt to climb for a day. Any sign of bad weather would force the pair to make a hasty retreat to Camp VI.

The weather the next day was clear so the pair went up. Though K2 had provided many difficult and technical days of climbing, the final day was one of plodding through snow. By noon a recognizable shoulder was reached at 25,600 ft. The Duke of Abruzzi had triangulated the altitude 29 years earlier and the climbers knew that they had reached the summit cone. The pair climbed up a few hundred more feet to gain a good view of the route that led to the summit. Both agreed that it did not appear any more difficult than the route below and that the summit could be reached from the Abruzzi Ridge. They then turned and started back down the mountain.

Though their high point of 26,000 ft. was 2,250 ft. below the summit, the First American Karakoram Expedition was a success. The entire south side of the mountain was reconnoitered and a promising route to the summit was discovered. More importantly there were no major injuries and everyone involved survived the attempt high up the Savage Mountain. It was now up to the Second American Karakoram Expedition to climb the mountain.

Read about the Second American Karakoram Expedition here.

Read about the Third American Karakoram Expedition here.

By Eric Rueth

What is a Volunteer Instructor?

In the United States, new climbers are introduced to the sport in a variety of ways. Students can seek the services of a professional guide or climbing instructor, and for those students a growing population of AMGA certified guides and instructors provide a reliable standard of care.  But for many, the costs and availability of professional guides and instructors is prohibitive.  For others, the formality of a professional teacher-student relationship does not provide a satisfactory sense of community or belonging. For these students, America's volunteer instructors await.

Mountaineering Boots of the early 20th century

A tale of horror and woe

by Allison Albright


Modern mountaineering boots are made to be comfortable, lightweight, insulated and waterproof. They're constructed of nylon, polyester, Gore-Tex, Vibram and involve things like "micro-cellular thermal insulation" and "micro-perforated thermo-formable PE." This technology costs anywhere from a couple hundred dollars to over $1000 and makes it much more likely for a mountaineer to keep all their toes. 

We didn't always have it so good. 

Mountaineering boots circa 1911.

By H. Harden - Jones, Owen Glynne Rock-climbing in the English Lake District, 1911, Public Domain, https://commons.wikimedia.org/w/index.php?curid=9433840

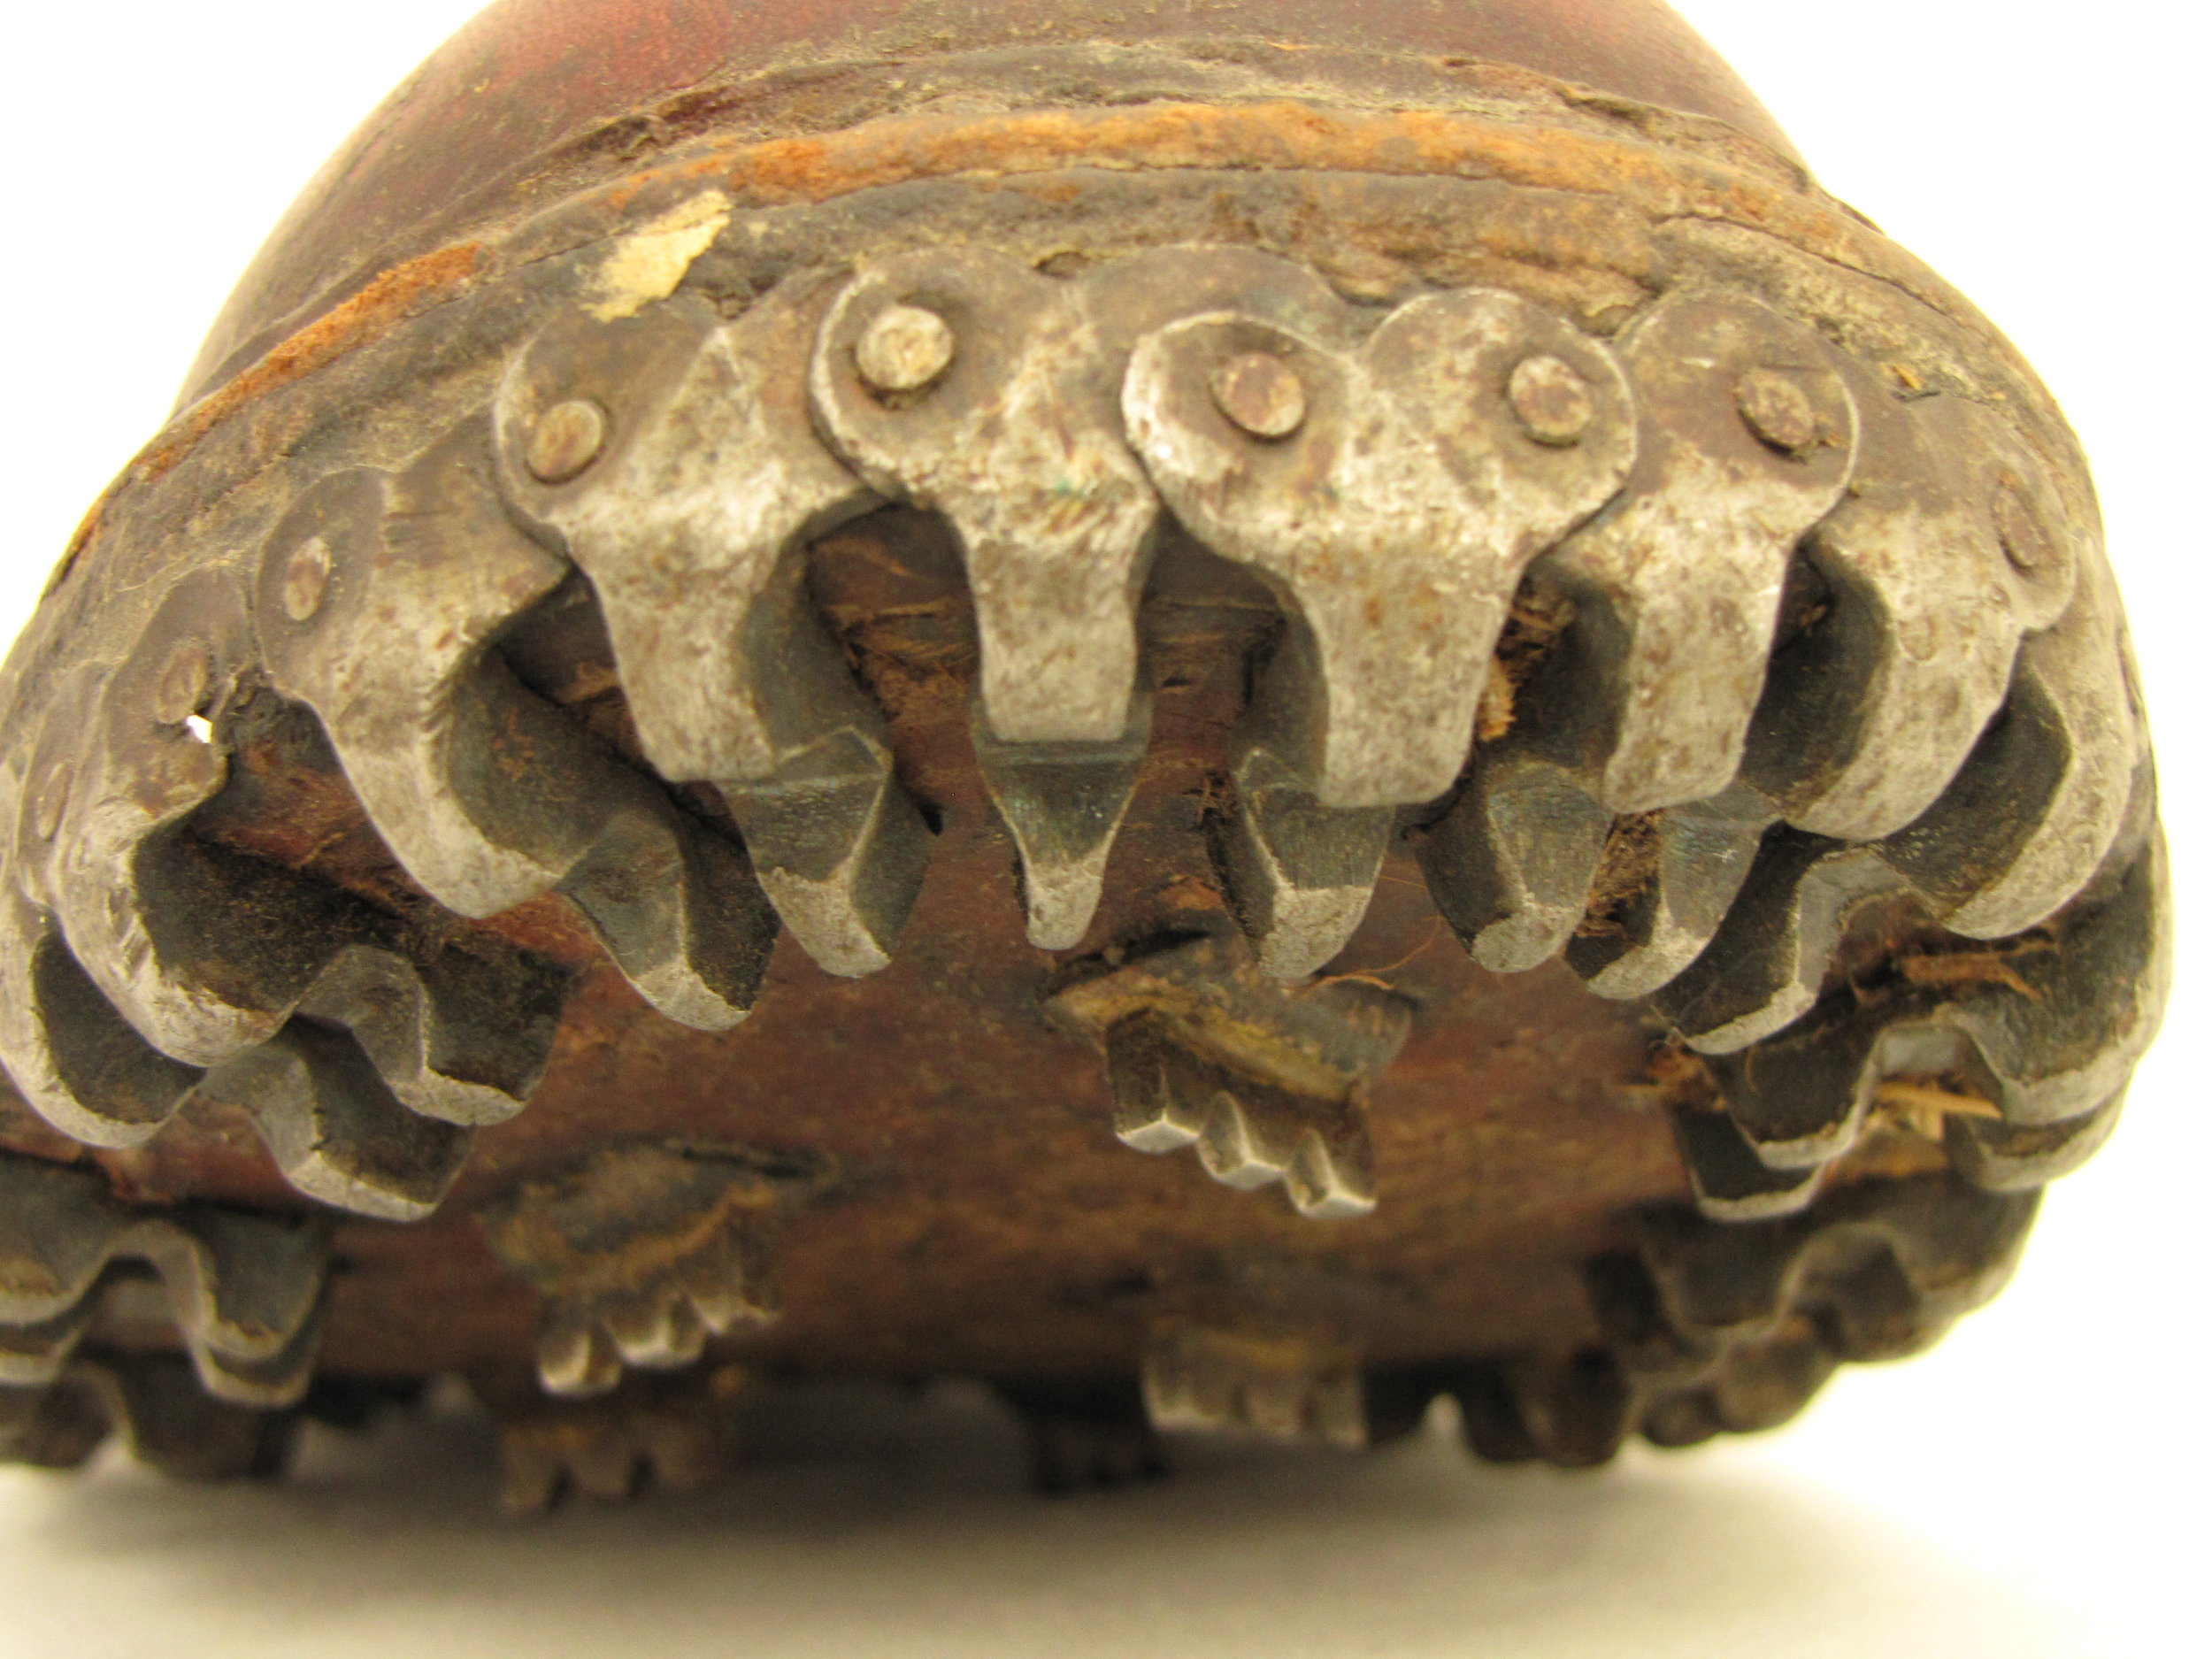
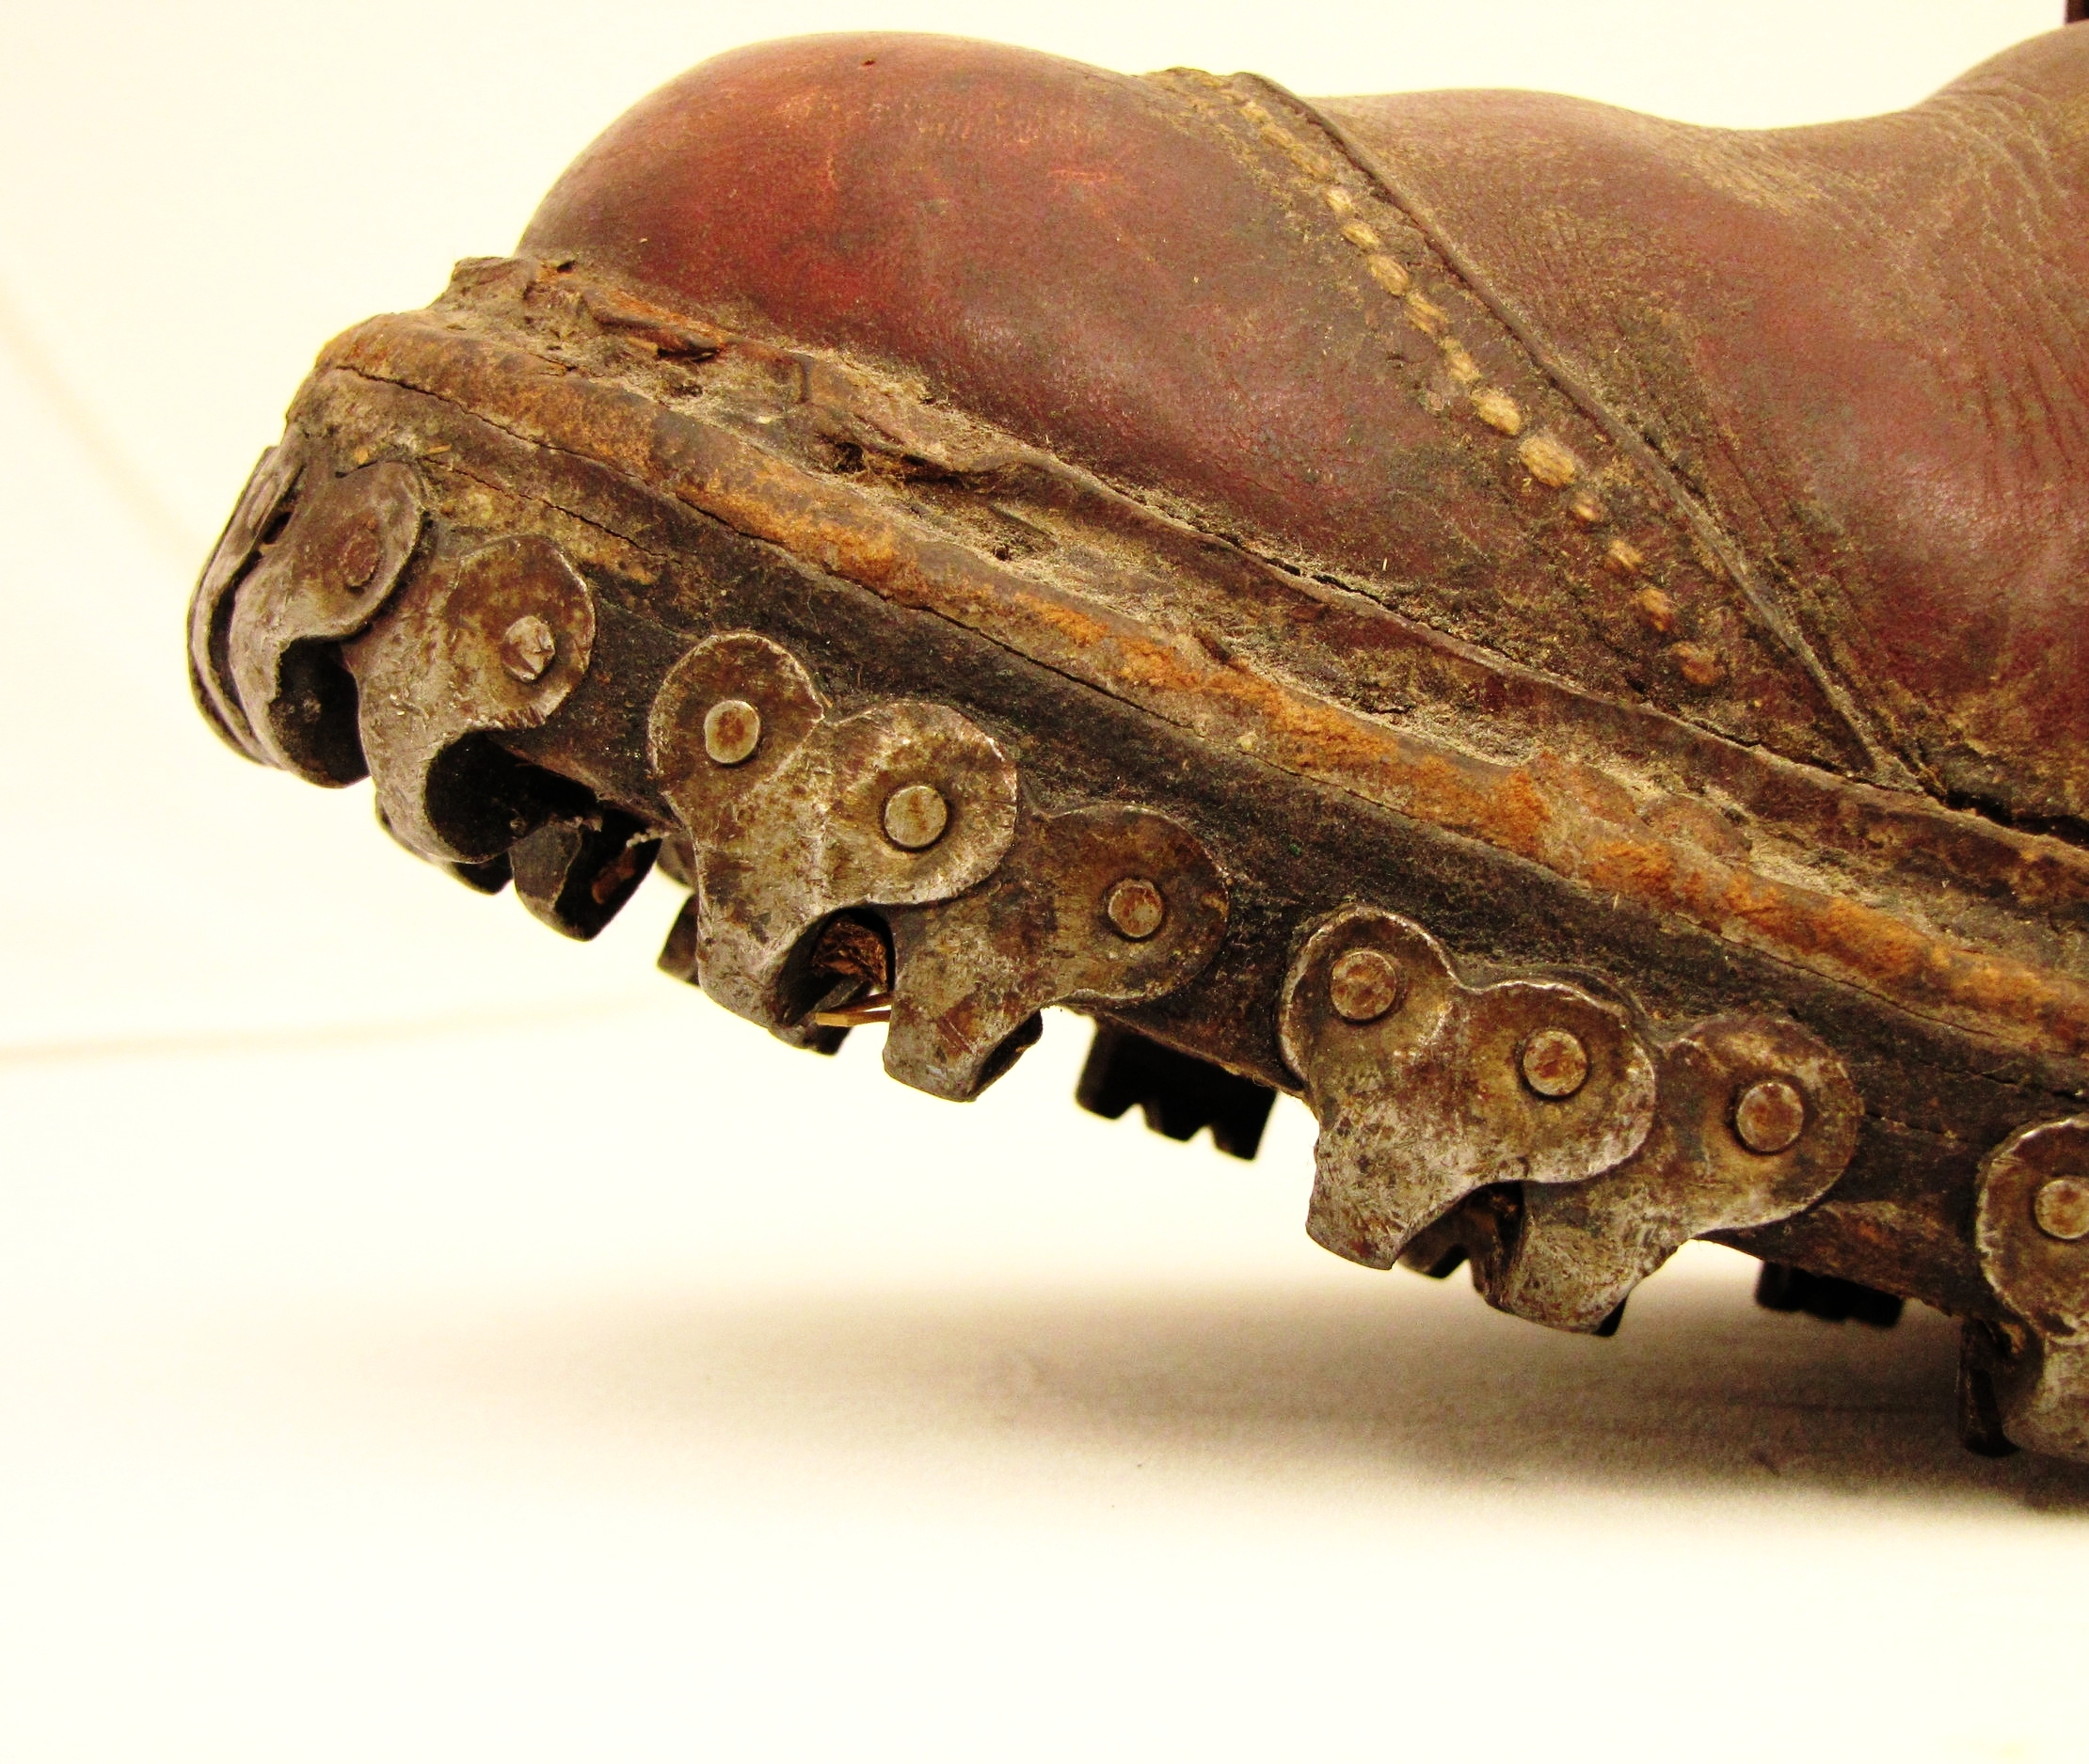
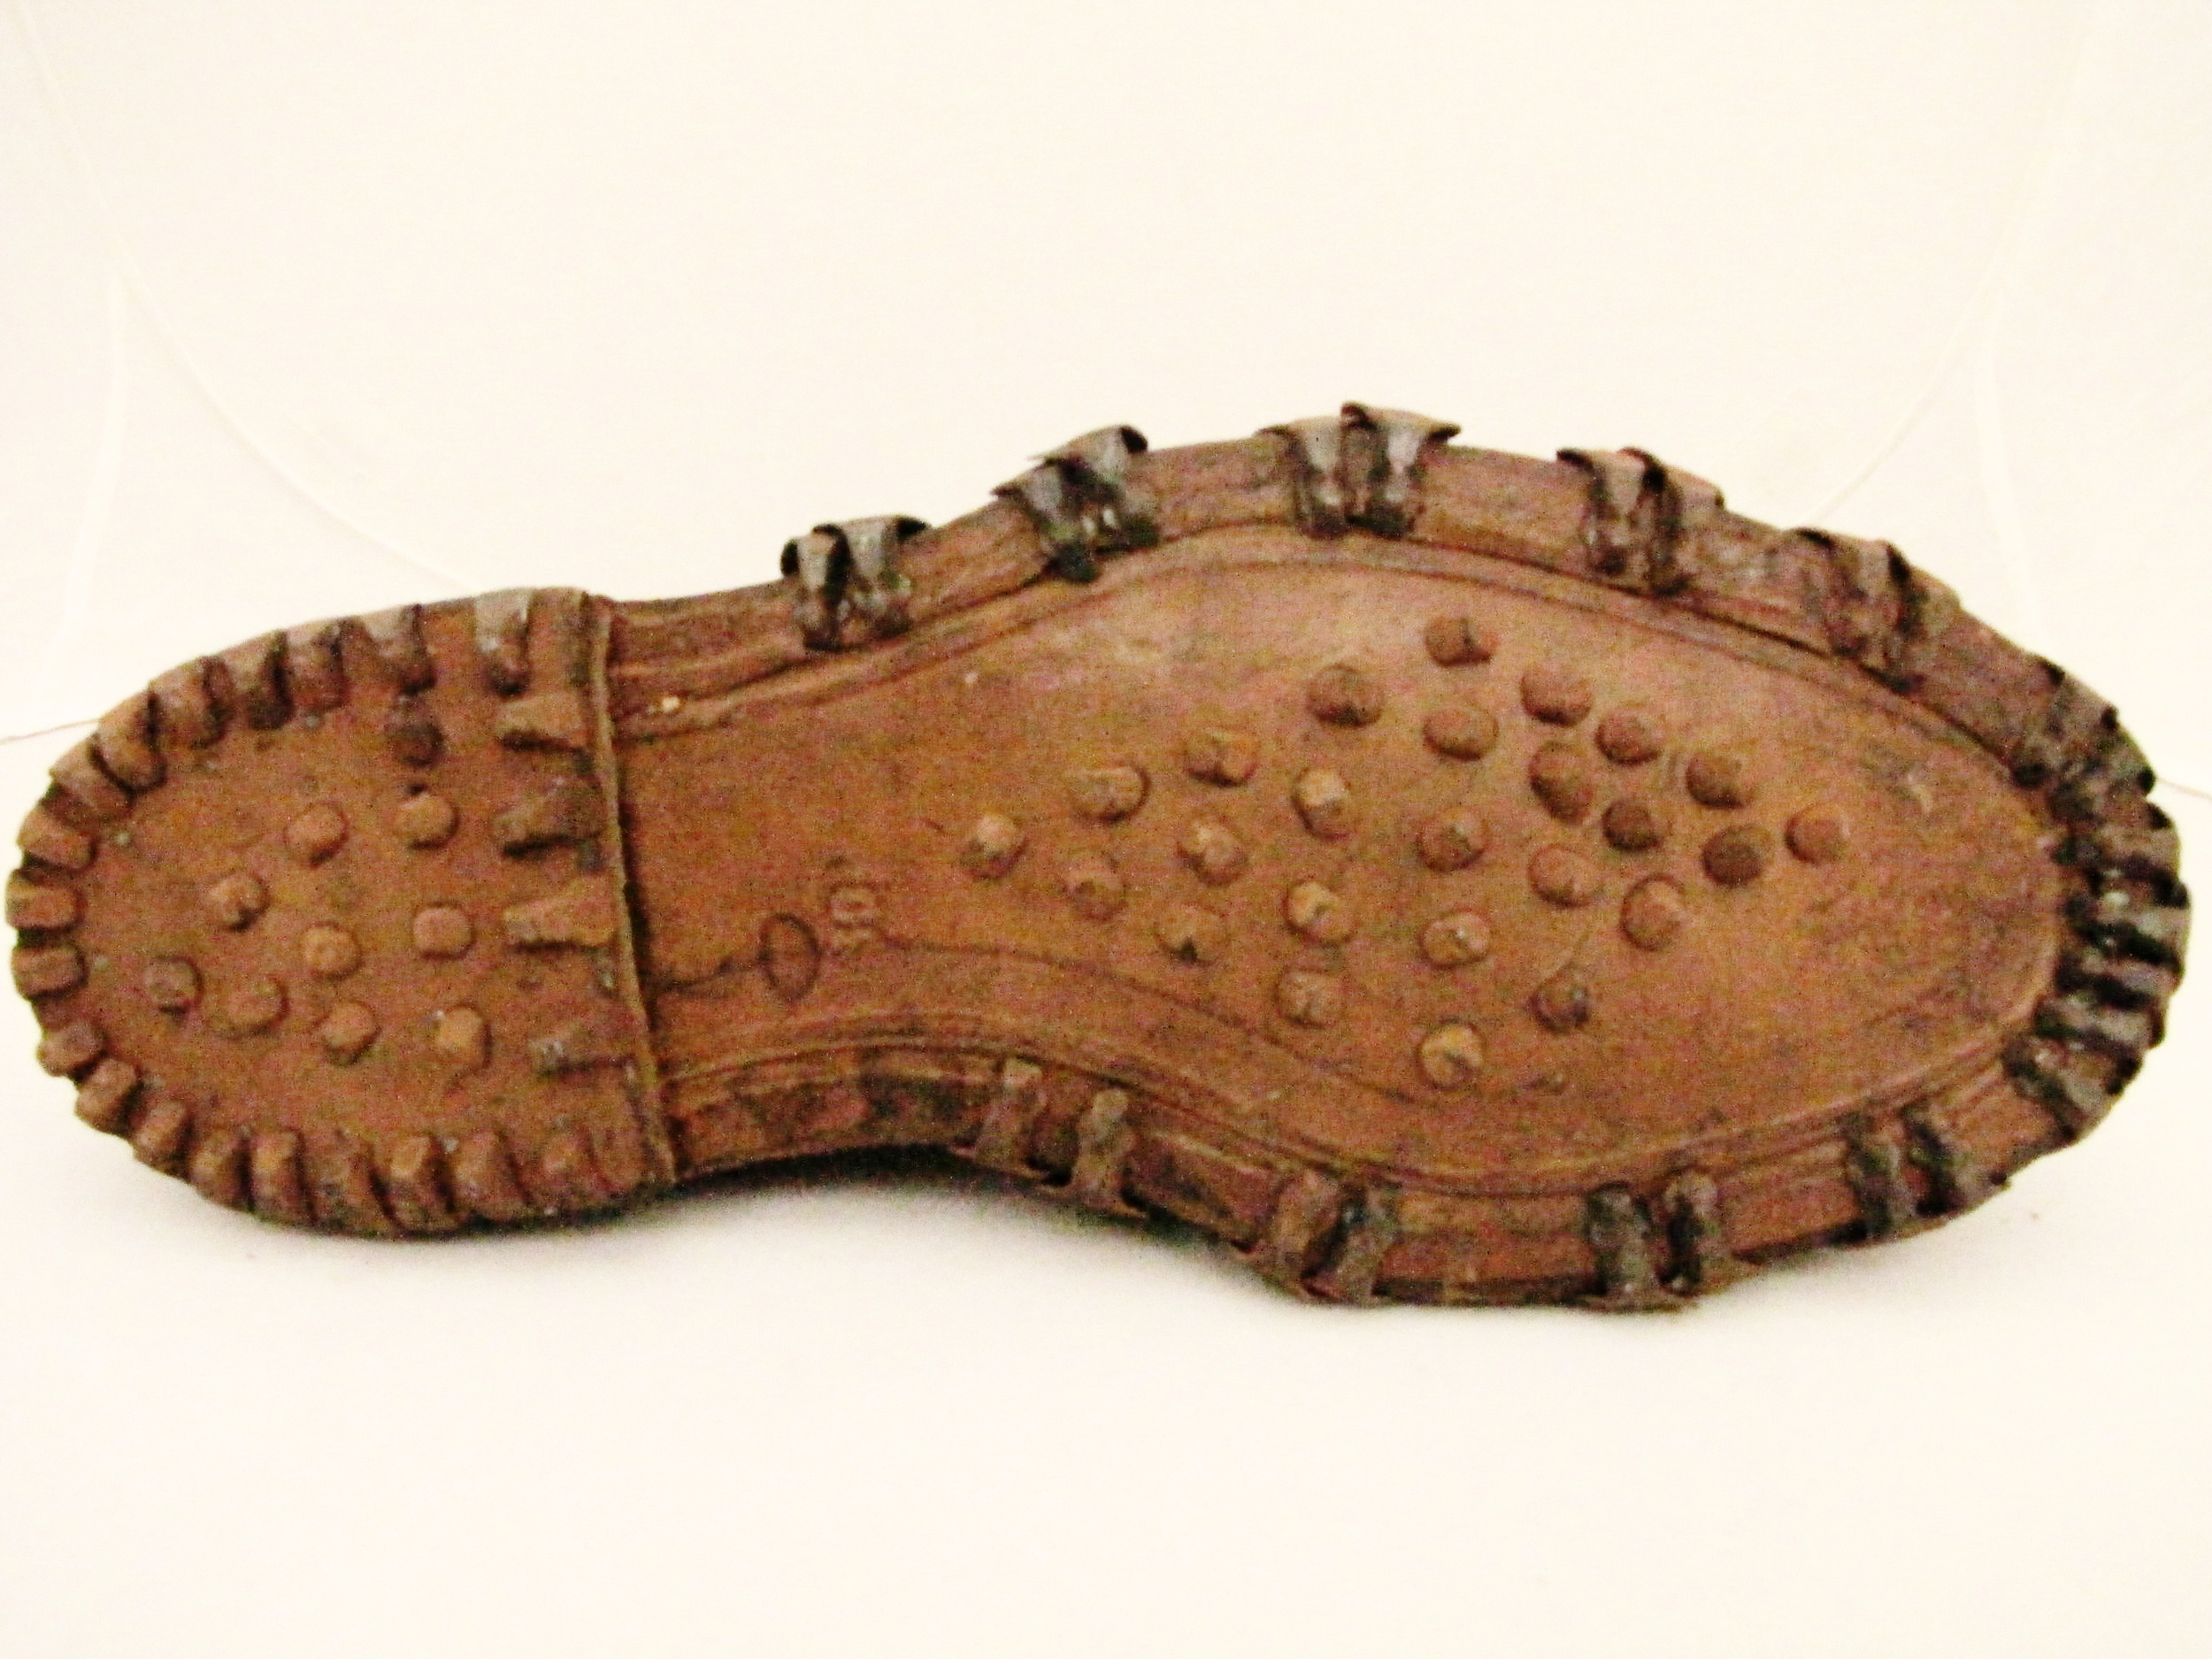
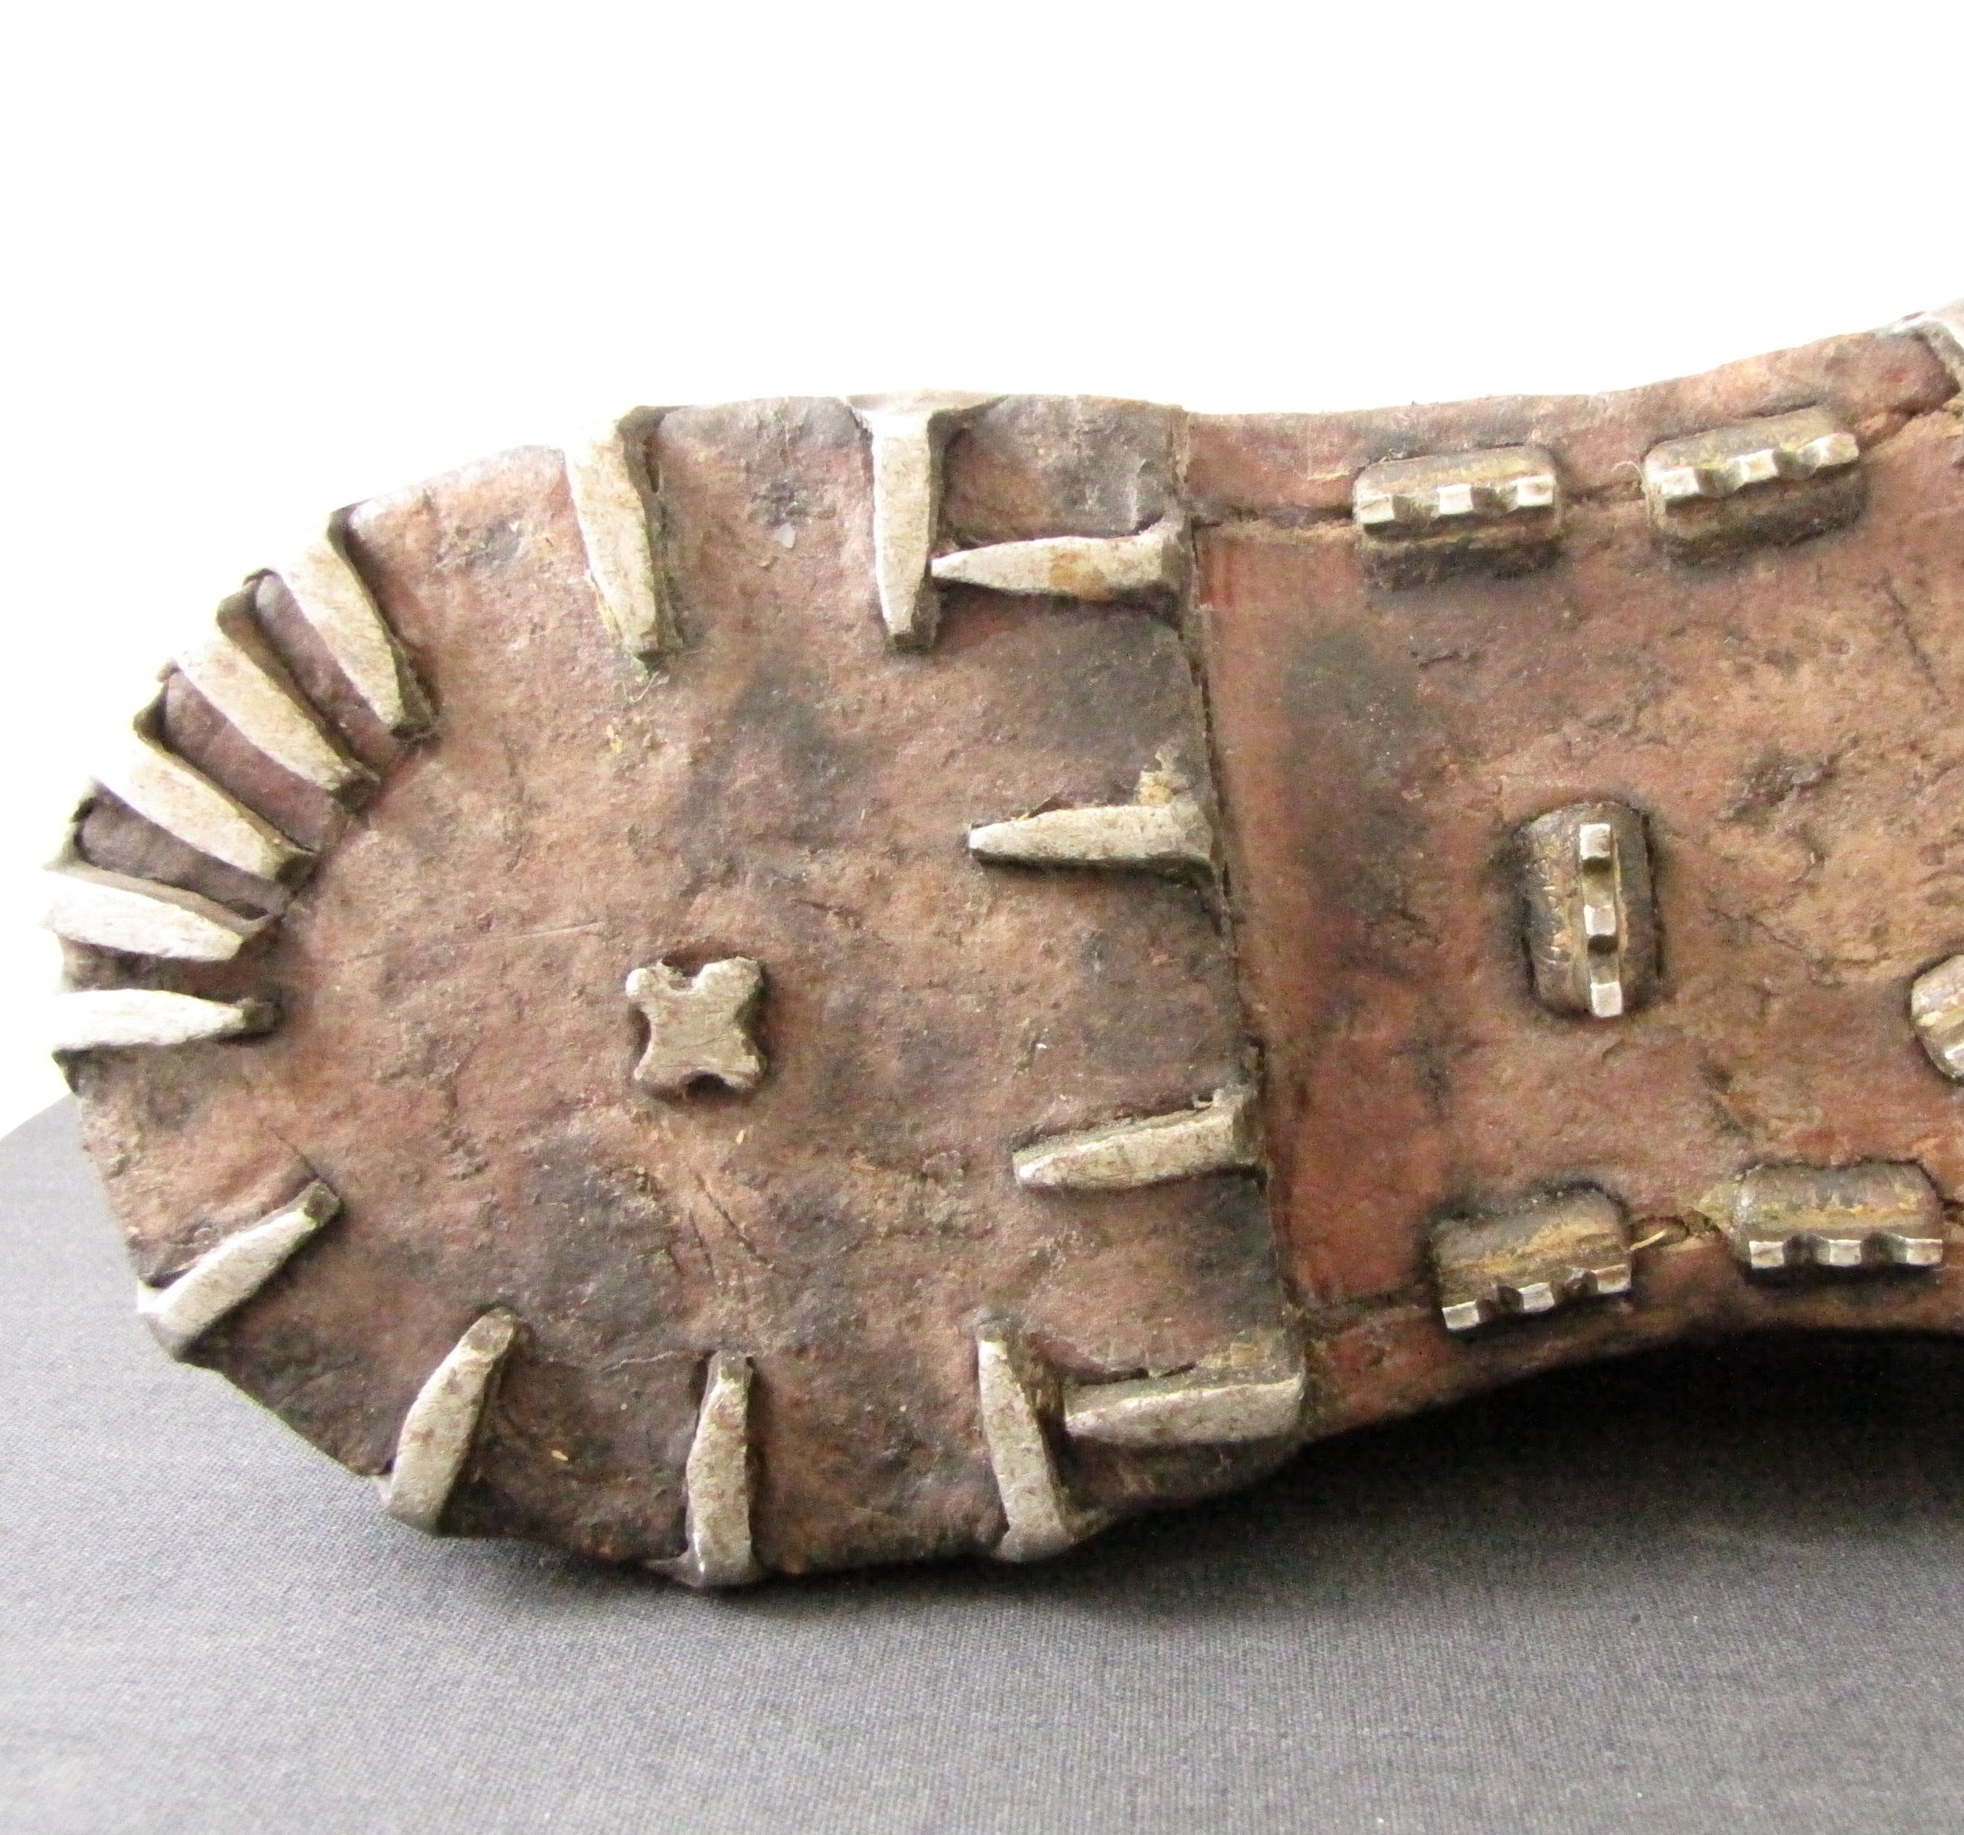
Early mountaineering boots were made of leather. They were heavy, and to make them suitable for alpinism it was necessary for climbers to add to their weight by pounding nails, called hobnails, into the soles. 

The very best boot is without a doubt the recognized Alpine climbing boot. Their soles are scientifically nailed on a pattern designed by men who understood their business; their edges are bucklered with steel like a Roman galley or a Viking’s sea-steed. No doubt they are heavy, but this slight inconvenience is forgotten as soon as the roads are left.
— C.E. Benson, 1902

Tricouni nails were a recent invention in 1920 and could be attached to mountaineering boots to provide traction. They were specially hardened to retain their shape and sharpness.

Illustration from Mountain Craft by Geoffrey Winthrop Young. New York, 1920.

Illustration of boot nails from Mountaineering Art by Harold Raeburn, 1920.

In 1920 a pair of climbing boots went for about £3.00 - the equivalent of $28.63 in 2017 US dollars. However, climbers got much less for their money than we get out of our modern boots.

Original hobnails, stored in a reused box

There is no use asking for “waterproof” boots; you will not get them.
— Harold Raeburn

In addition to being heavy, the boots were not waterproof. Mountaineers had to apply castor oil, collan or melted Vaseline to the boots before each trip. This kept the boots flexible and also kept at least some water out. Animal fats were also an option, but they had a strong, unpleasant smell and would decompose, causing the leather and stitching of the boots to rot as well.

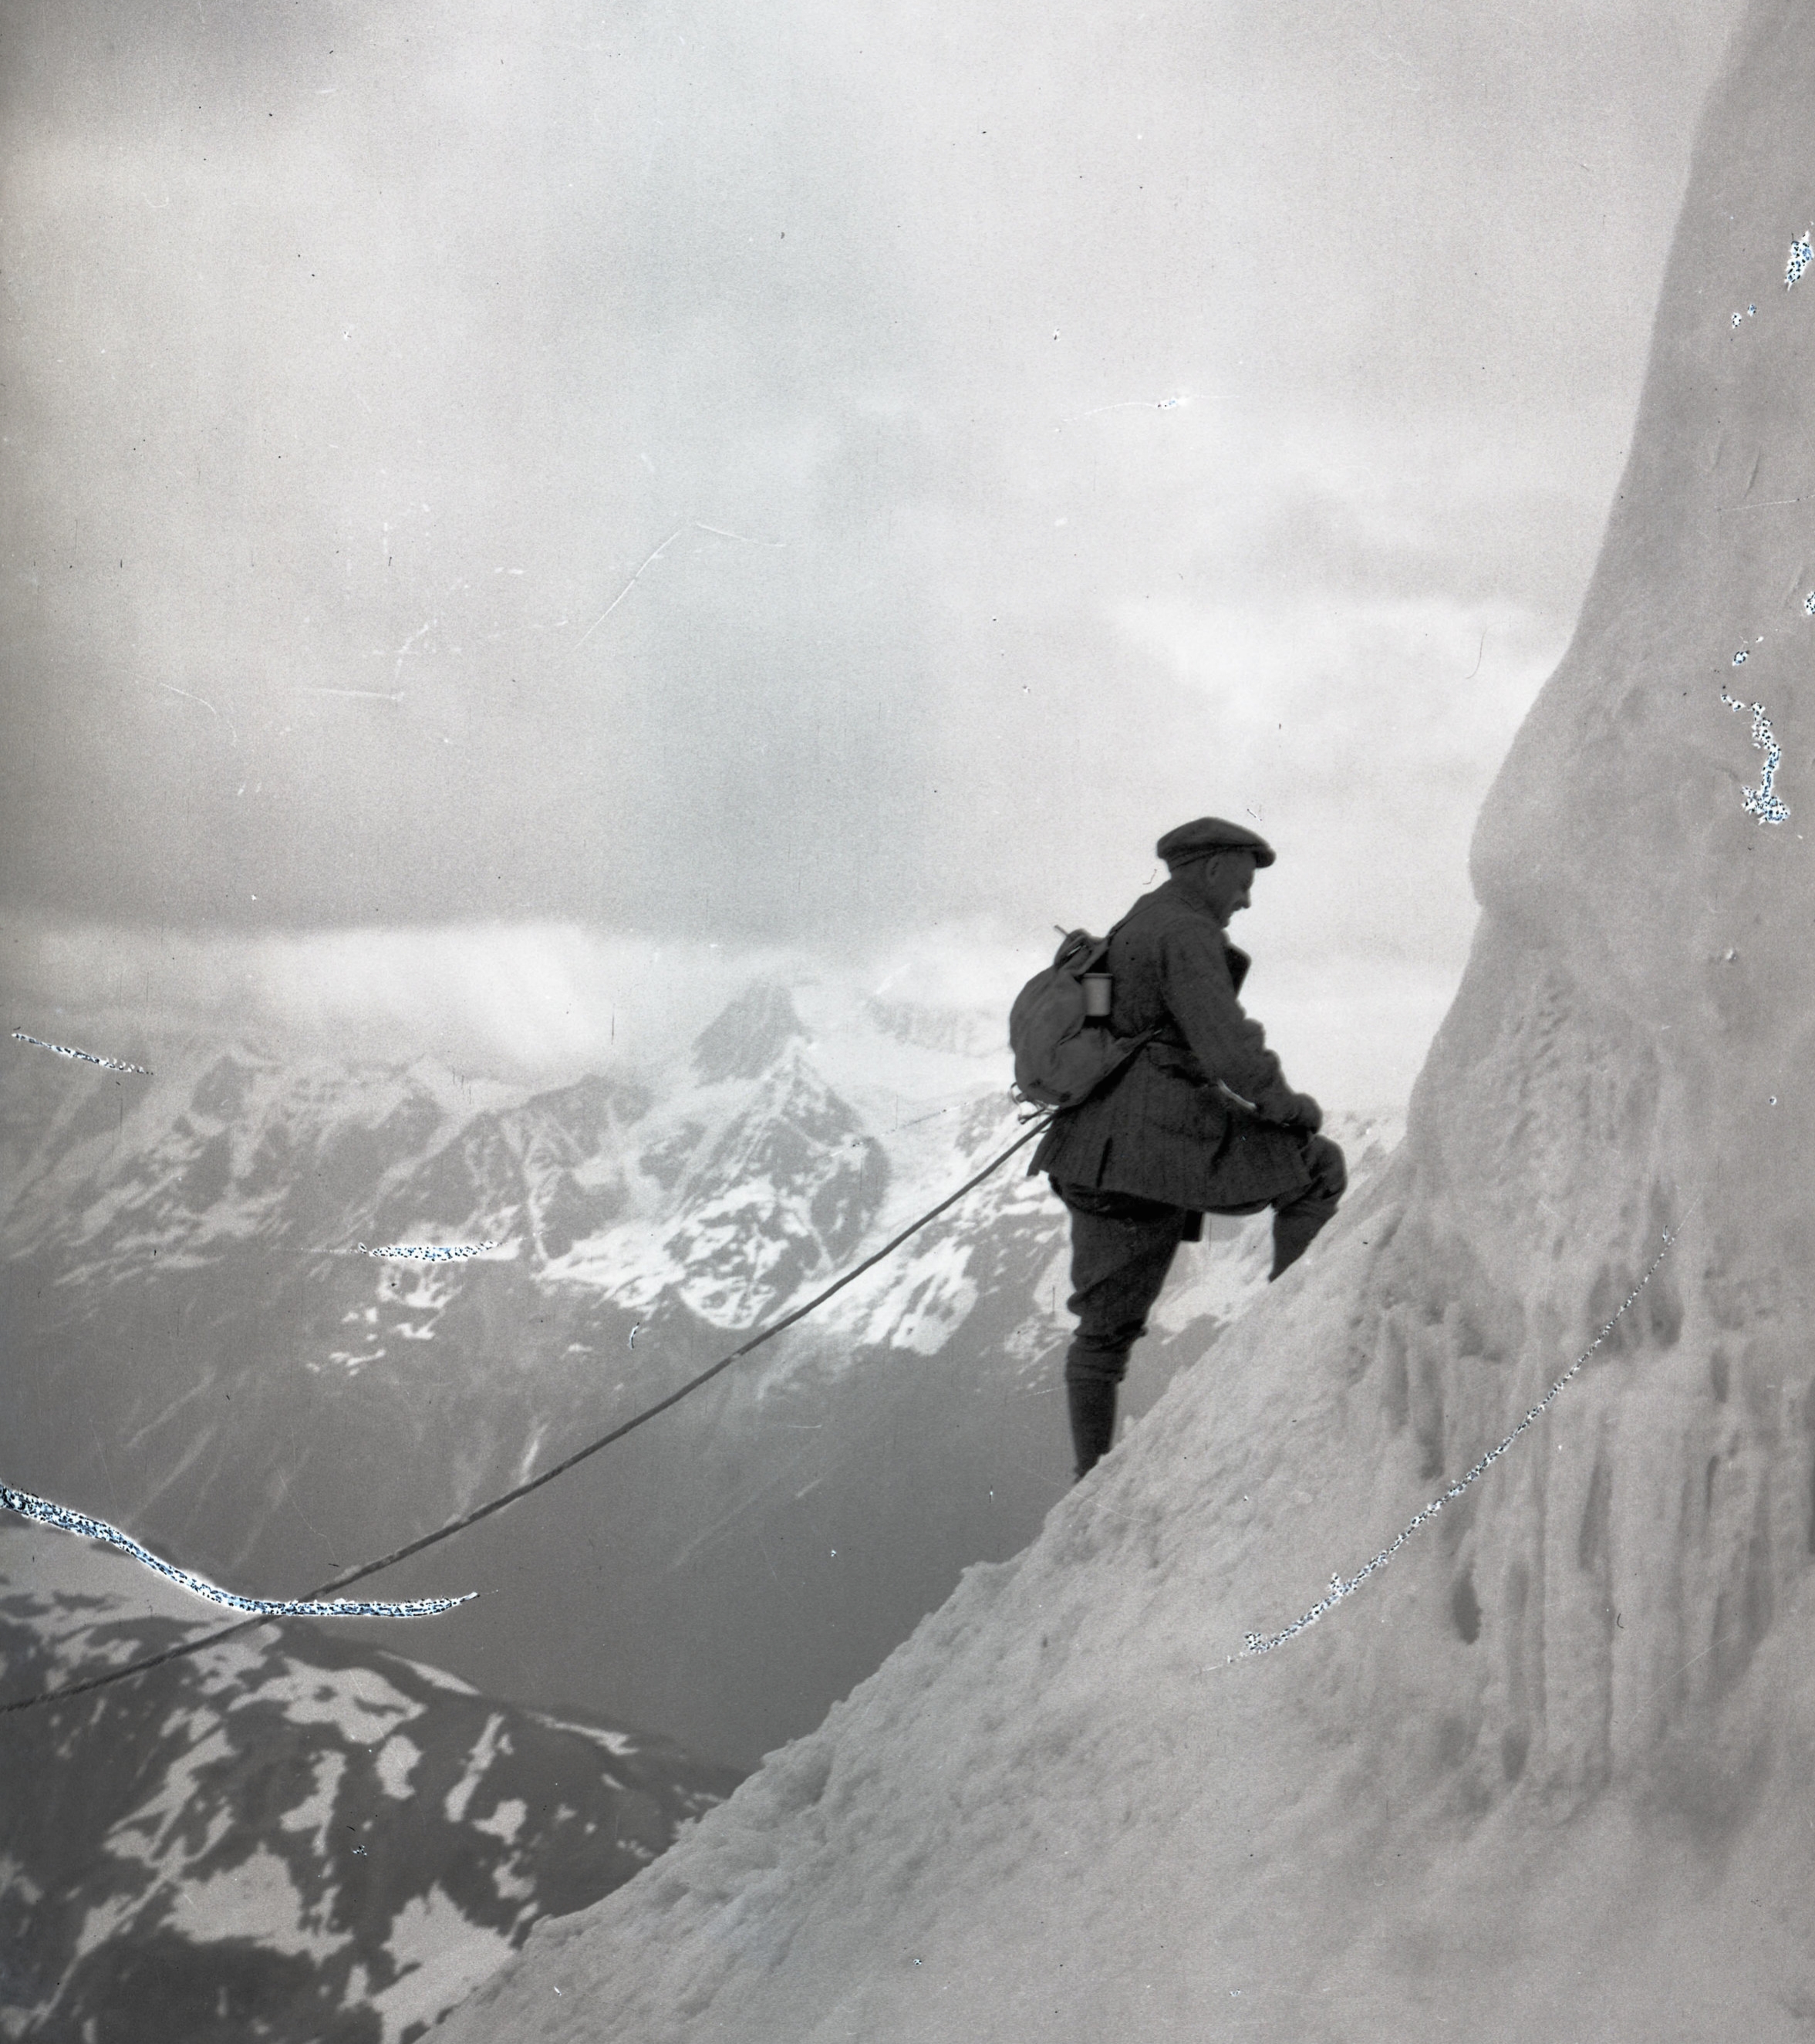
Hobnail boots

in action on Mumm Peak, Canada. 1915
Photo from our Andrew James Gilmour collection.

Boots with linings were not recommended for mountaineering, as the linings were usually made of wool and other natural fibers which were slow to dry when inside a boot. Wet boot linings, either due to water or snow leakage or human sweat, were a major cause of frostbite resulting in the loss of toes. 

When not in use, the boots needed to be stuffed with dry paper, hay, straw or oats which were changed at intervals to ensure that all moisture was absorbed. If they weren't stuffed in this manner on an expedition, they were in danger of freezing and twisting out of shape. 

A pair of worn hobnail boots set to dry over a fan in about 1920. This luxurious set-up was possible because the mountaineer was staying in a Swiss hotel.

Photo from our Andrew James Gilmour collection.

Look with suspicion upon the climber who says he wears the same pair of boots without re-soling for three or four years. It will probably be found that his climbing is not of much account, or he is wearing boots which have badly worn and blunted nails, with worn-out and nail-sick soles, a worse climbing crime if he proposes to join your party, than if he were to wander up the Weisshorn alone.
— Mountaineering Art by Harold Raeburn, 1920

Crampons

Today crampons are made of stainless steel and weigh about 1 to 2 lbs. They can be bolted or strapped to the boot. In the early 20th century, crampons were made of steel or iron. They were strapped to the boot with hemp or leather straps passed through metal loops attached to the frames. Surprisingly, they didn't weigh too much more in the 1920s than they do today. 

They could be bought in a variety of configurations, including models ranging from four to ten spikes. Mountaineers who recommended their use wrote that good crampons should have no fewer than eight spikes which should not be riveted to the frame. The crampons also should not be welded anywhere and the iron variety were likely to break if any real work were required of them. 

A steel crampon with eight spikes and hemp and leather straps - ideal!

From the American Alpine Club Library archives

Good footwear is still one of the most important aspects of any trip. We're extremely grateful boot technology has advanced so much.

Care and Handling of Archival Nitrate Negatives

by Allison Albright

Nitrate film base was developed in the 1880s and was the first plasticized film base available commercially. It enabled photographers to take pictures under more diverse conditions, and its flexibility and low cost was partially responsible for making photography affordable and accessible to amateur consumers as well as professionals. It was widely used from the 1890s until the 1950s. 

An album of nitrate negatives circa 1900

Nitrate negatives also happen to be mildly toxic and somewhat volatile. Because the material is the same chemical composition as cellulose nitrate (also known as flash paper or guncotton), which is used in munitions and explosives, it is incredibly flammable and prone to auto-ignition. It was also used in motion picture film in the early 20th century and was responsible for several movie theater fires during that era.

Below are some negatives in the early stages of deterioration.

As if the danger of combustion wasn’t enough, nitrate negatives also emit harmful nitric acid gas as they deteriorate, meaning that we need to use safety precautions such as respirators and latex gloves when handling these negatives. 


HNO3 + 2 H2SO4 ⇌ NO2+ + H3O+ + 2HSO4

Nitric acid is considered a highly corrosive mineral acid.


Nitrate negatives usually deteriorate in just a few decades, making them an extremely unstable storage medium. As they deteriorate, the image begins to fade and the negative turns soft and gooey, causing it to weld itself to whatever it’s stored with, resulting in the loss of the image. 

A clump of badly deteriorated negatives stuck together forever

When good negatives go bad - a negative in the process of becoming goo

Like most archival collections containing materials created from about 1890 to the early 1950s, the AAC’s collection includes some nitrate film negatives. For most of their lives, these negatives have been stored in a cold, temperature controlled area. We’re digitizing these negatives in order to capture the images and make them accessible to the public before we put them in deep freeze. The best way to preserve and store nitrate negatives for the long term is to freeze them to slow the process of deterioration and minimize the risk that they’ll start a fire. 


Because of the unstable nature of nitrate negatives, some deterioration is to be expected. However, the vast majority of this collection is still in good shape. We've included a few selections below. Eventually, we’ll make all the images from our nitrate negatives available.

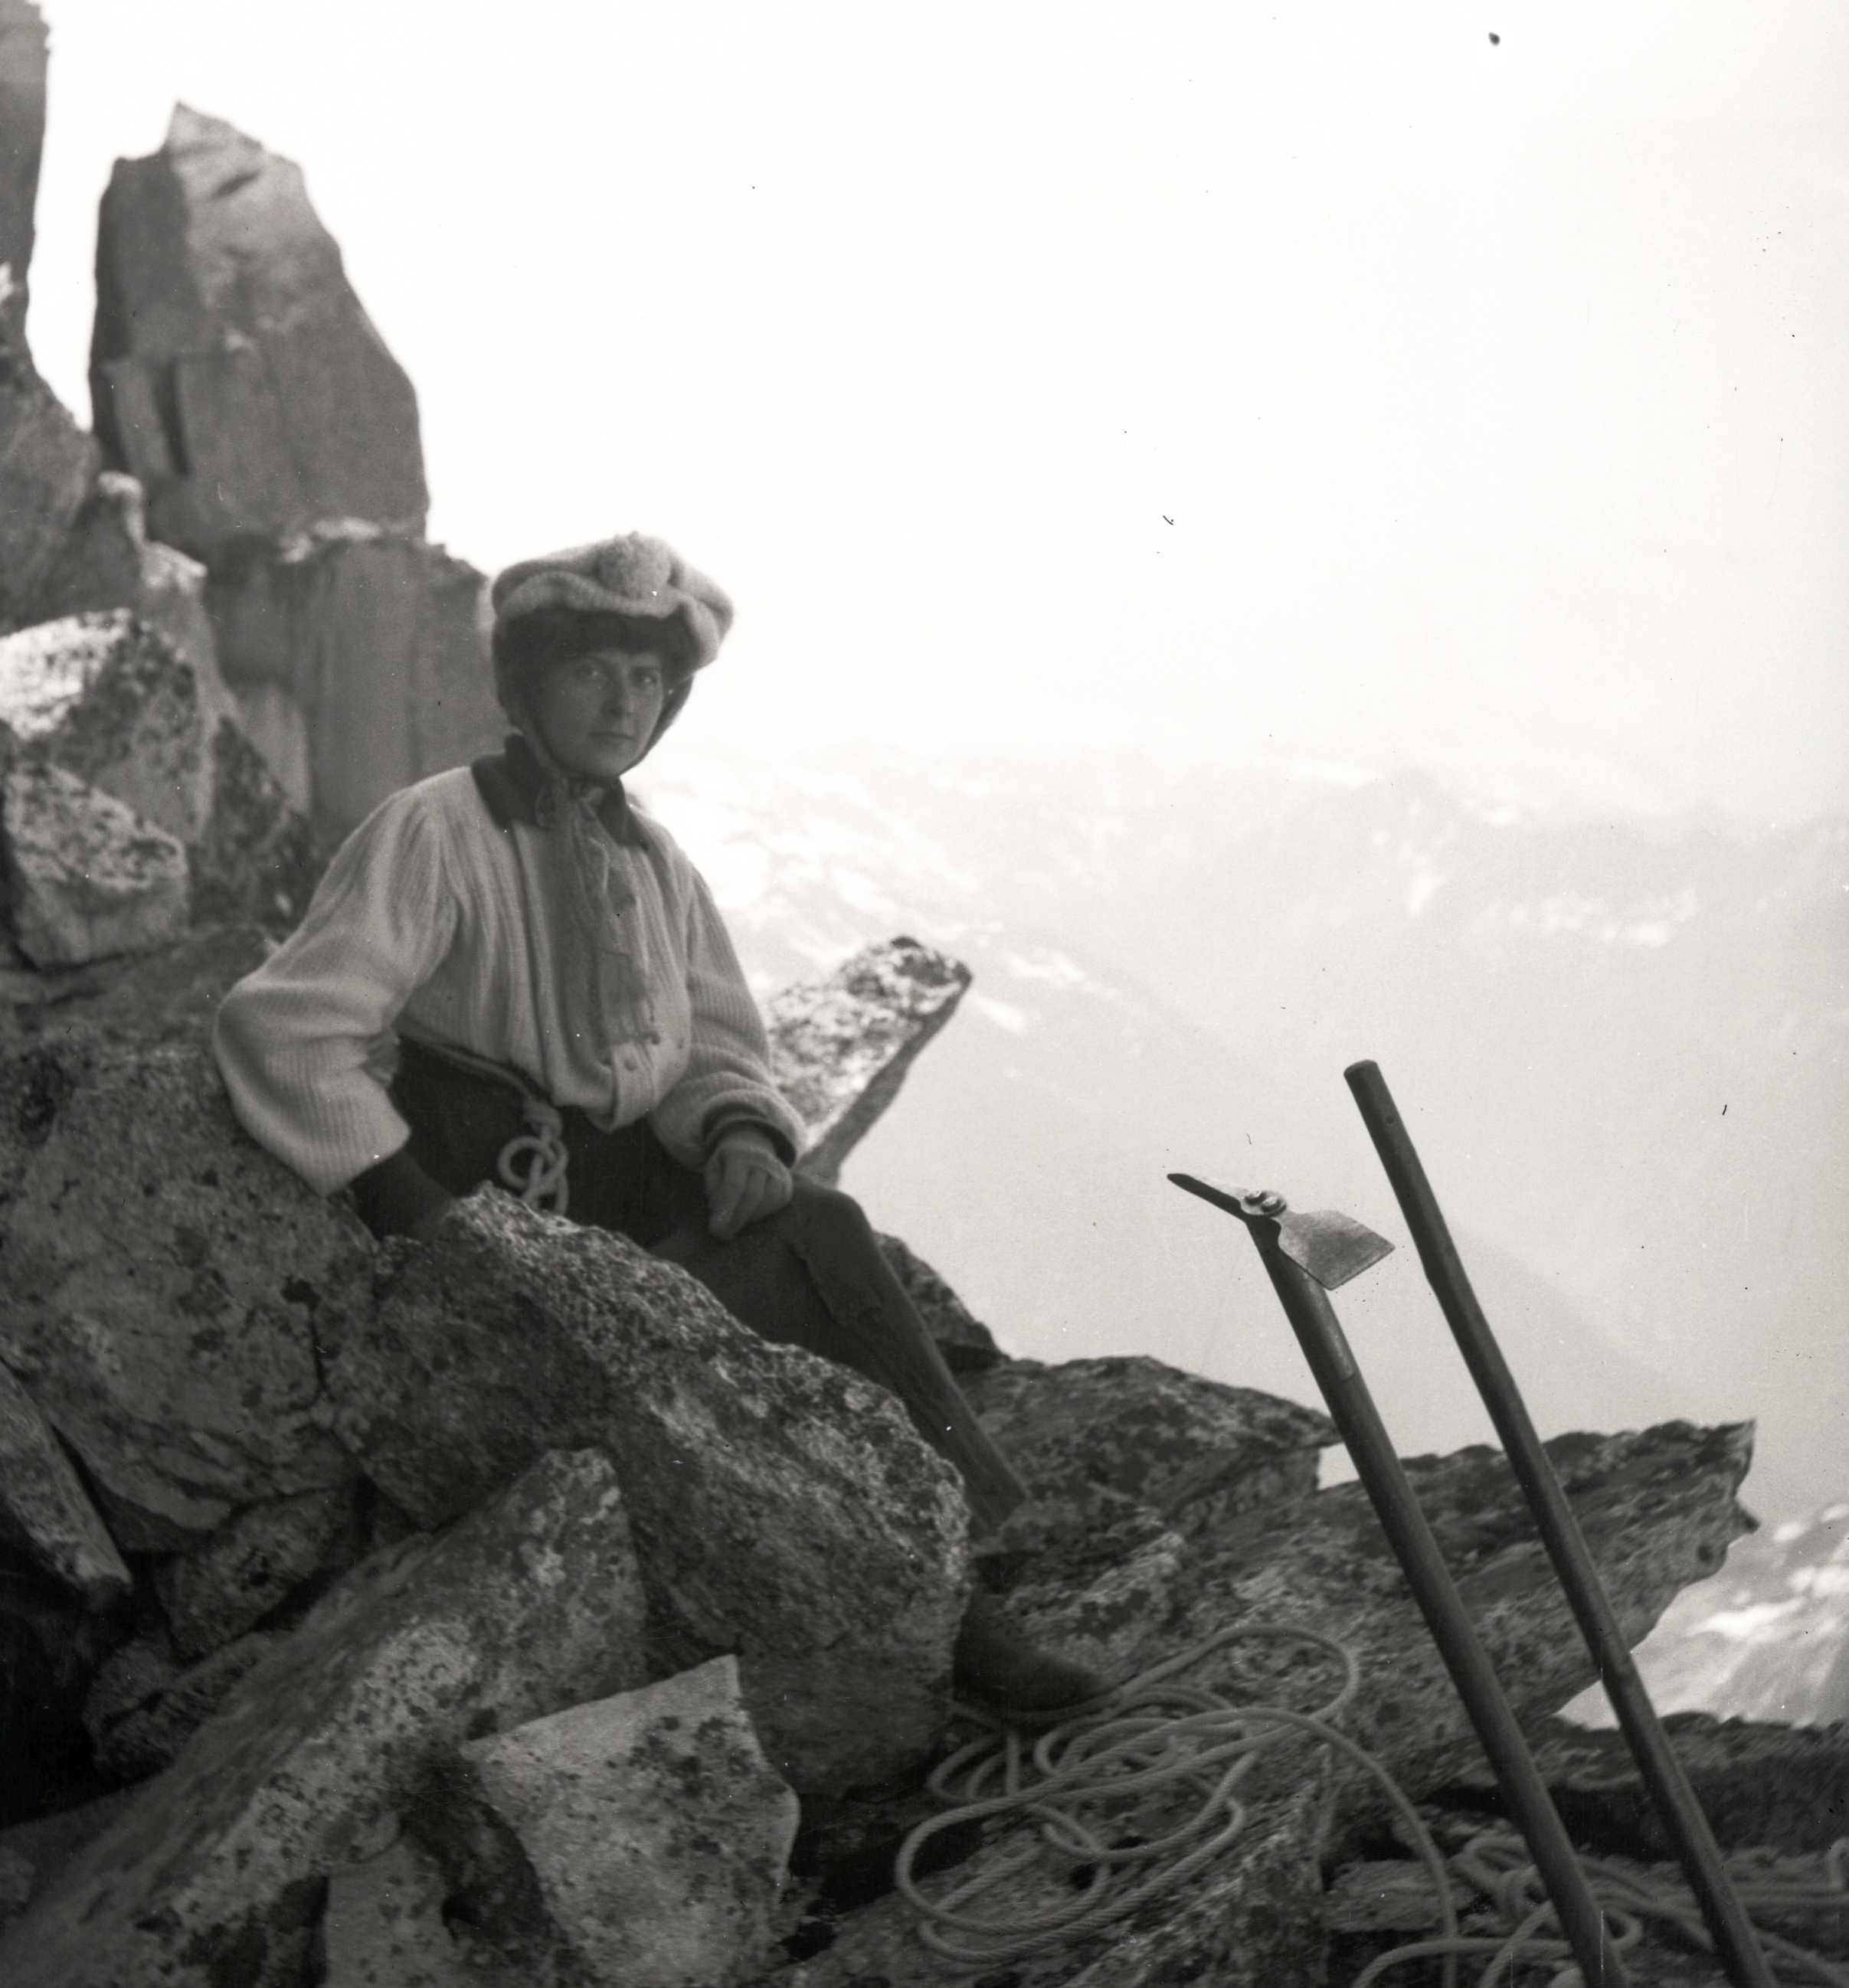
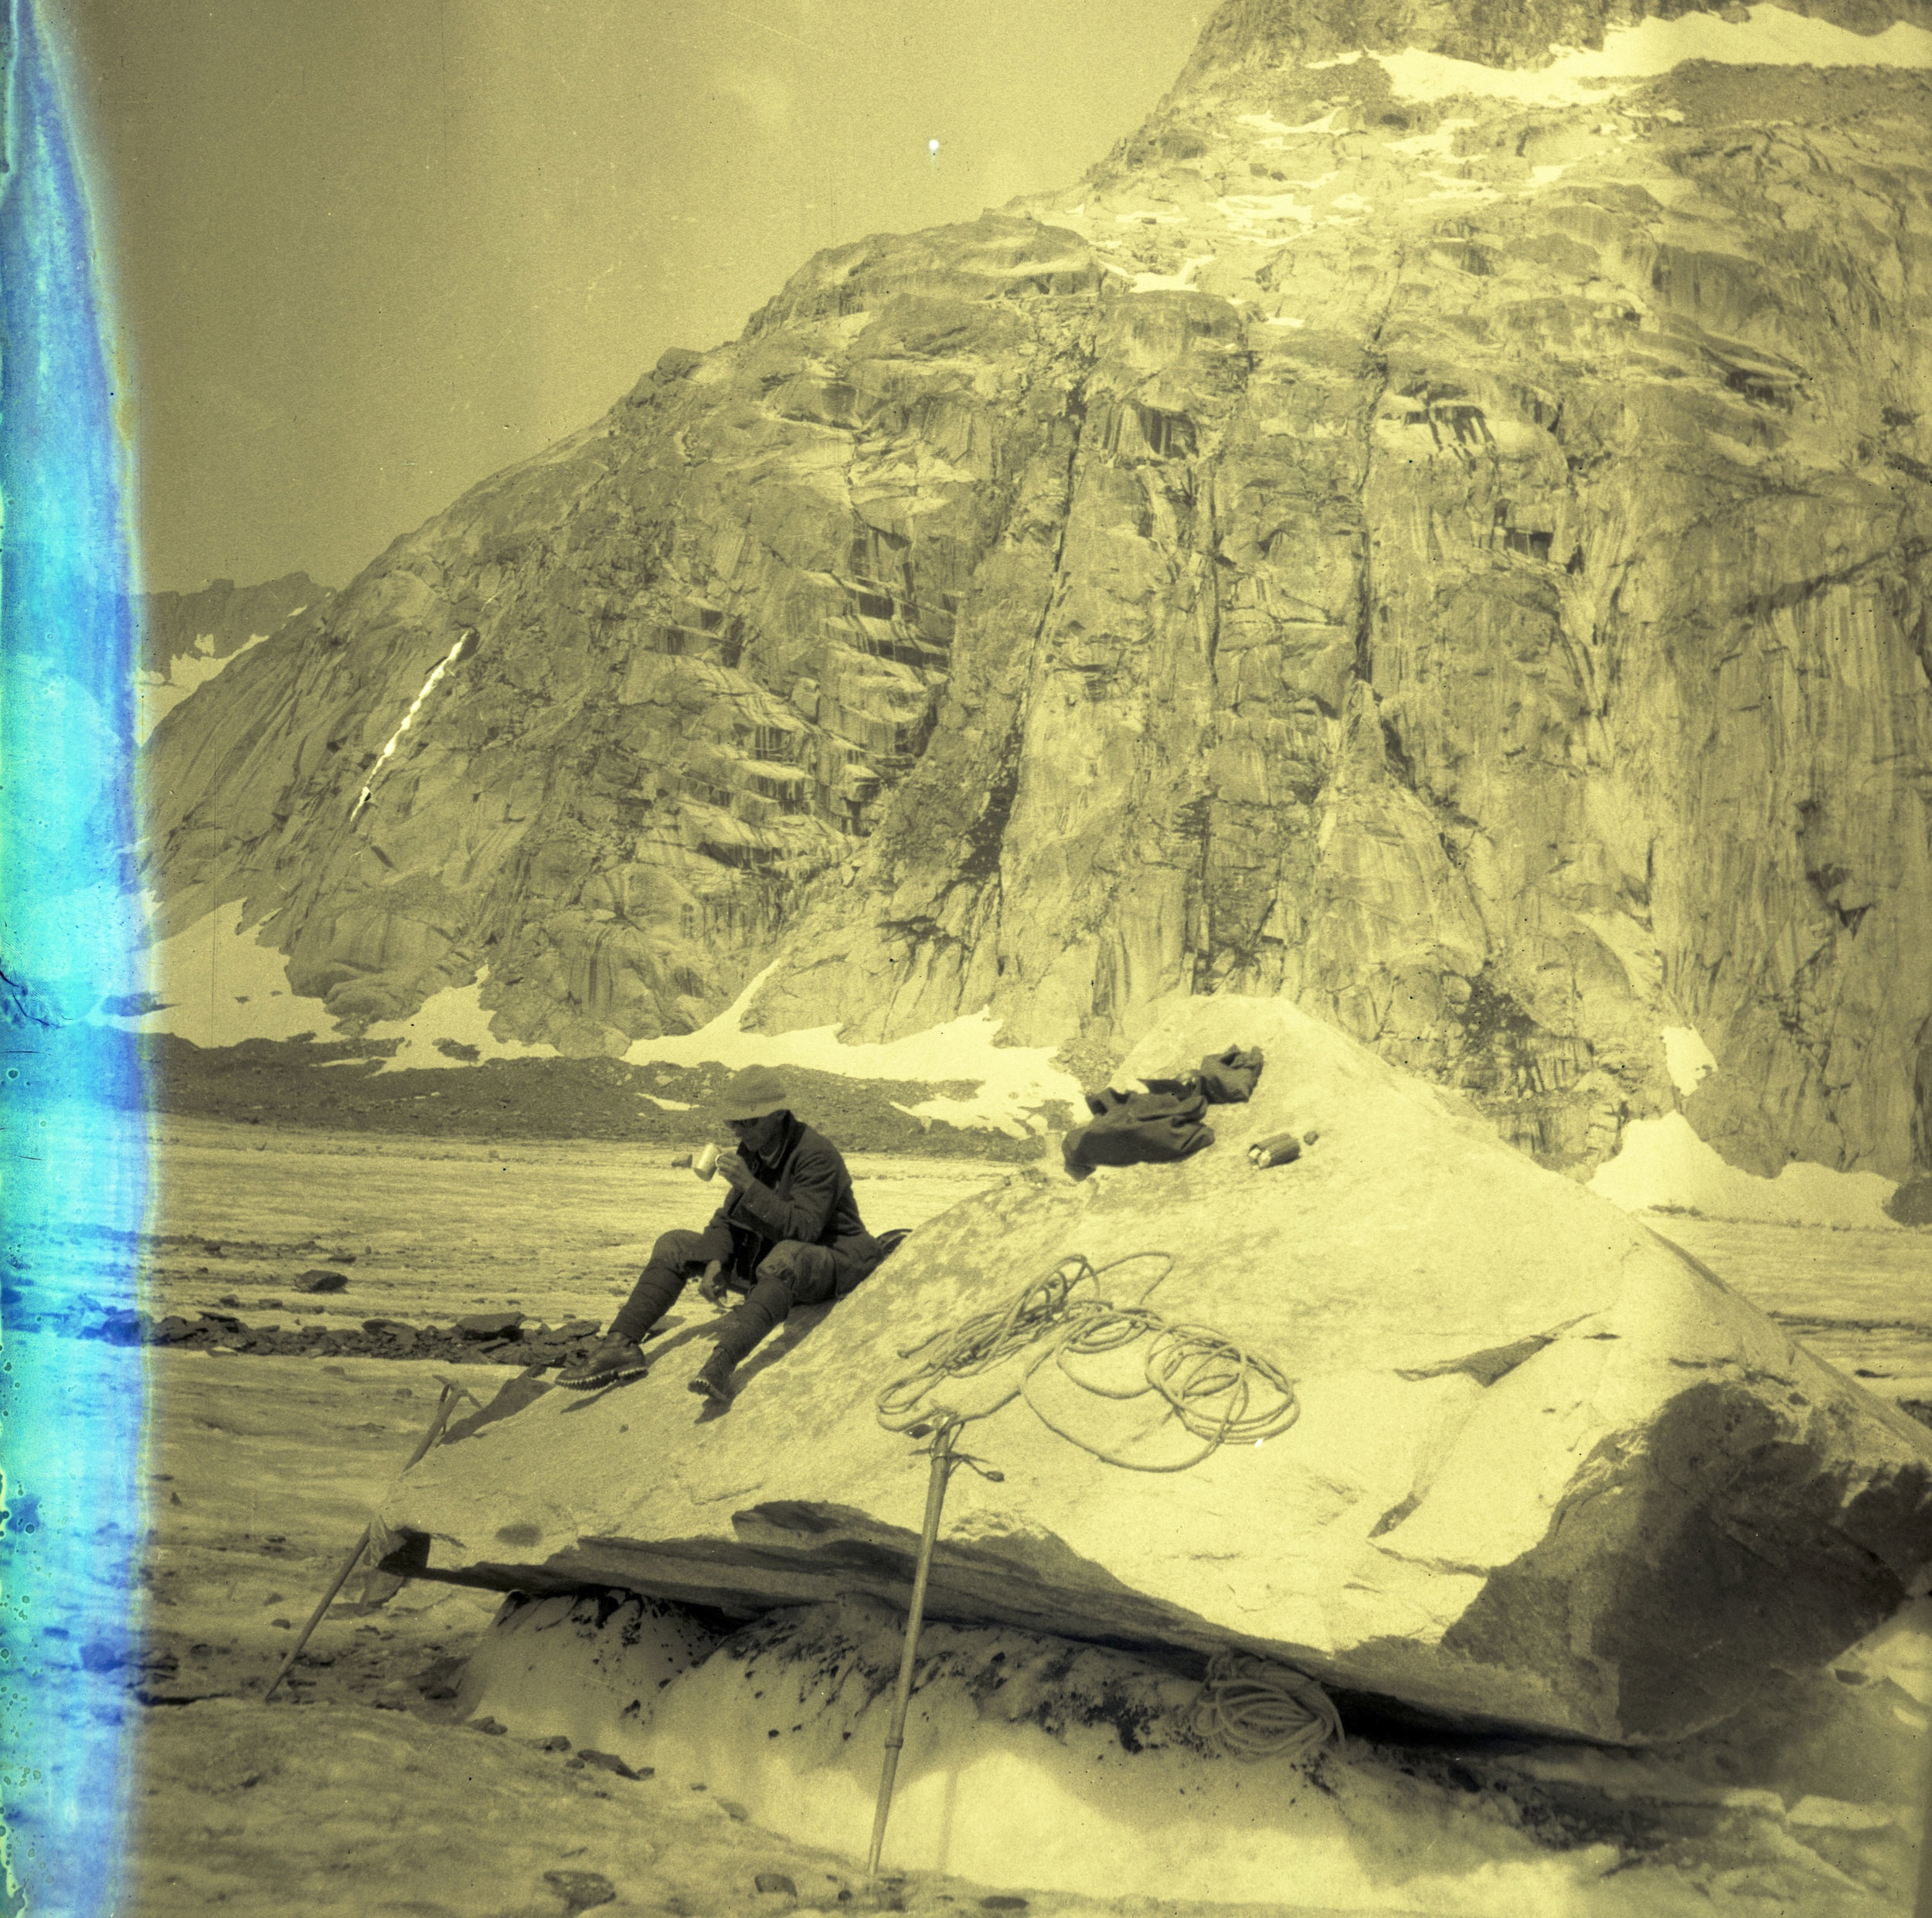
These photographs are taken from the collection of Andrew James Gilmour (1871-1941), an AAC member whose surviving photographs help inform our knowledge of the history of climbing and what the sport was like in the early 20th century.

Magic Lantern Slides

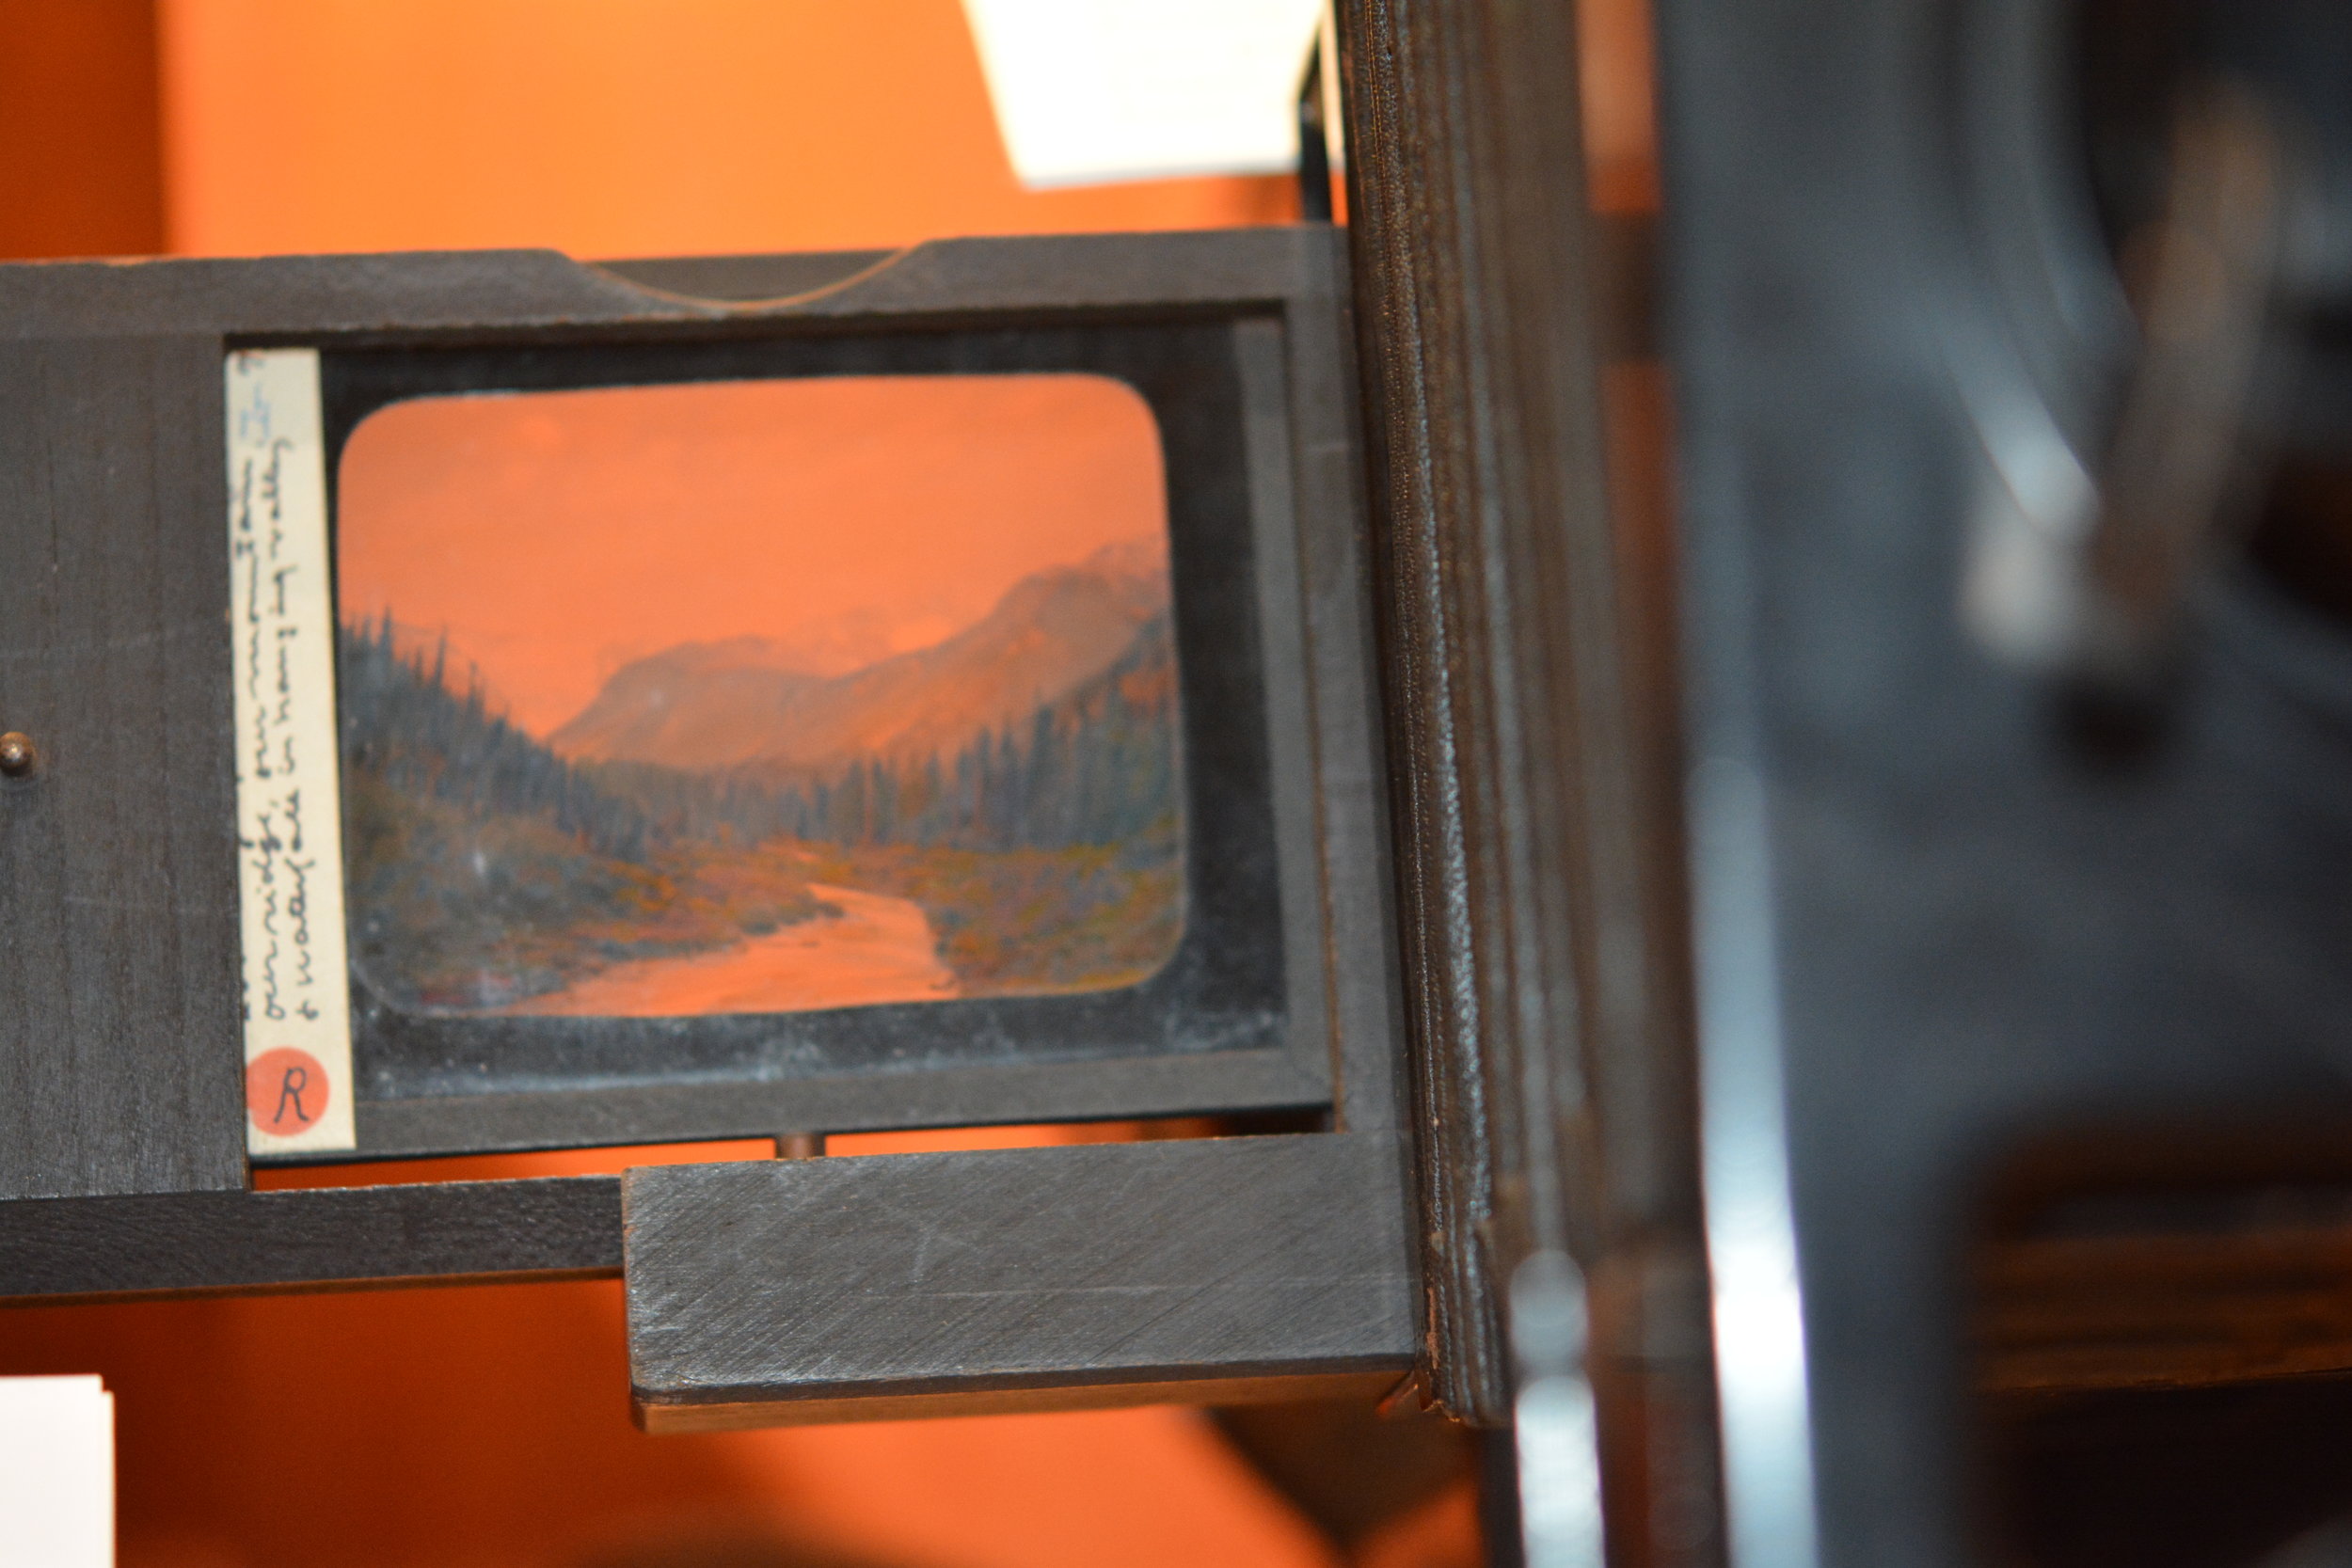
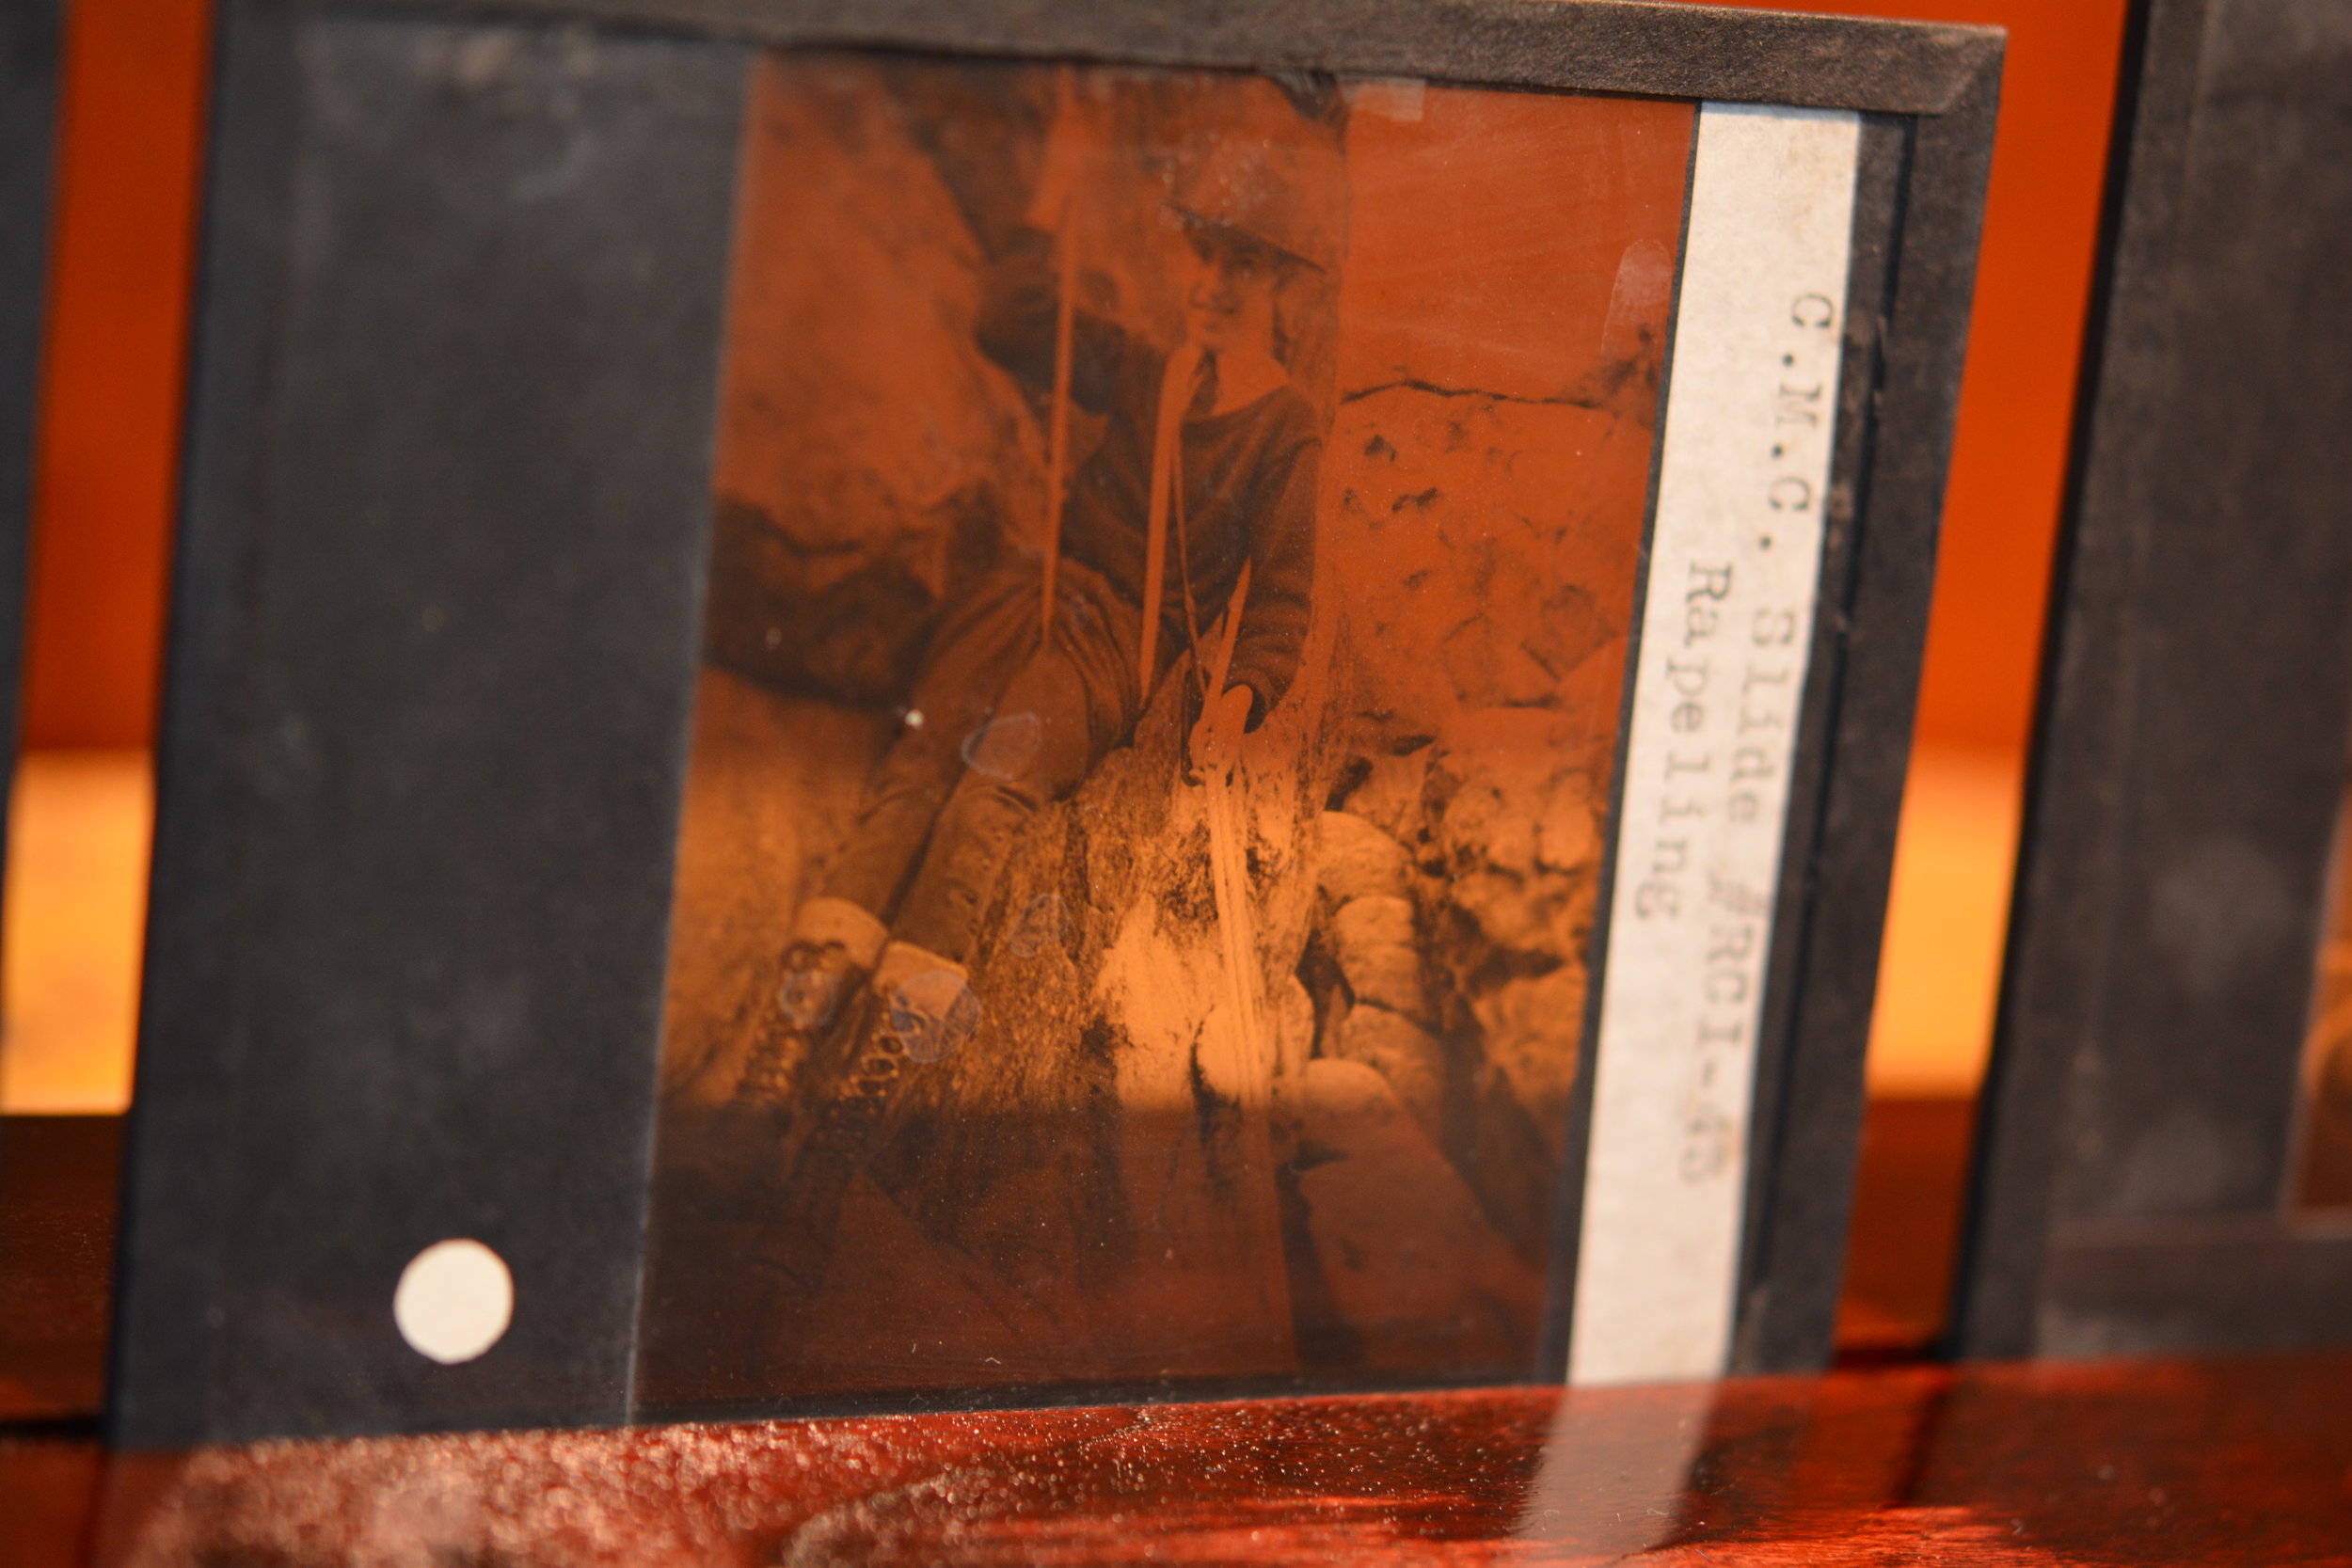
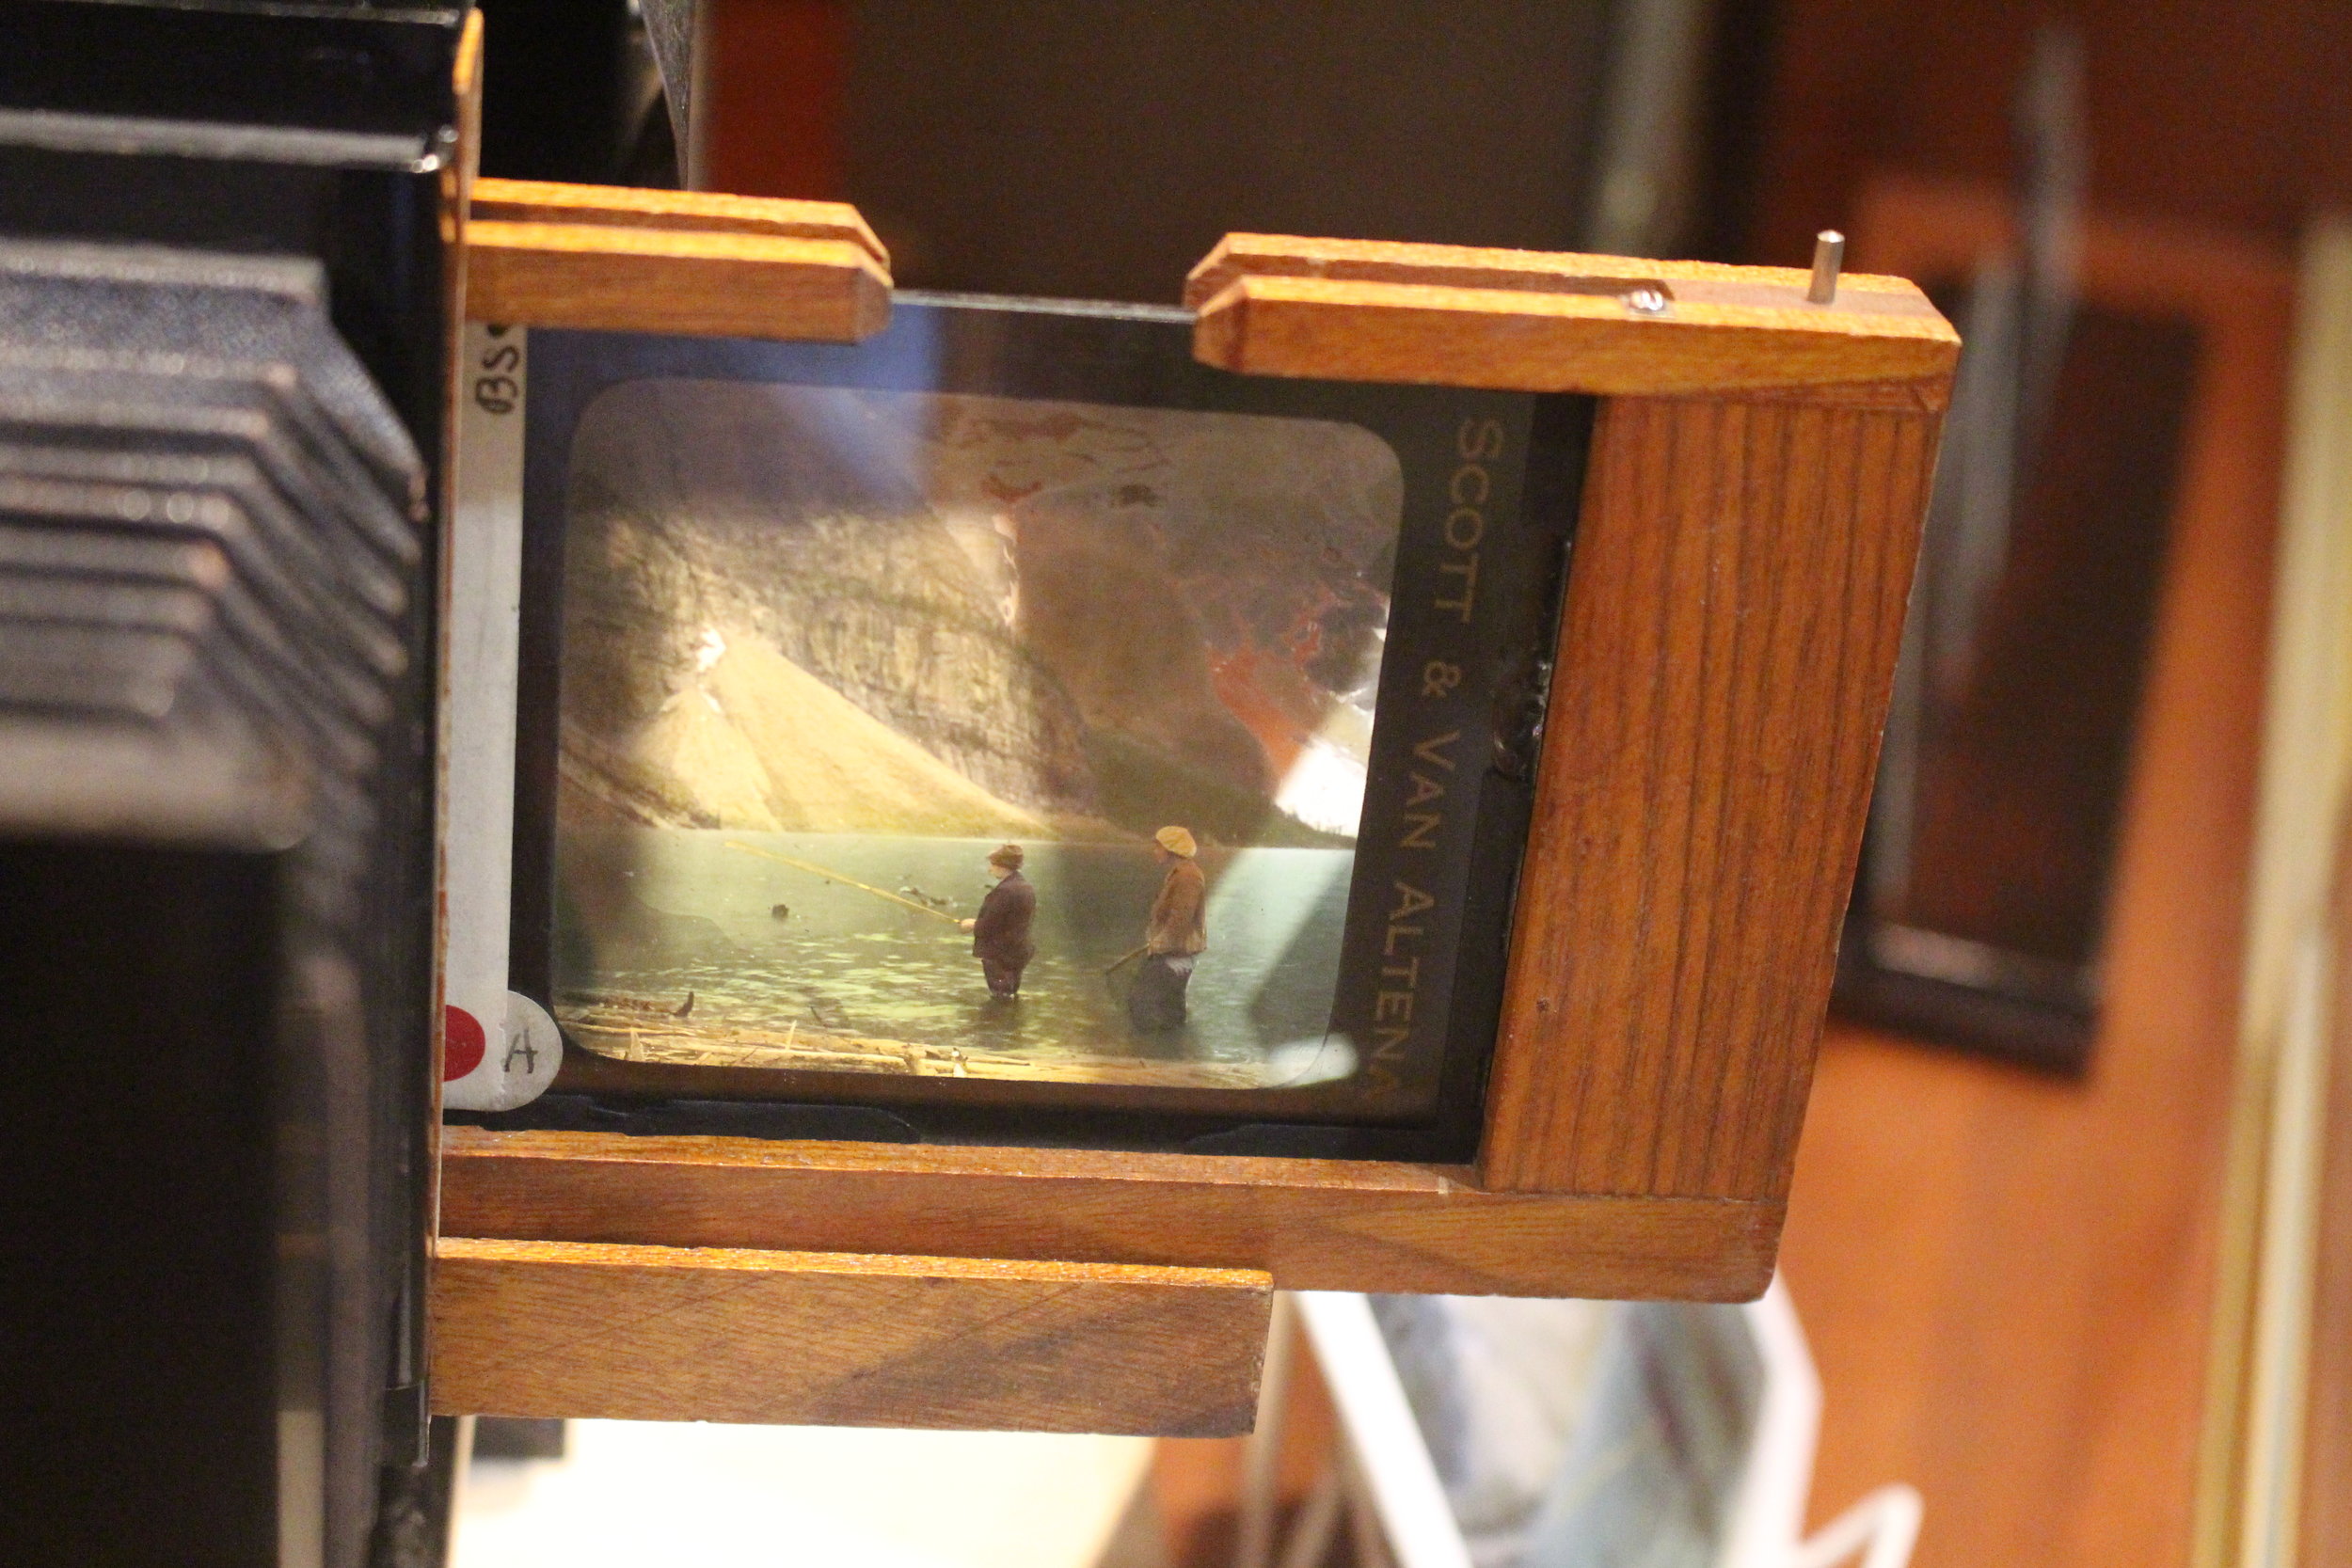
A Lantern Slide Close-Up. Caption reads: Climbing Mt. Lyell, Yosemite Nat. Pk. (Photo by Farquar). This slide came from Francis P. Farquhar. It is probably from the 1910-20s.

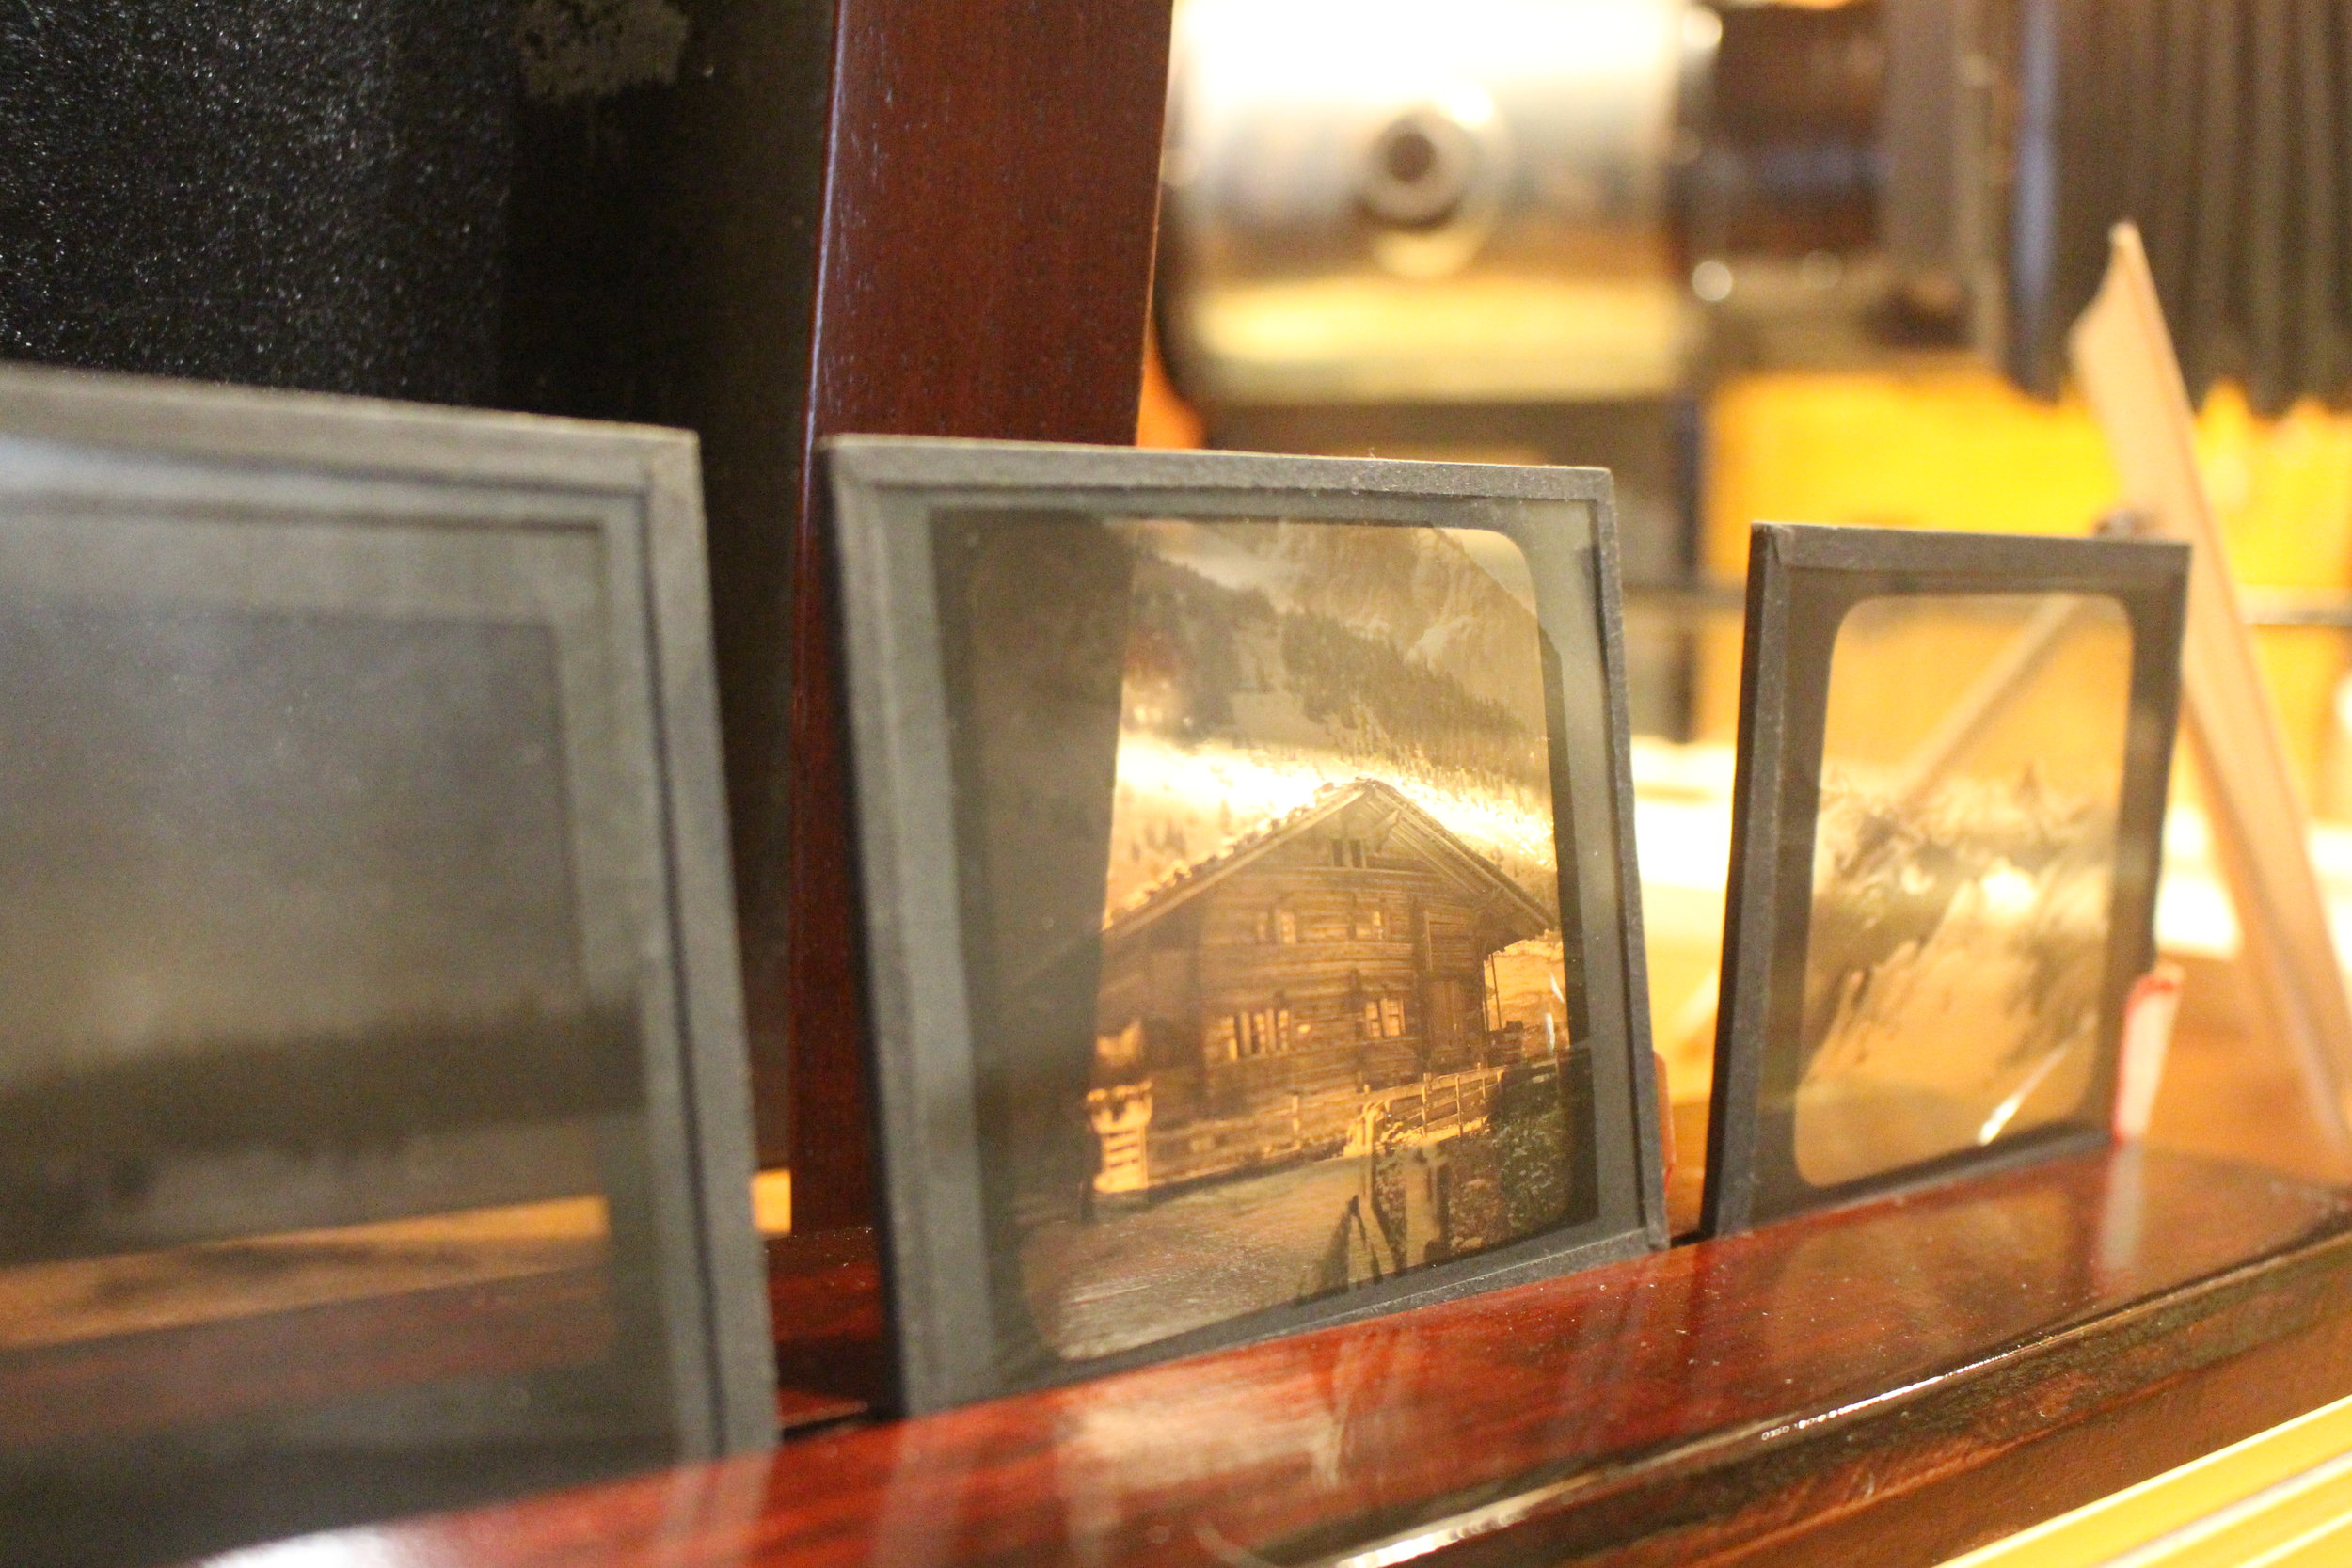
The magic lantern was an early type of image projection, used since the 17th century, to show painted or printed materials for entertainment. With the invention of the photograph, it was adapted in the 19th century to project photographic materials to the masses.

Mountaineers would often employ this method to illustrate lectures on their mountain pursuits. Many of the early American Alpine Club annual dinners included lectures and talks that were "illustrated by lantern views."

Excerpt from the 1911 By-Laws & Register Book: Notes from the Eighth Annual Meeting held in Boston, 1909

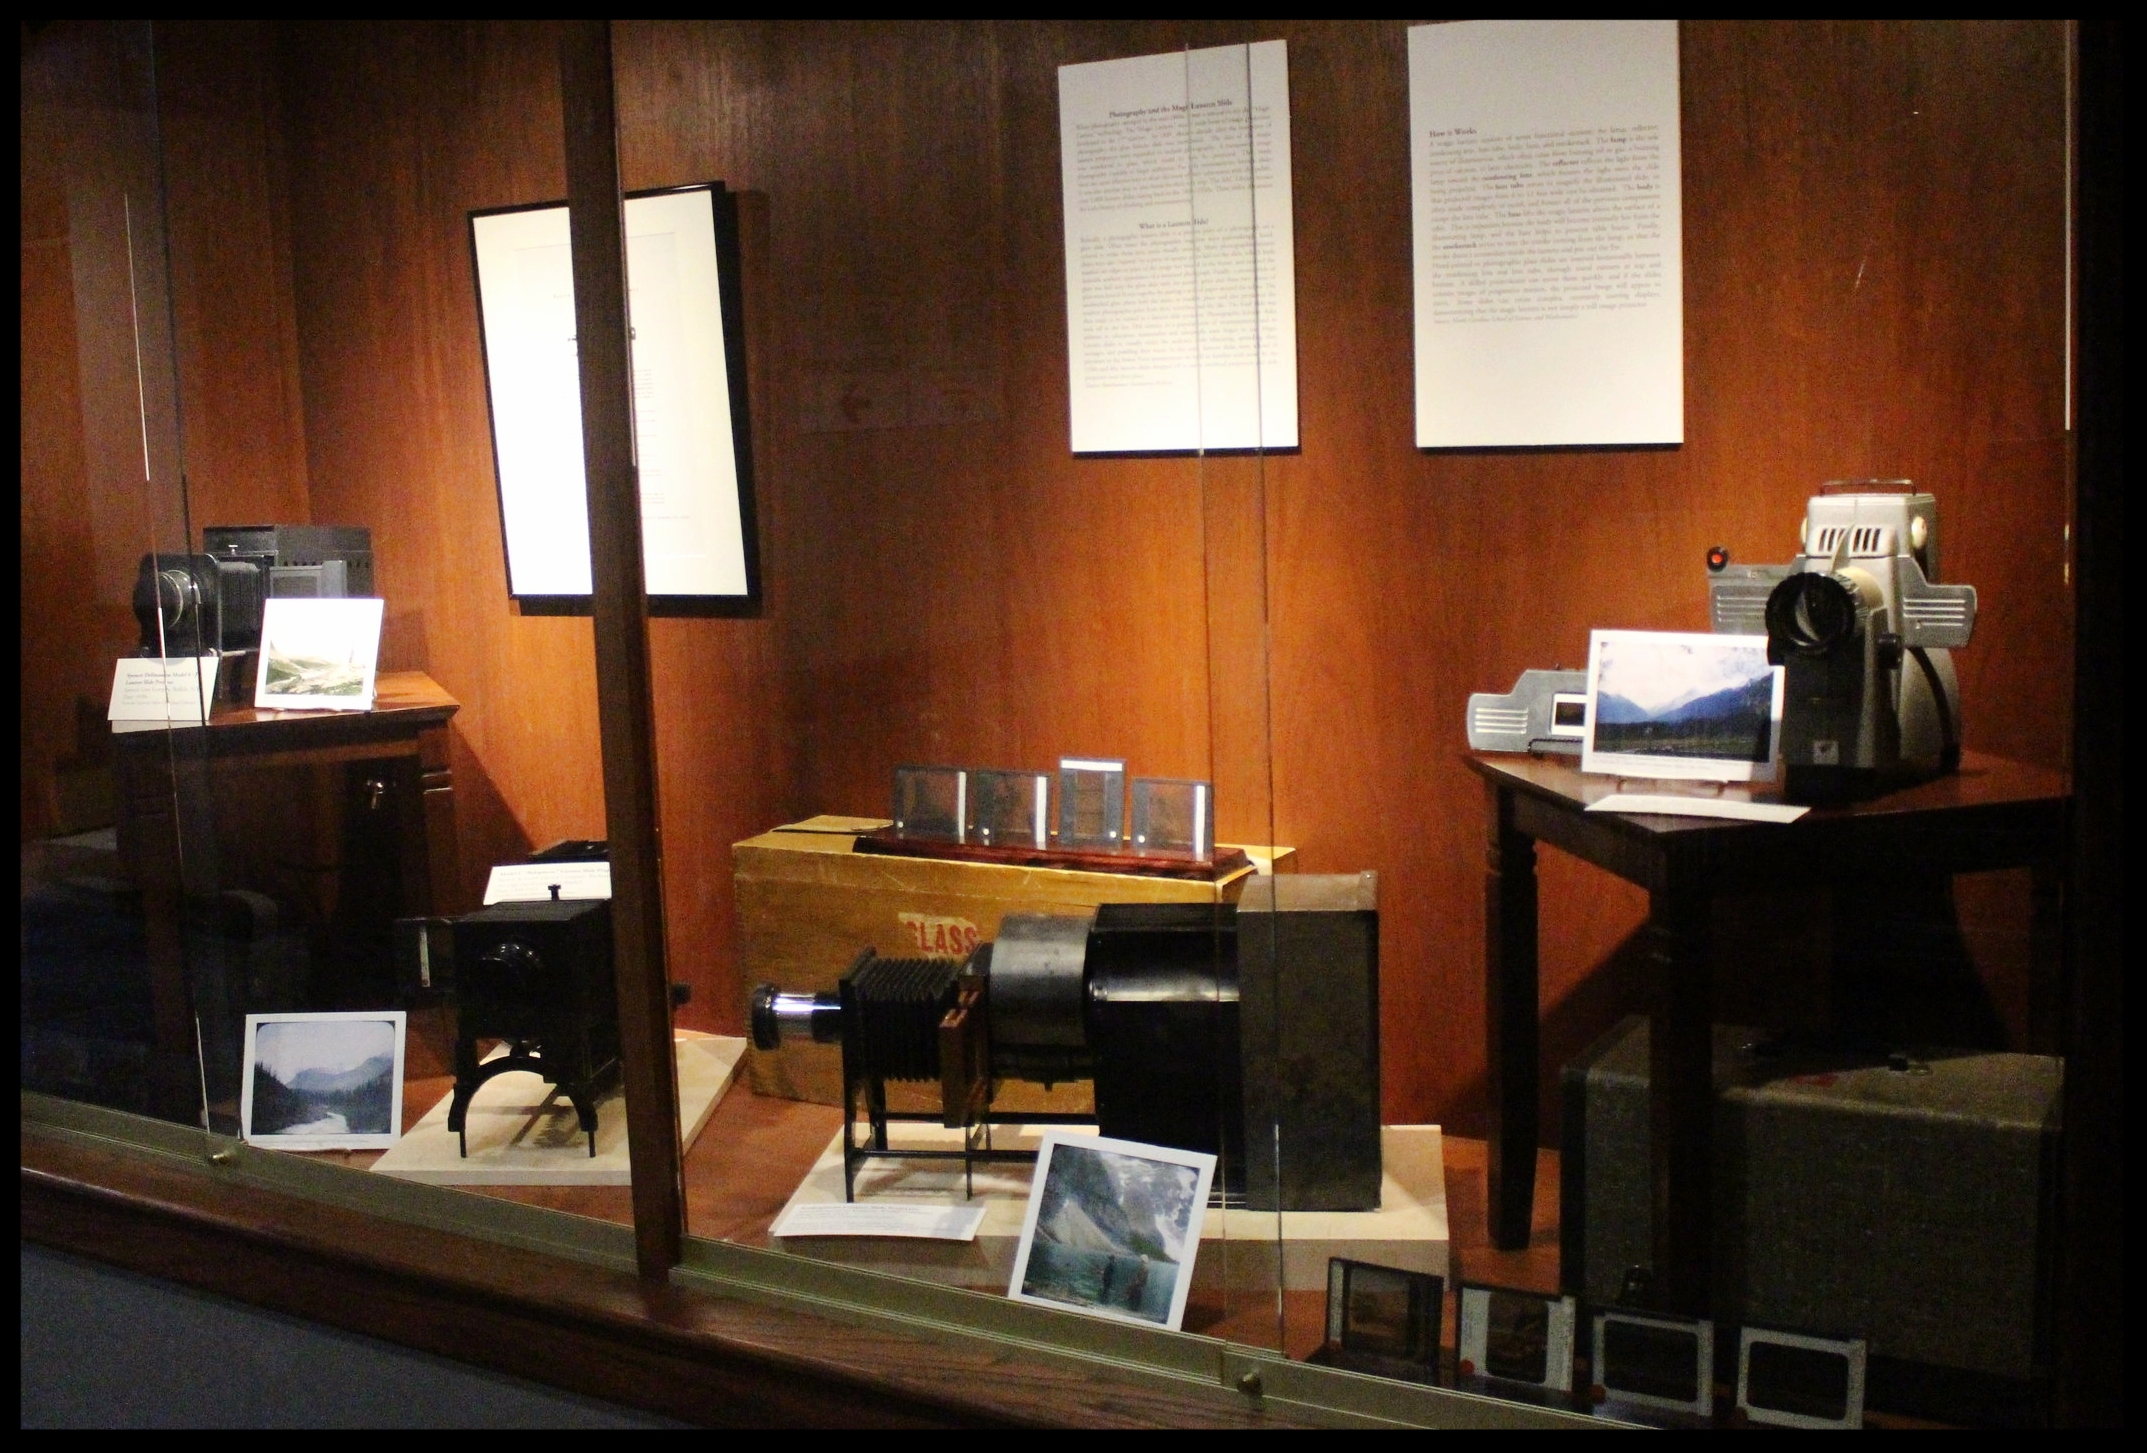
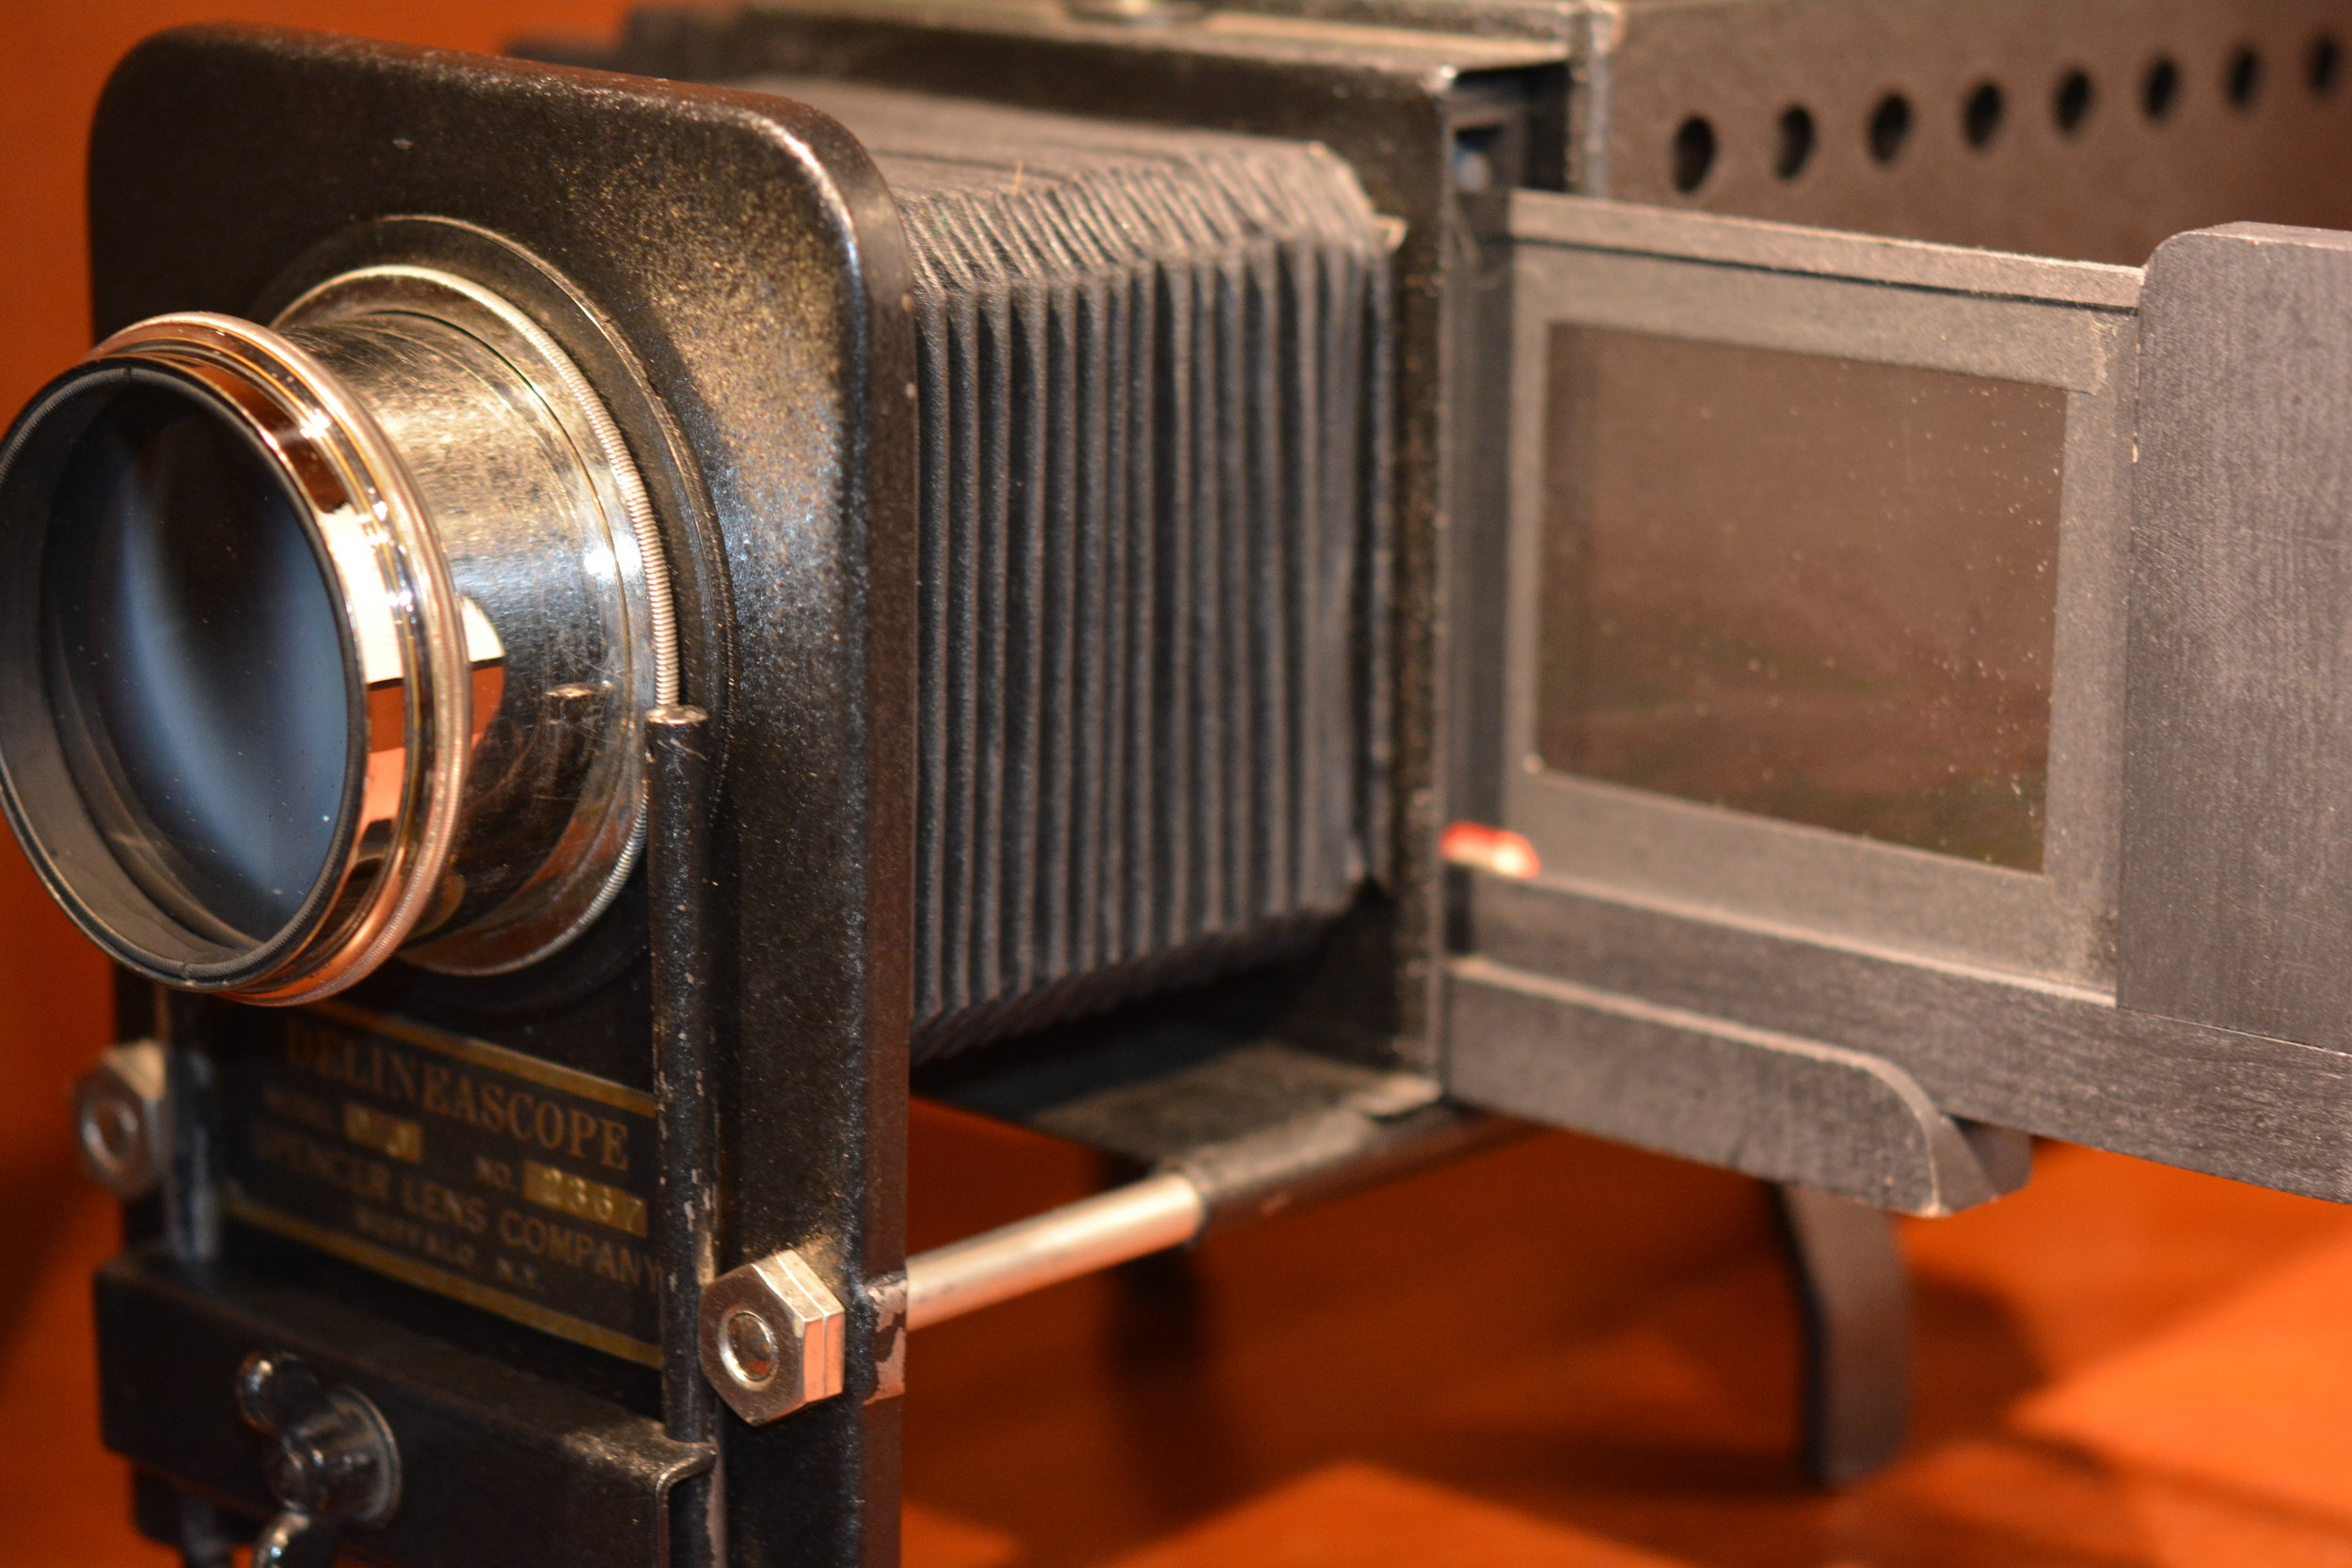
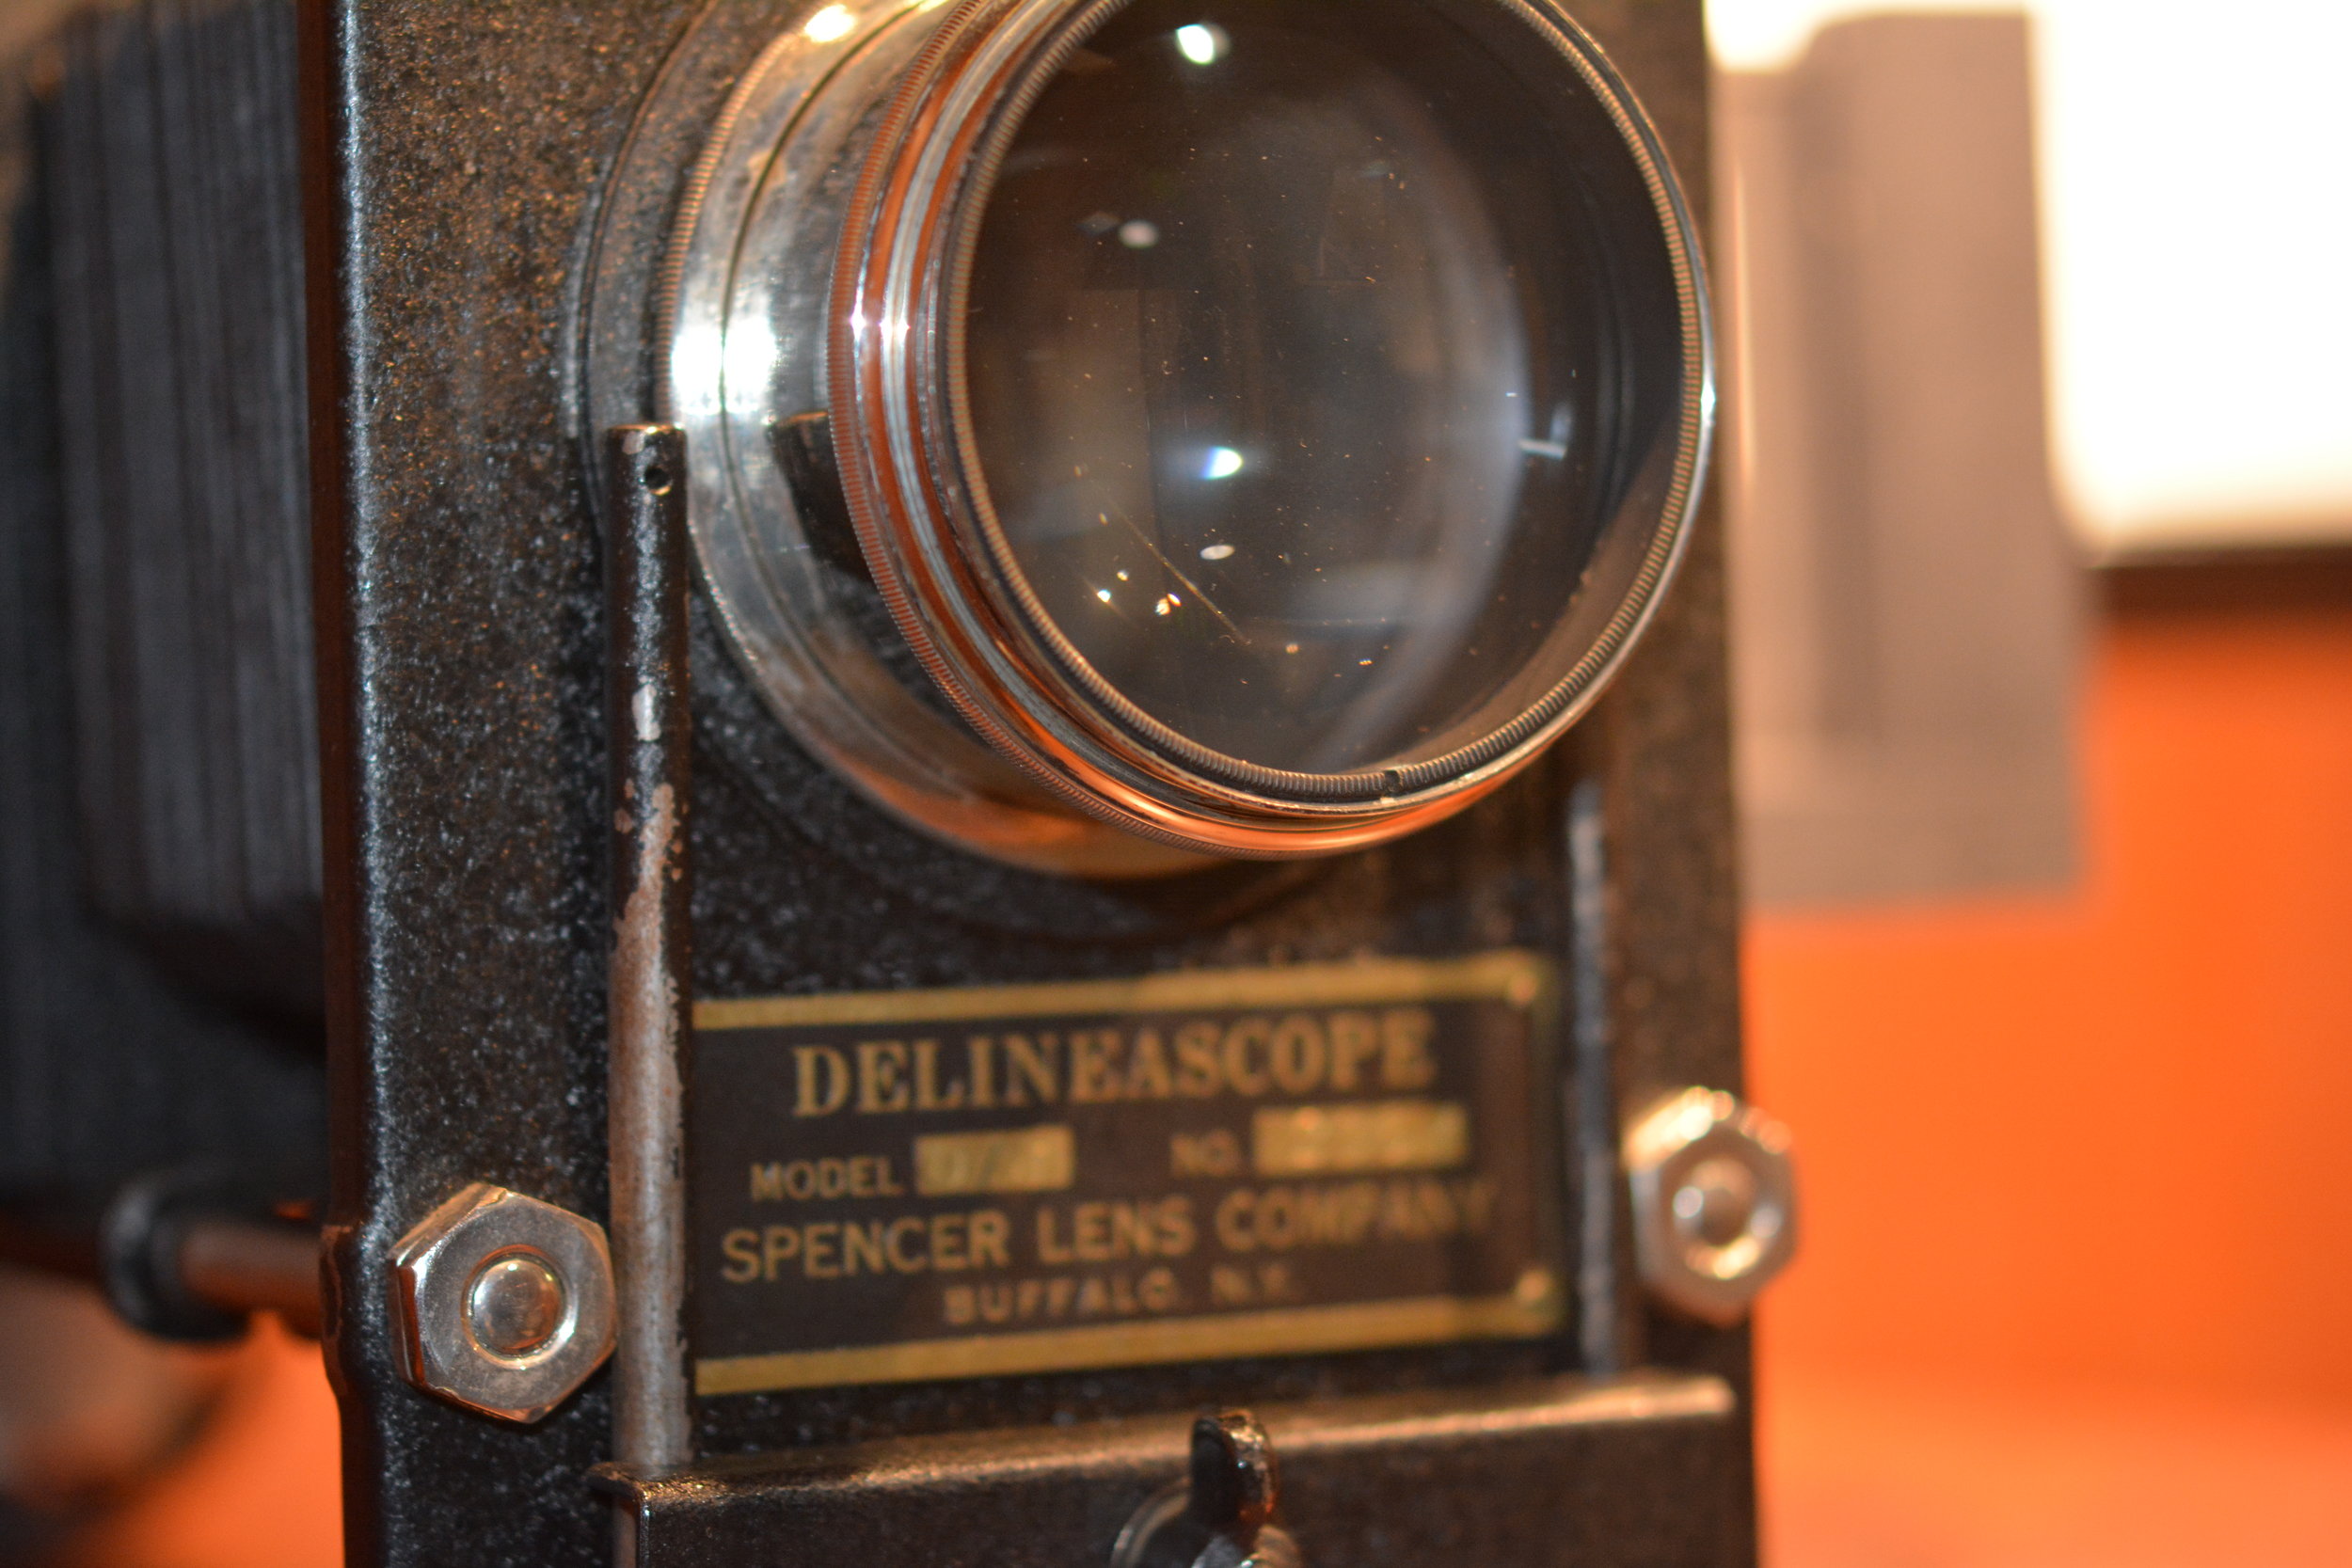
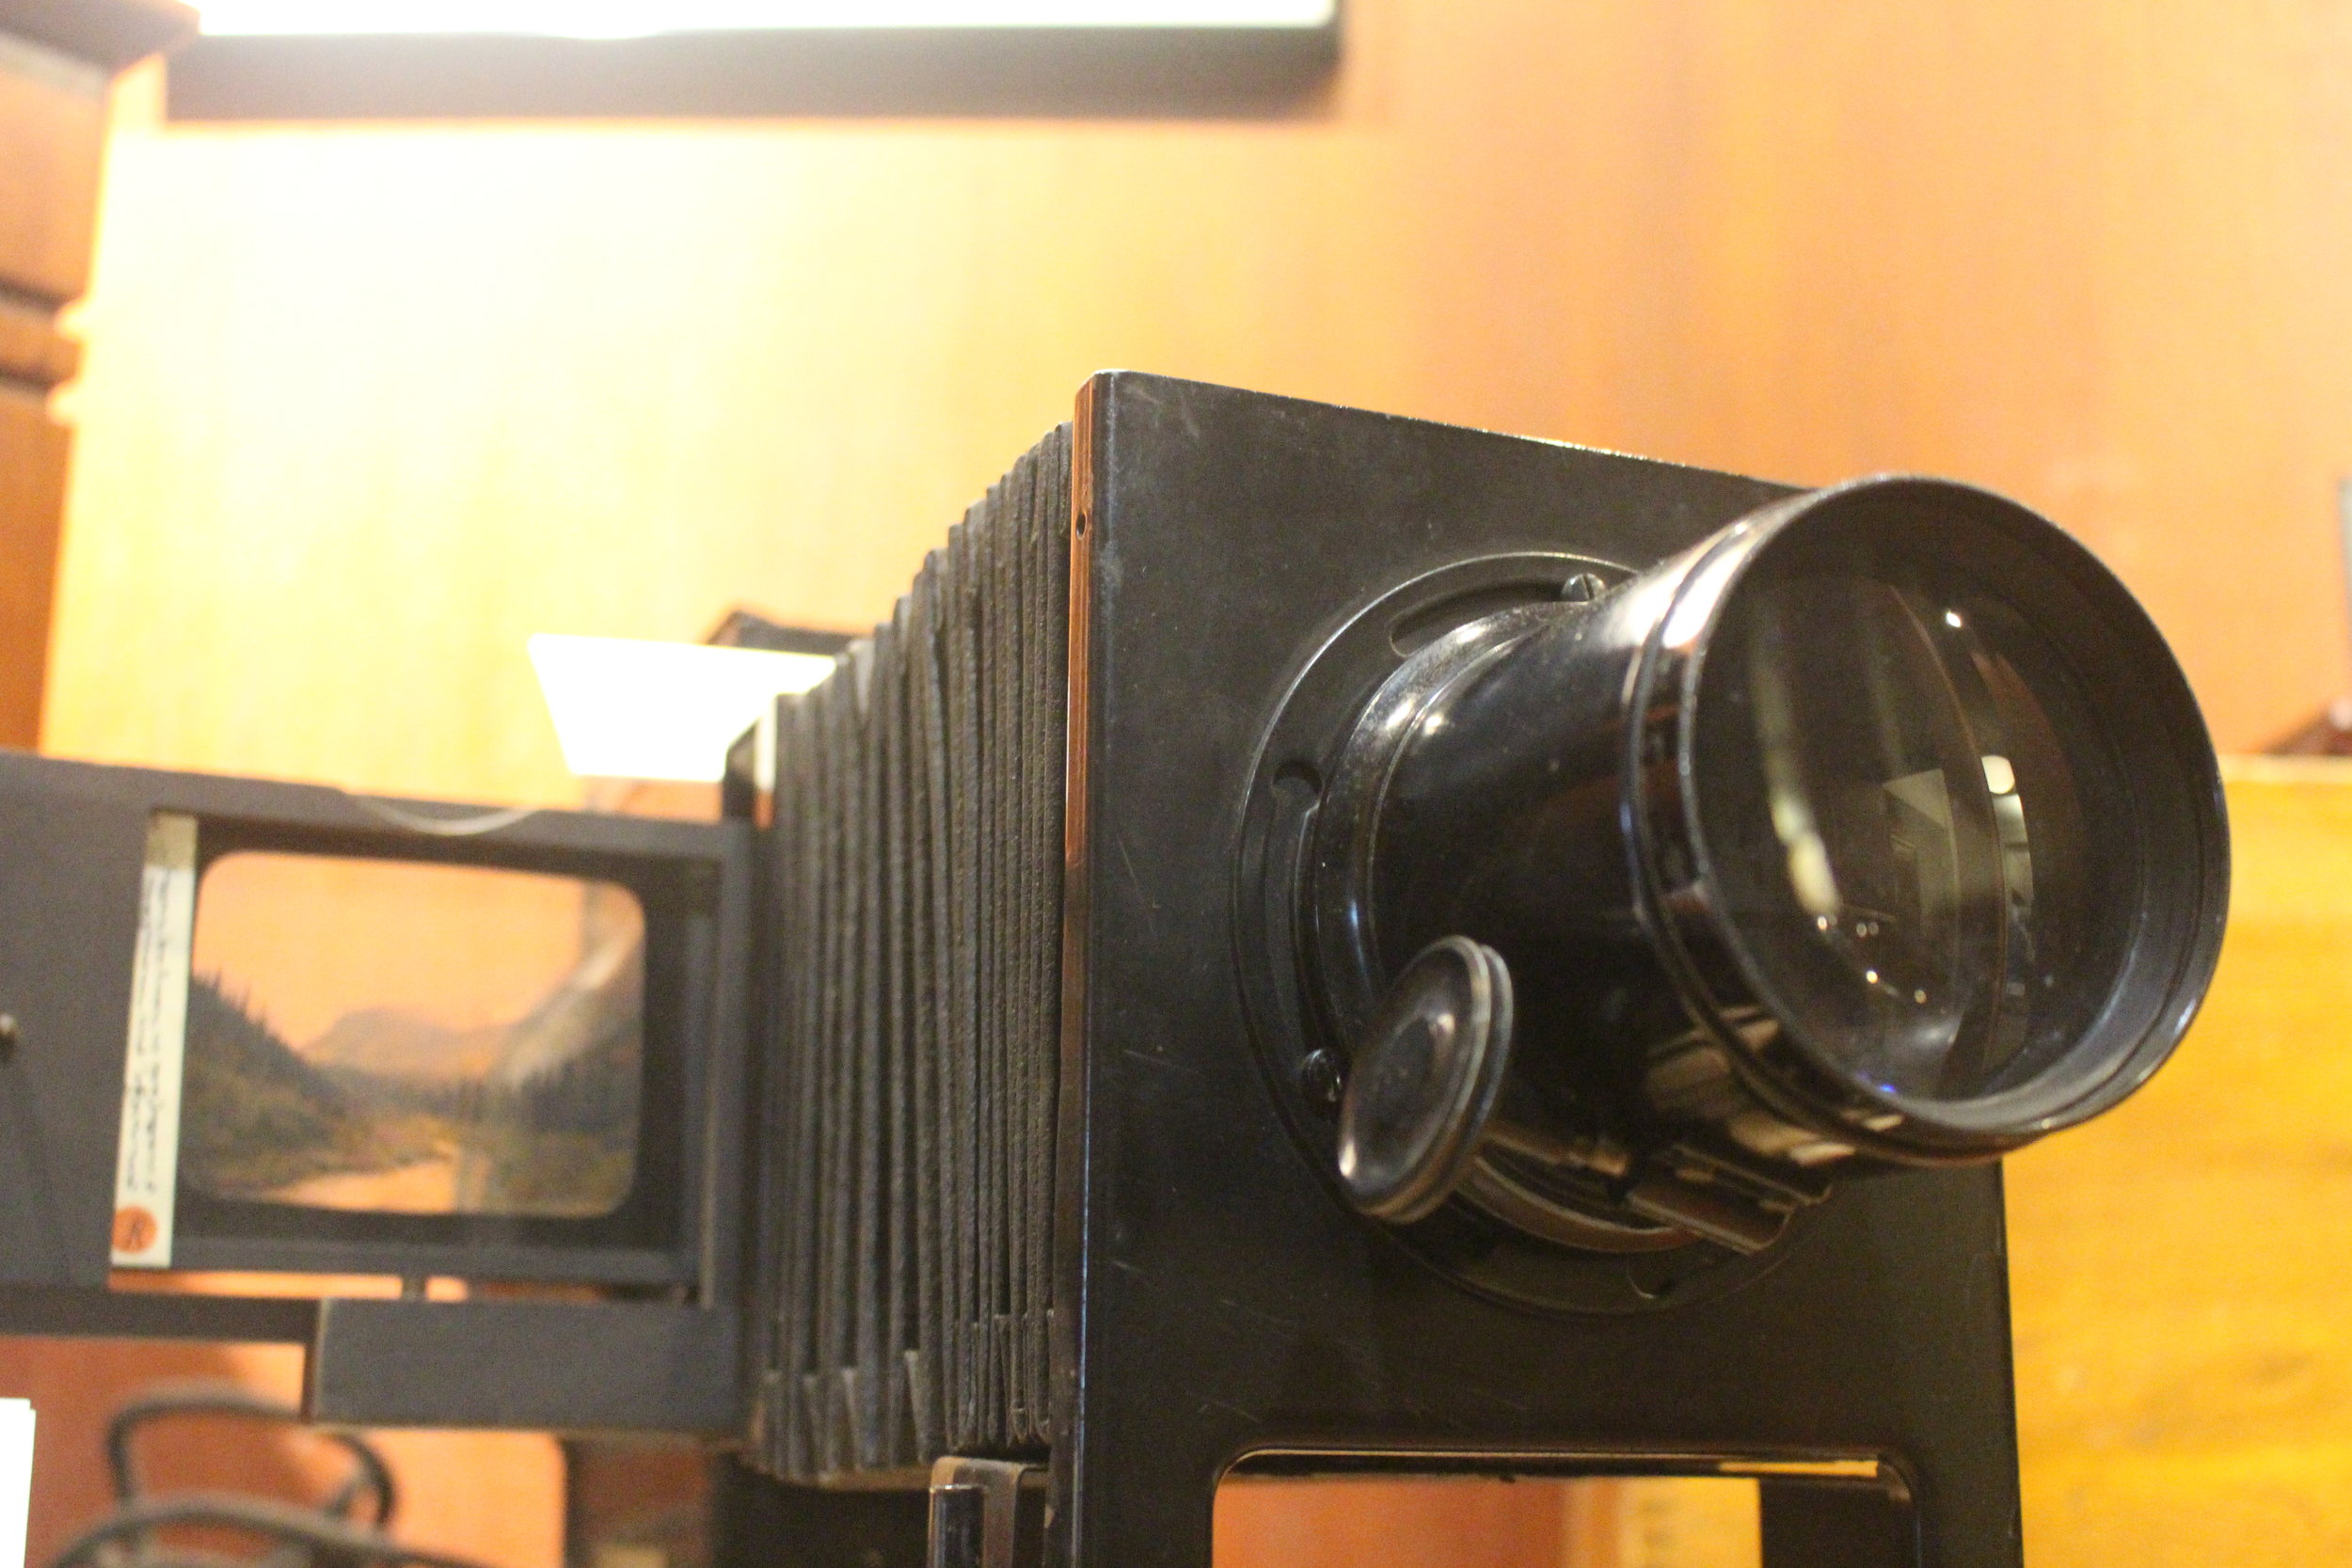
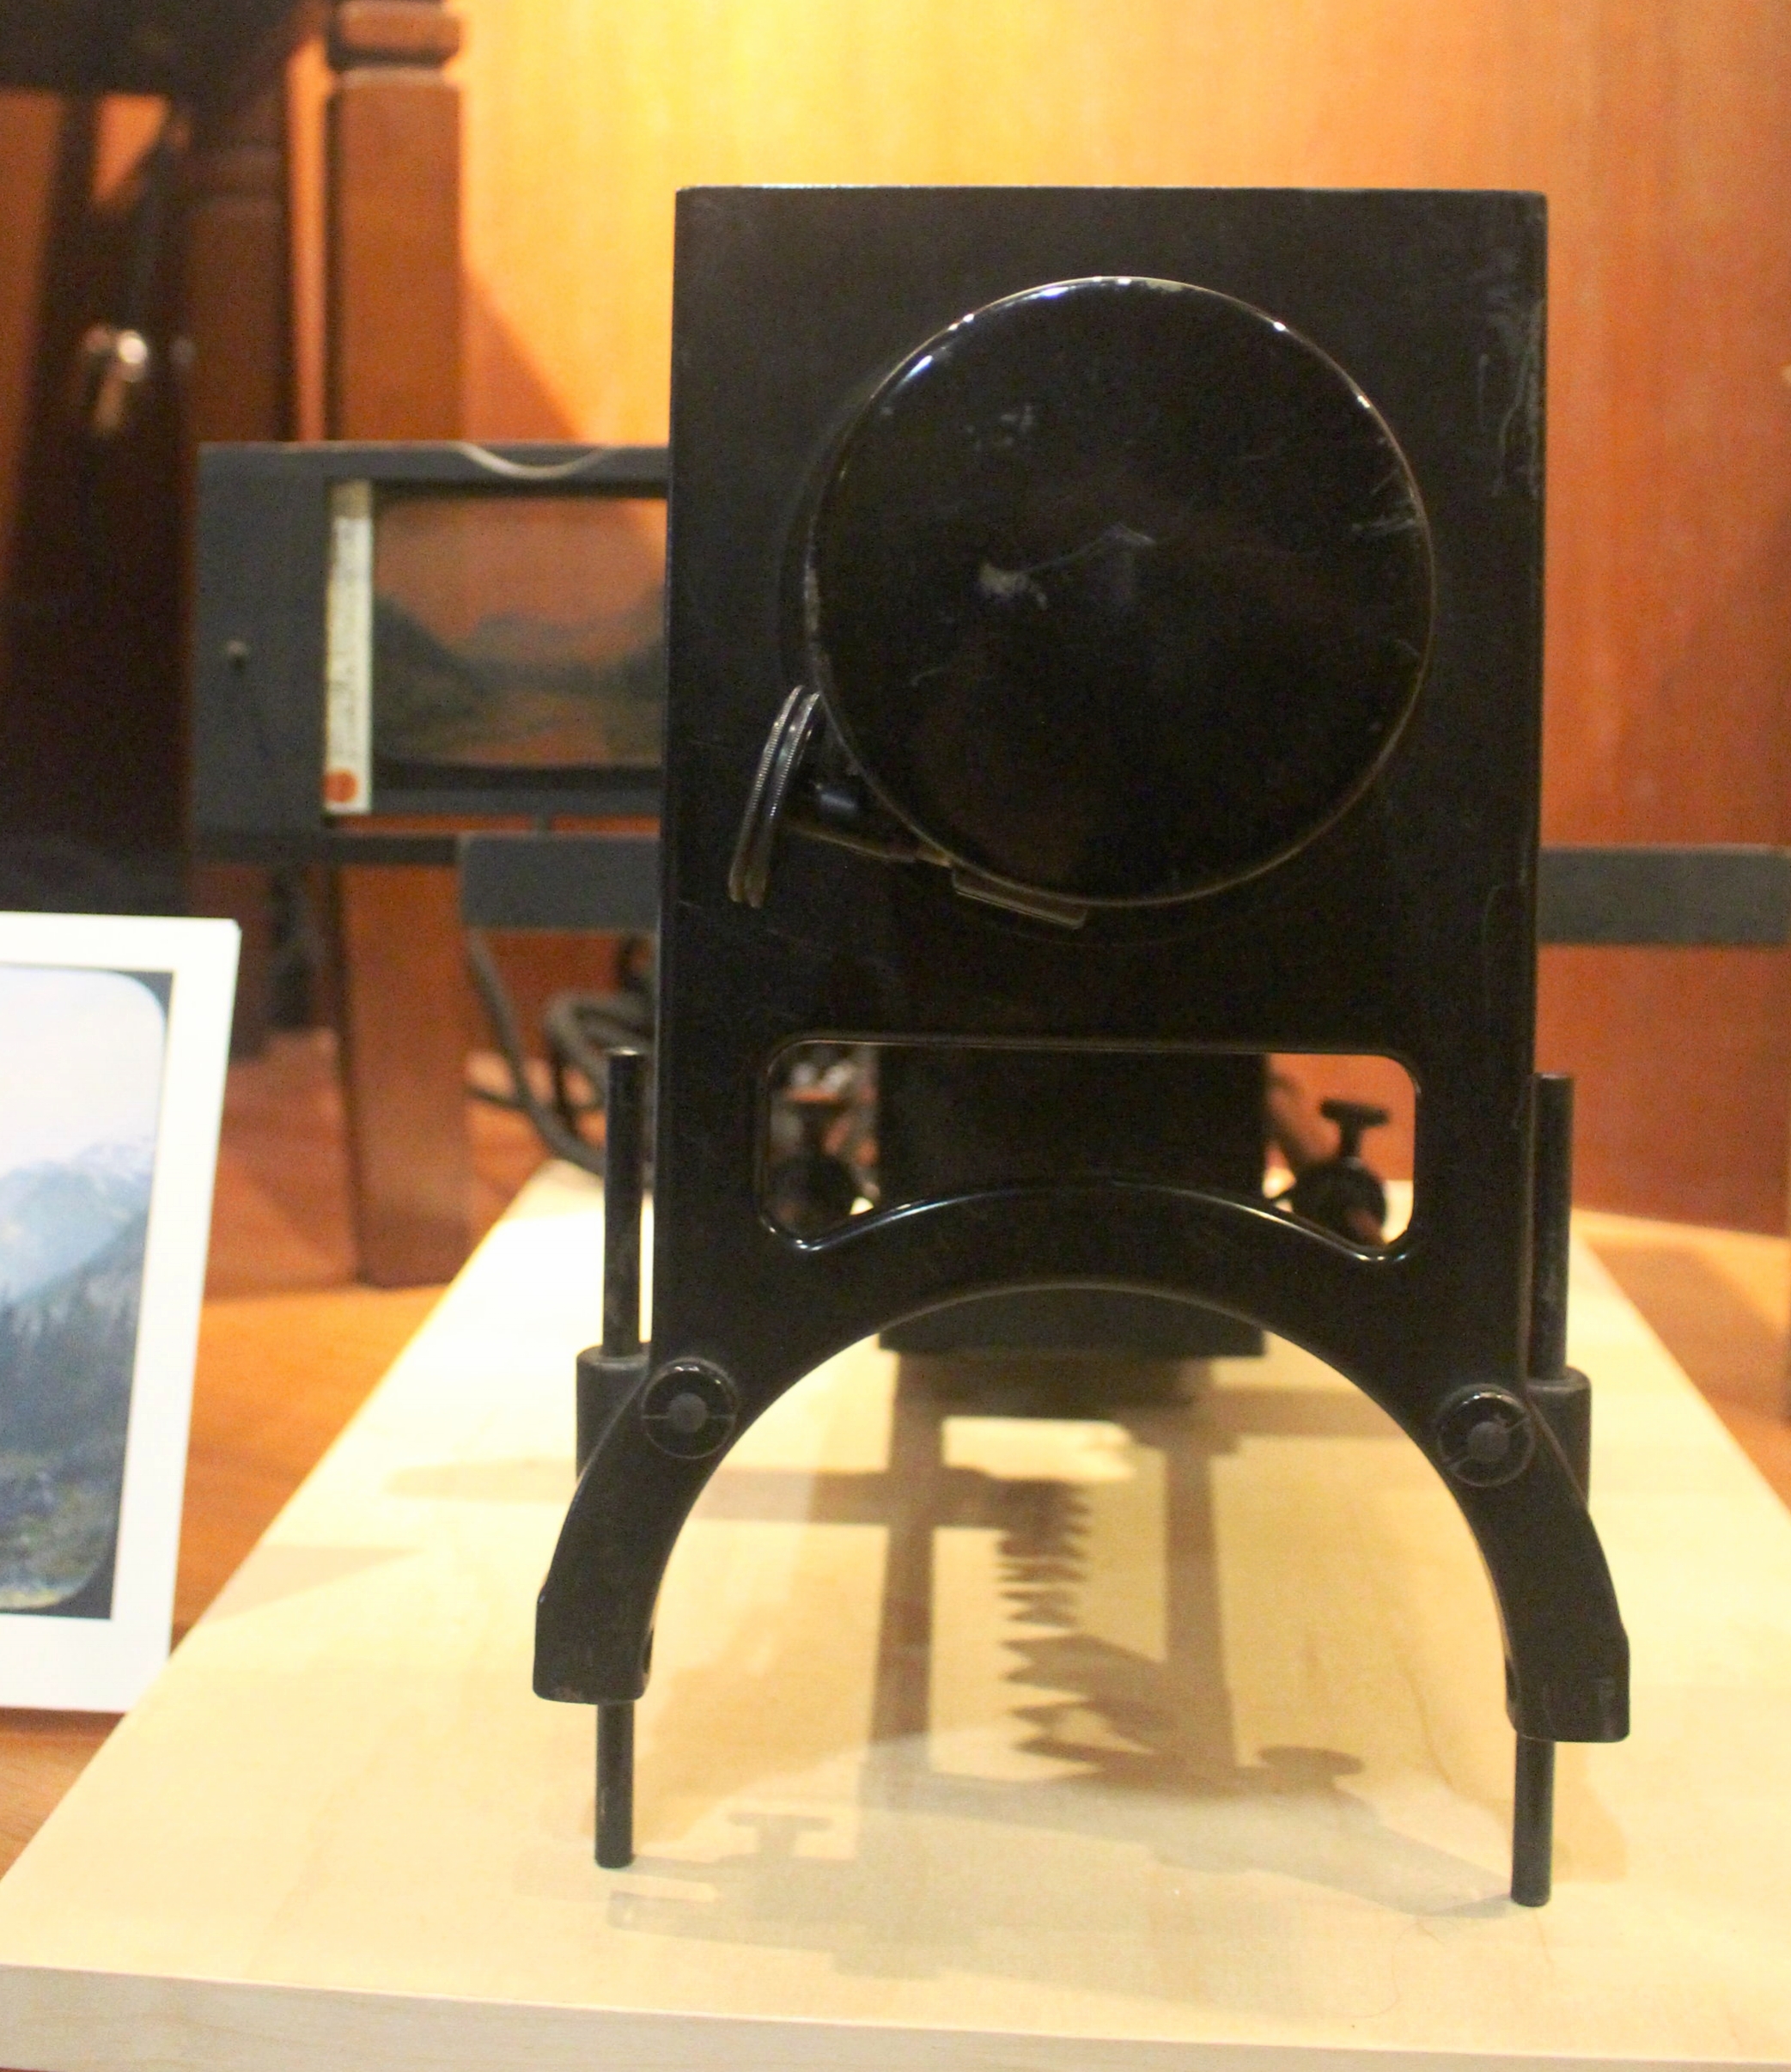
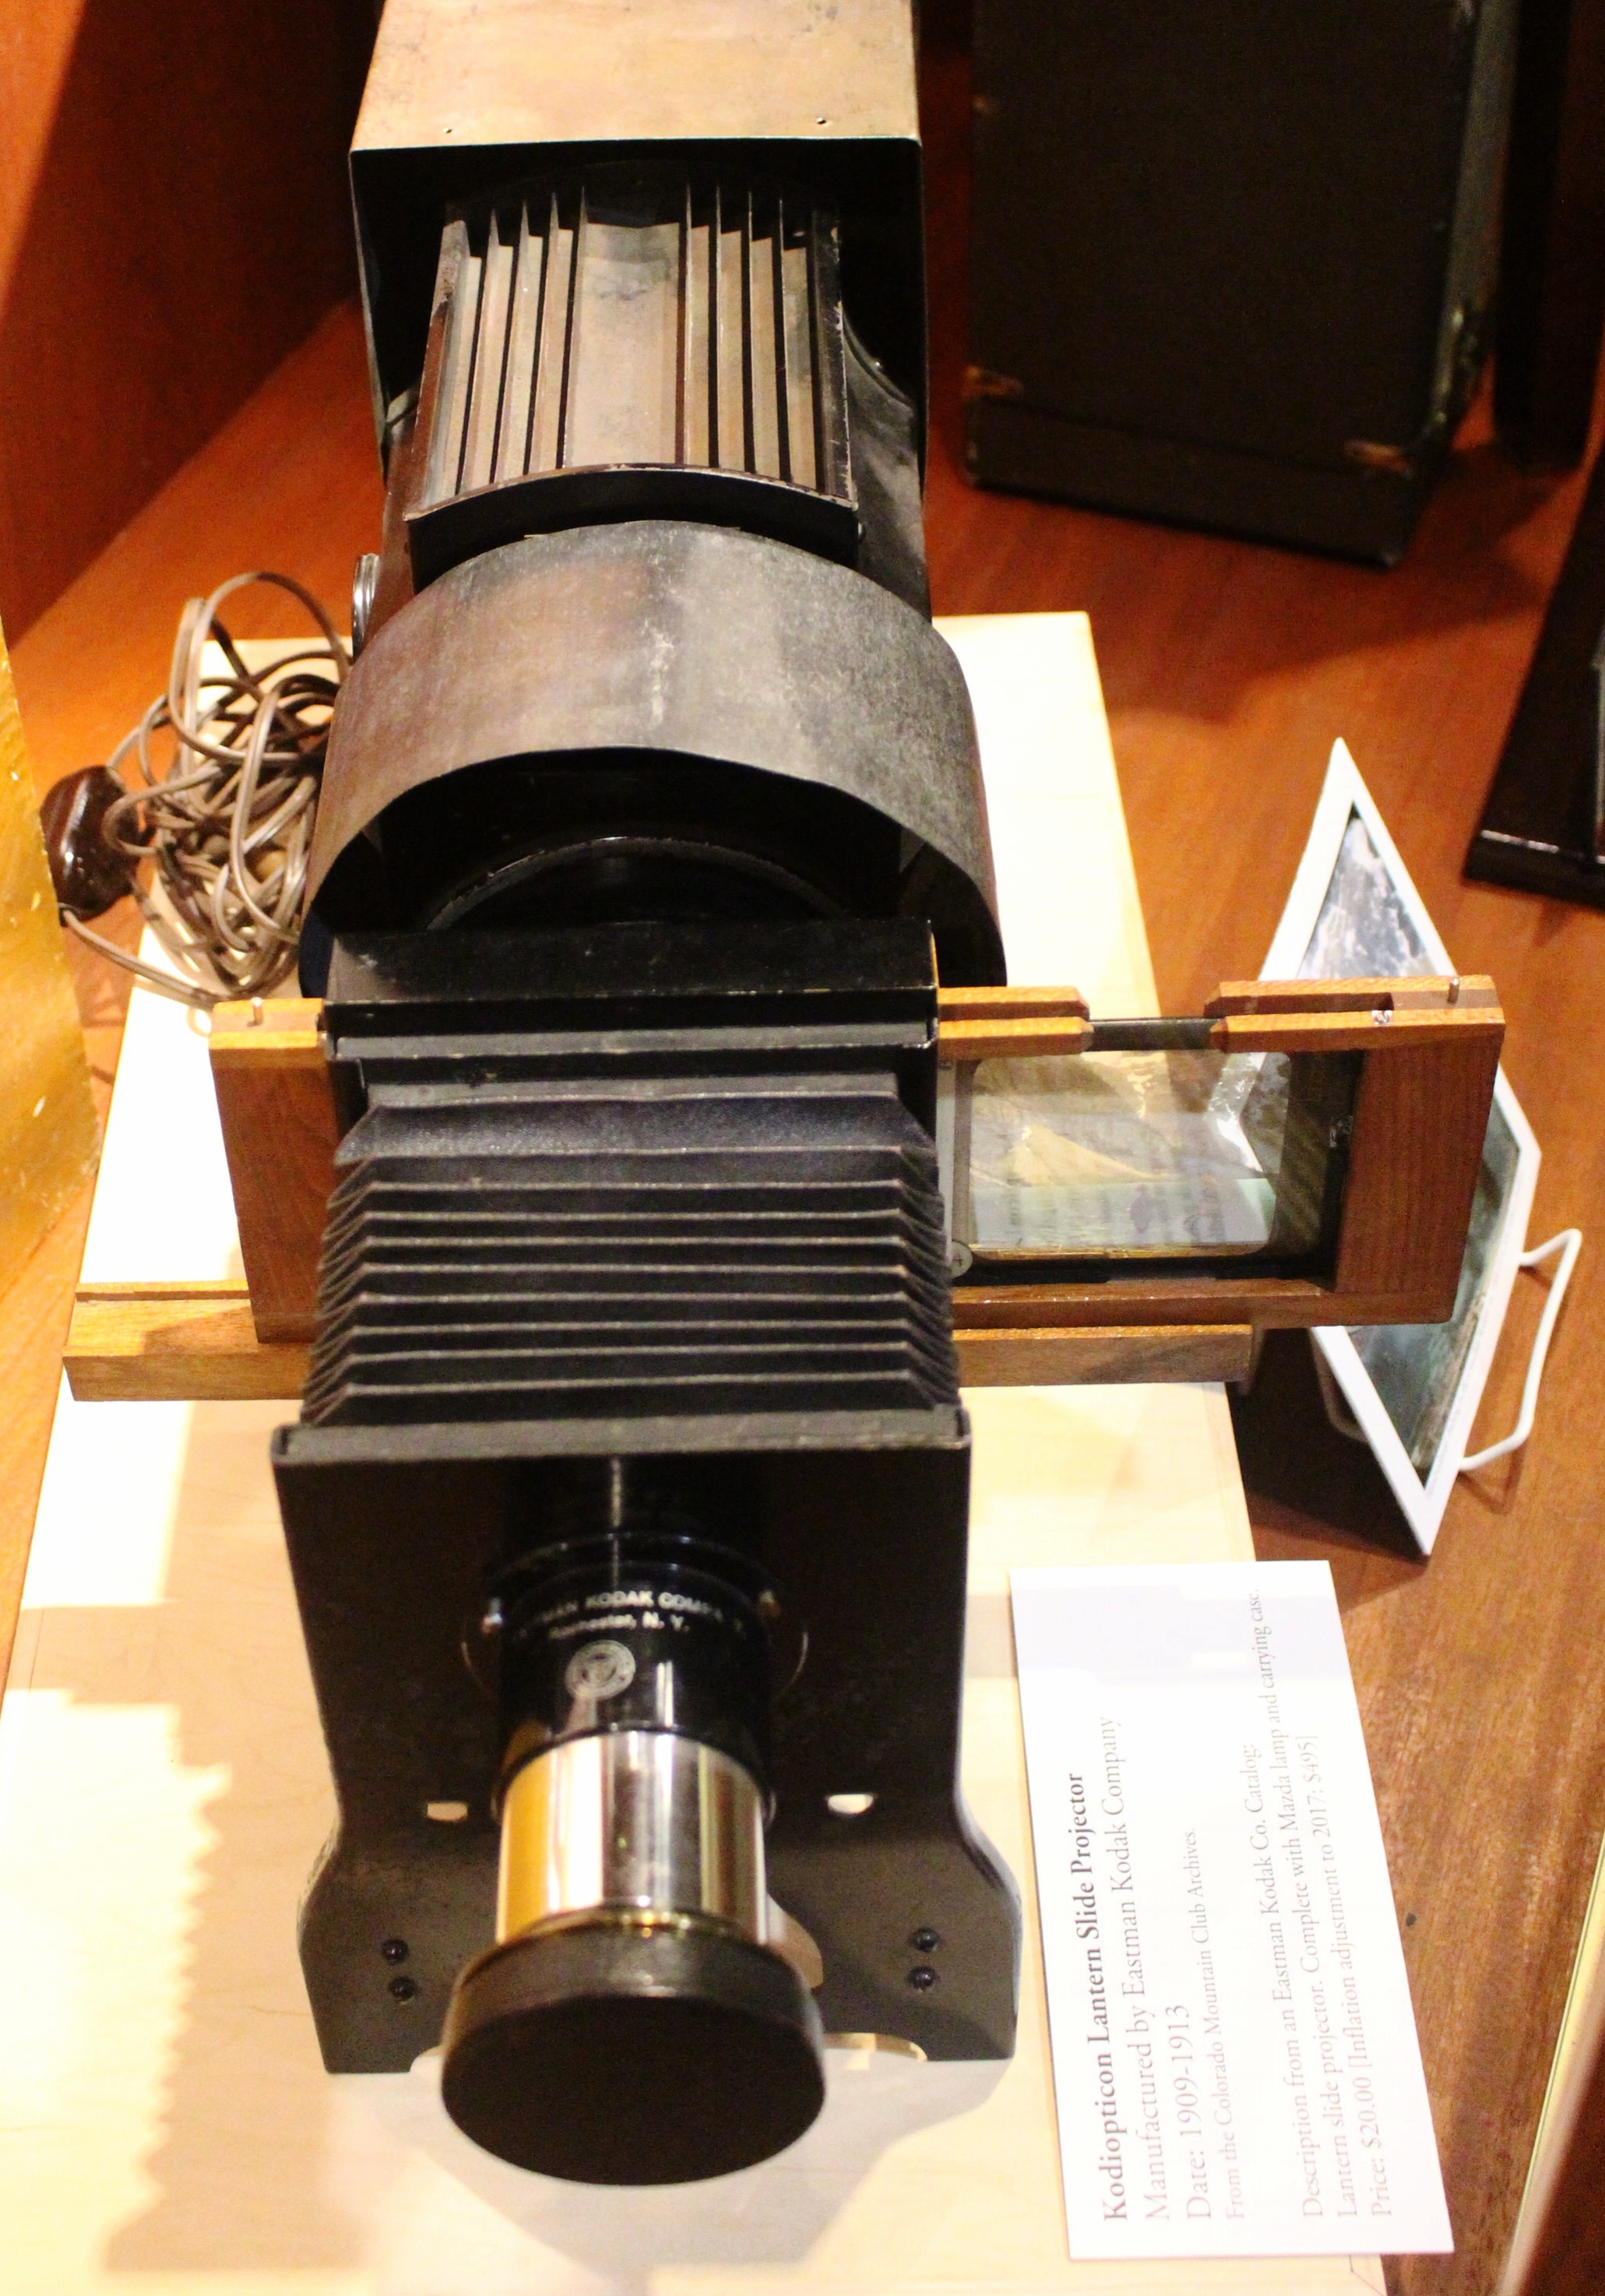
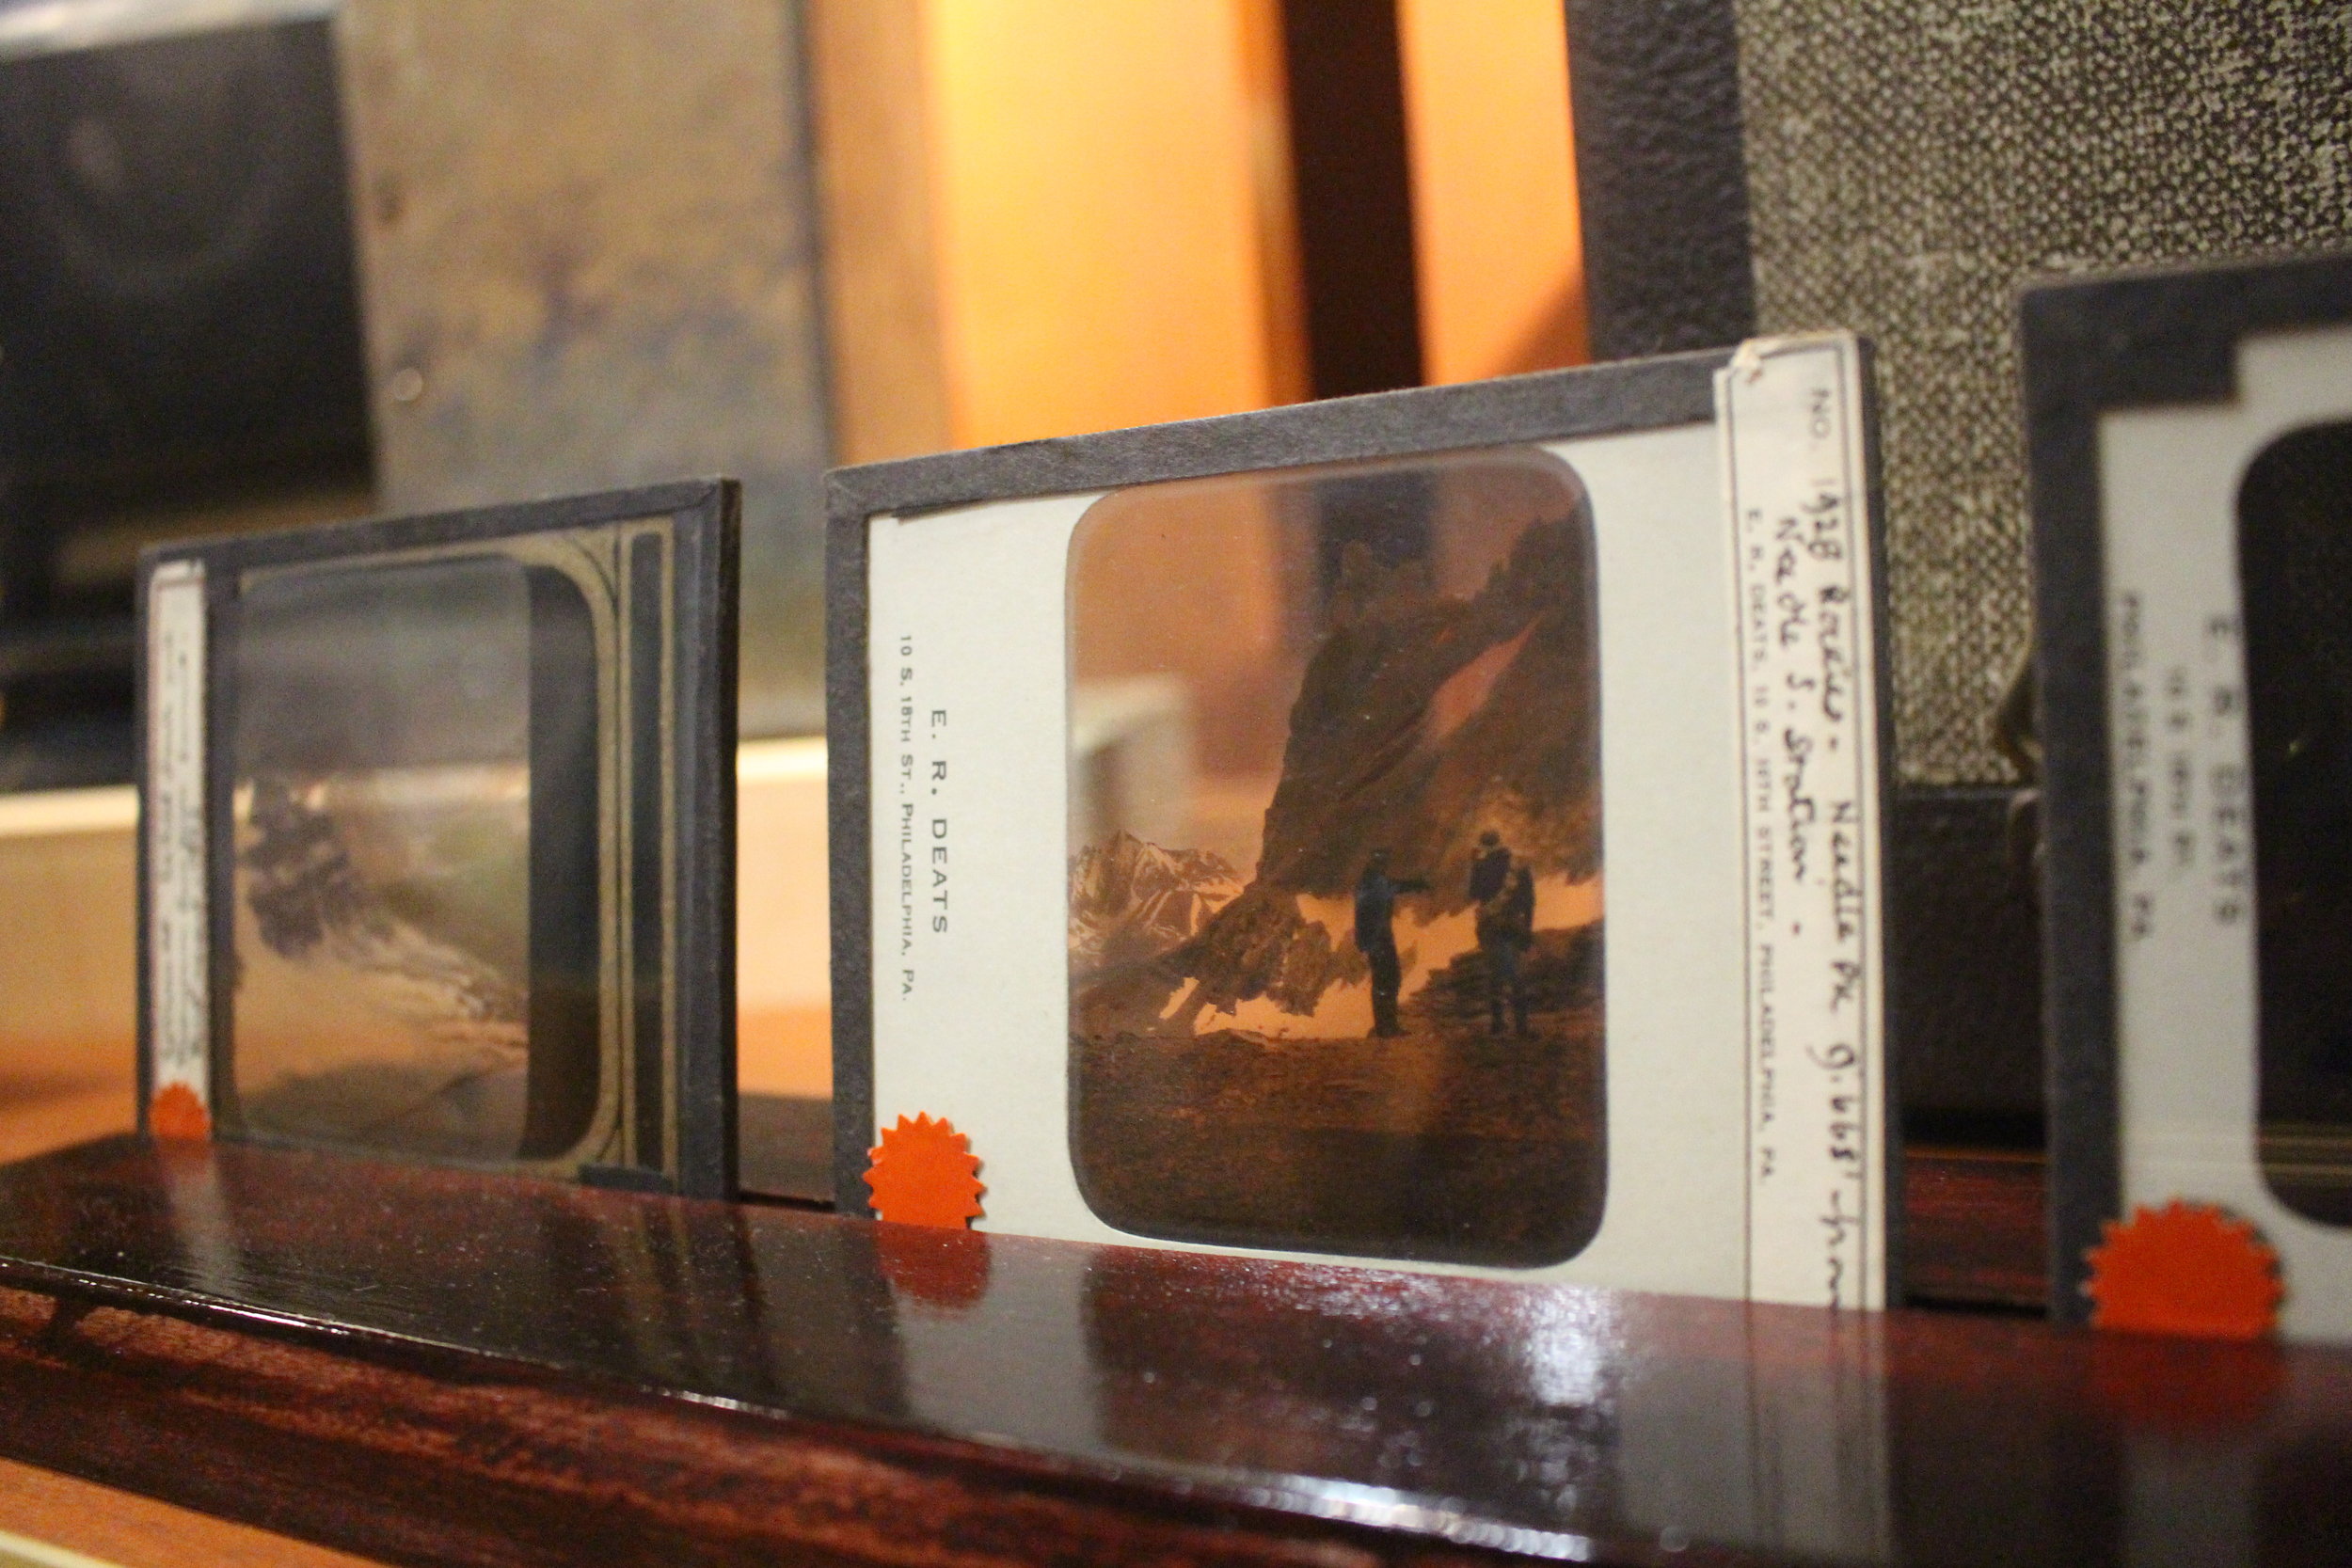
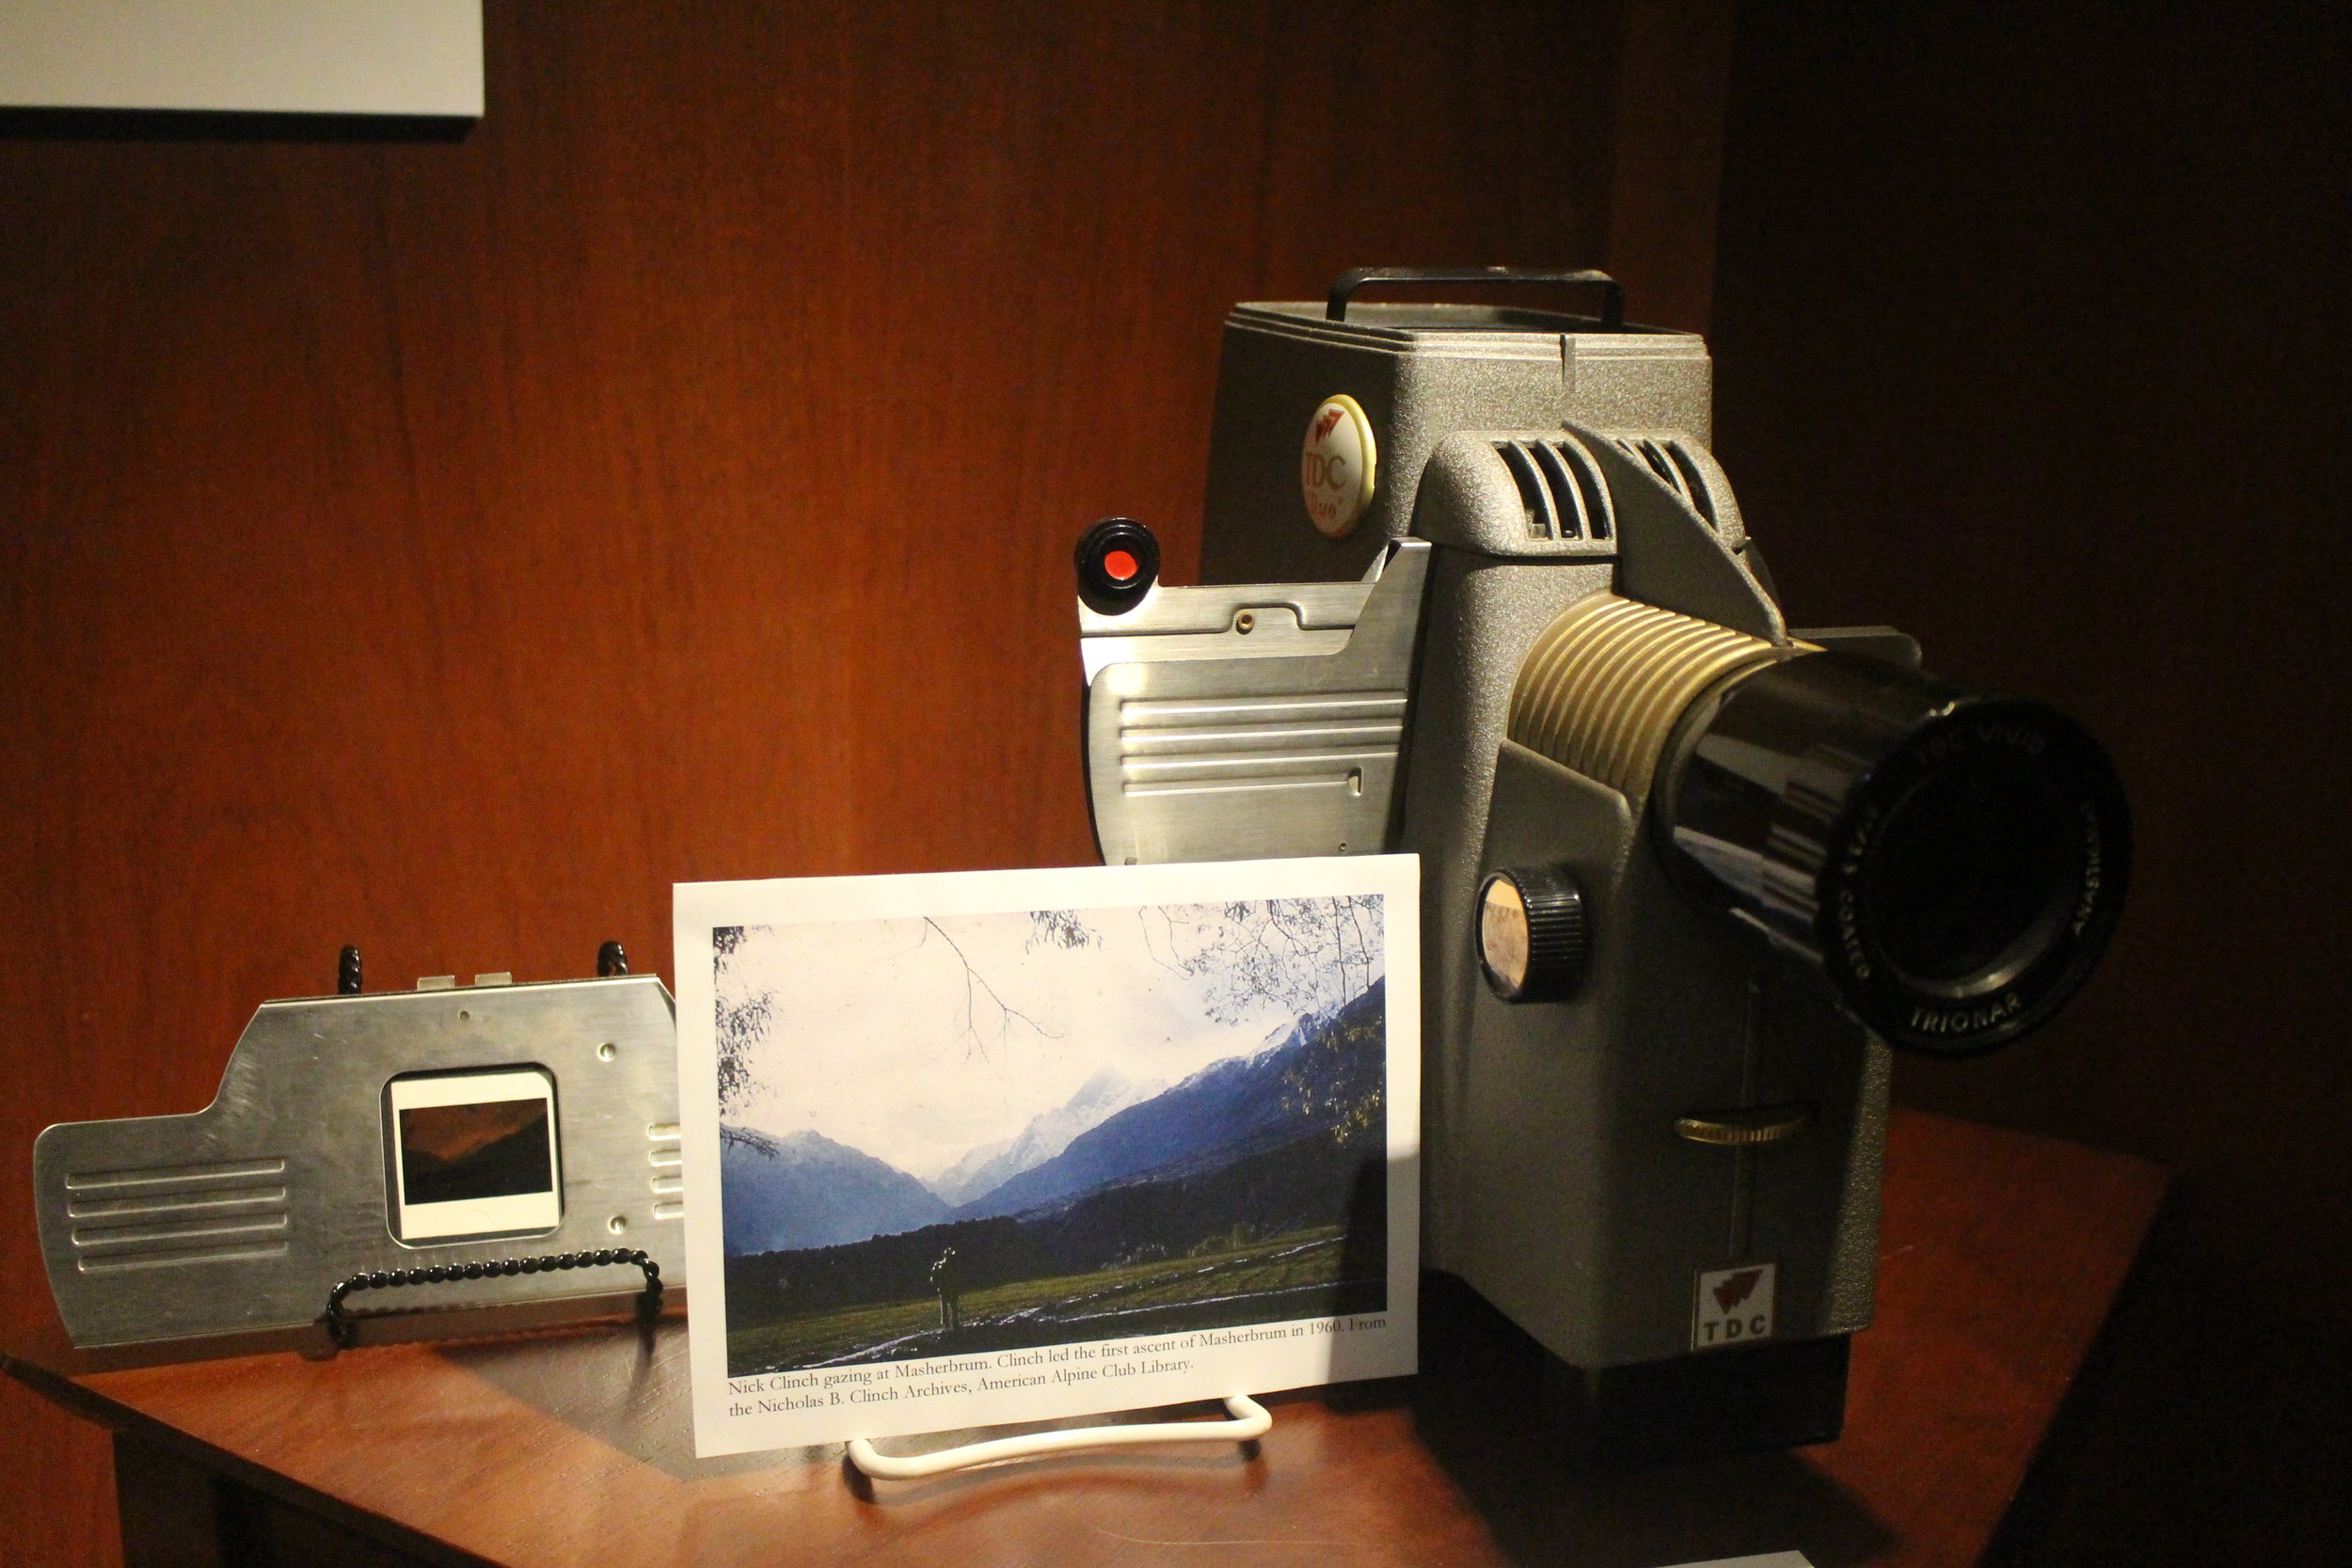
Lantern slide projectors are the apparatus used to display the images. We have three in the AAC Library. They are currently on exhibit (until February 2018) in the American Mountaineering Center.

On display at the American Mountaineering Center in Golden, Colorado (until Feb. 2018).

These projectors date from approximately 1900 to 1930s. A 1950s slide projector is also on display with a 35mm glass slide. The many glass lantern slides on display date from 1890-1950. Most are from the American Alpine Club Archives, with a few from the Colorado Mountain Club Archives. You can see mountain scenes, cabins, and instructional slides.

This is one of the projectors in our collection. This page is from a 1911 Bausch & Lomb catalog, which can be viewed in its entirety here on HathiTrust.

Movember Mustache Study

by Eric Rueth

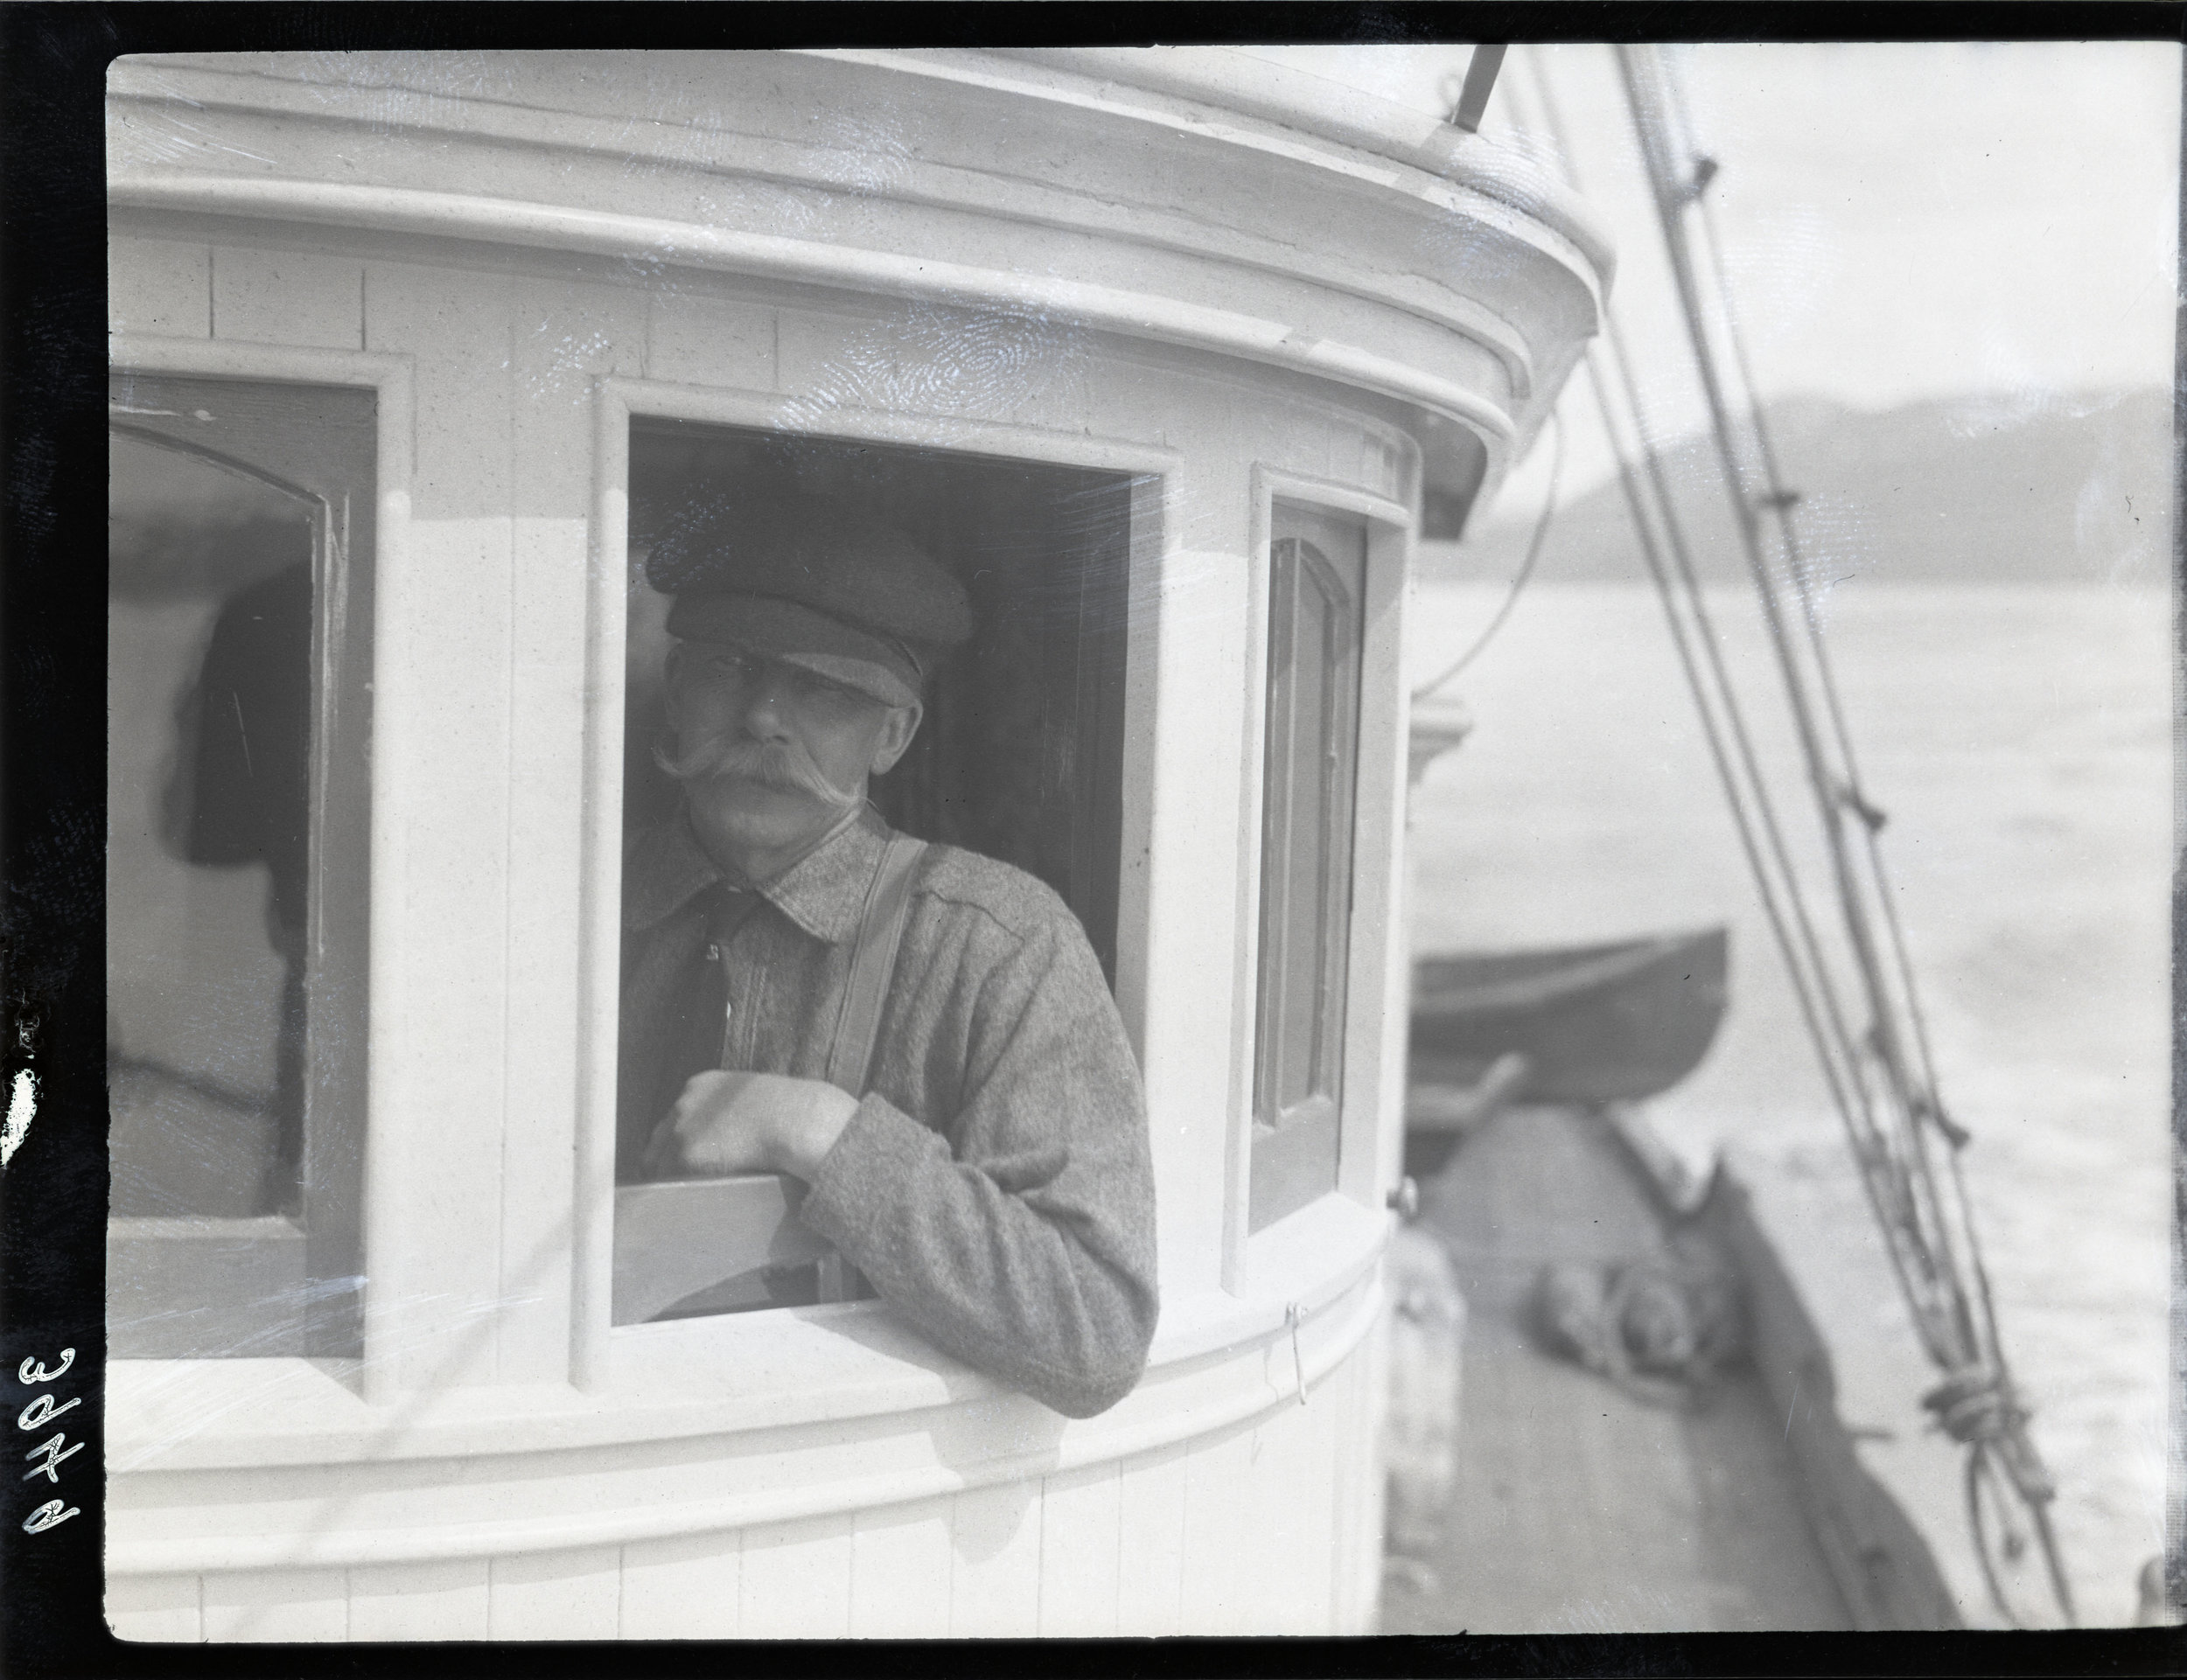
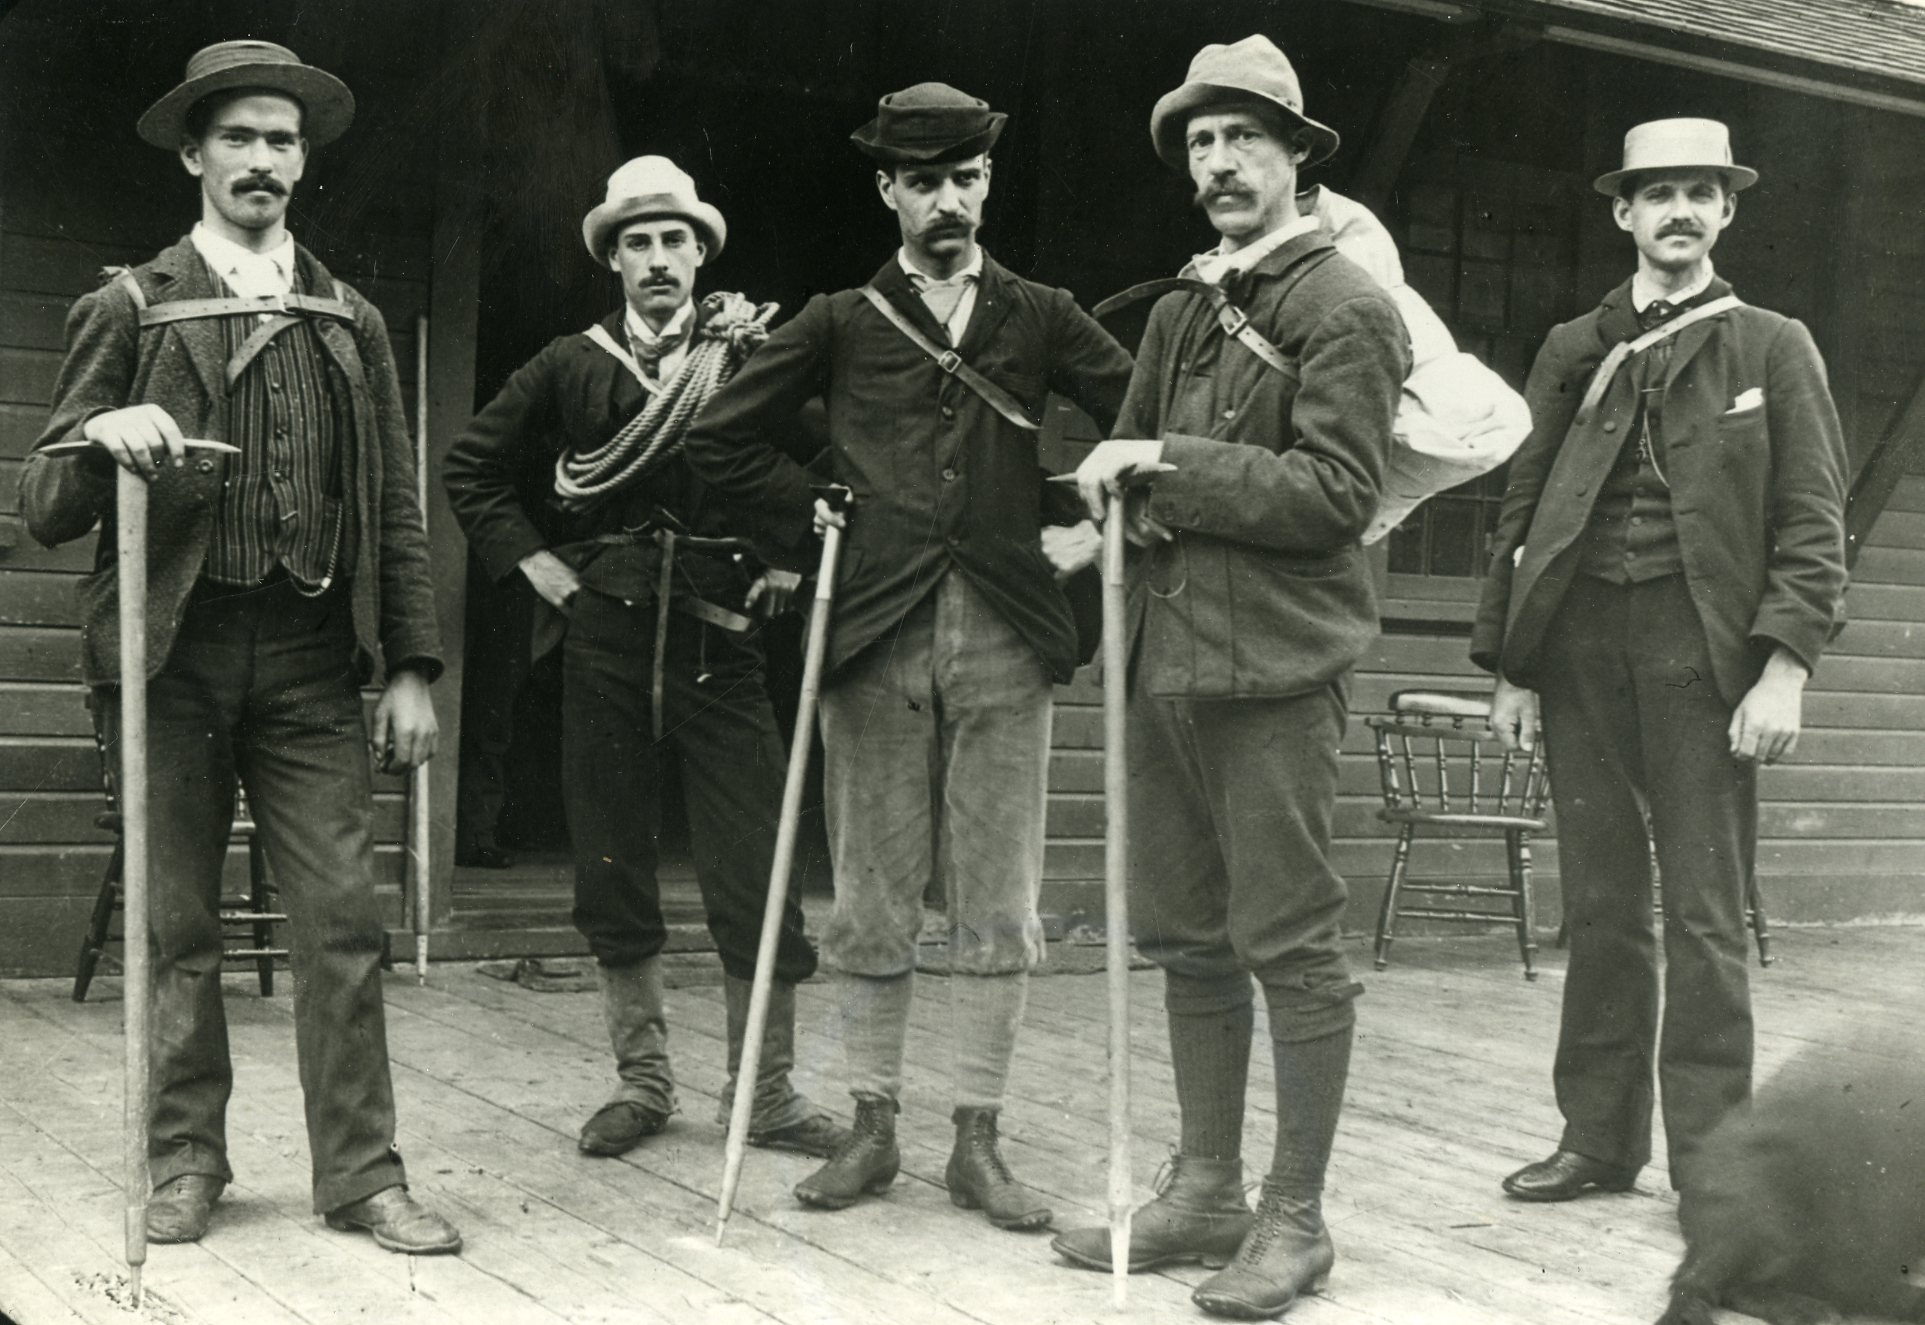
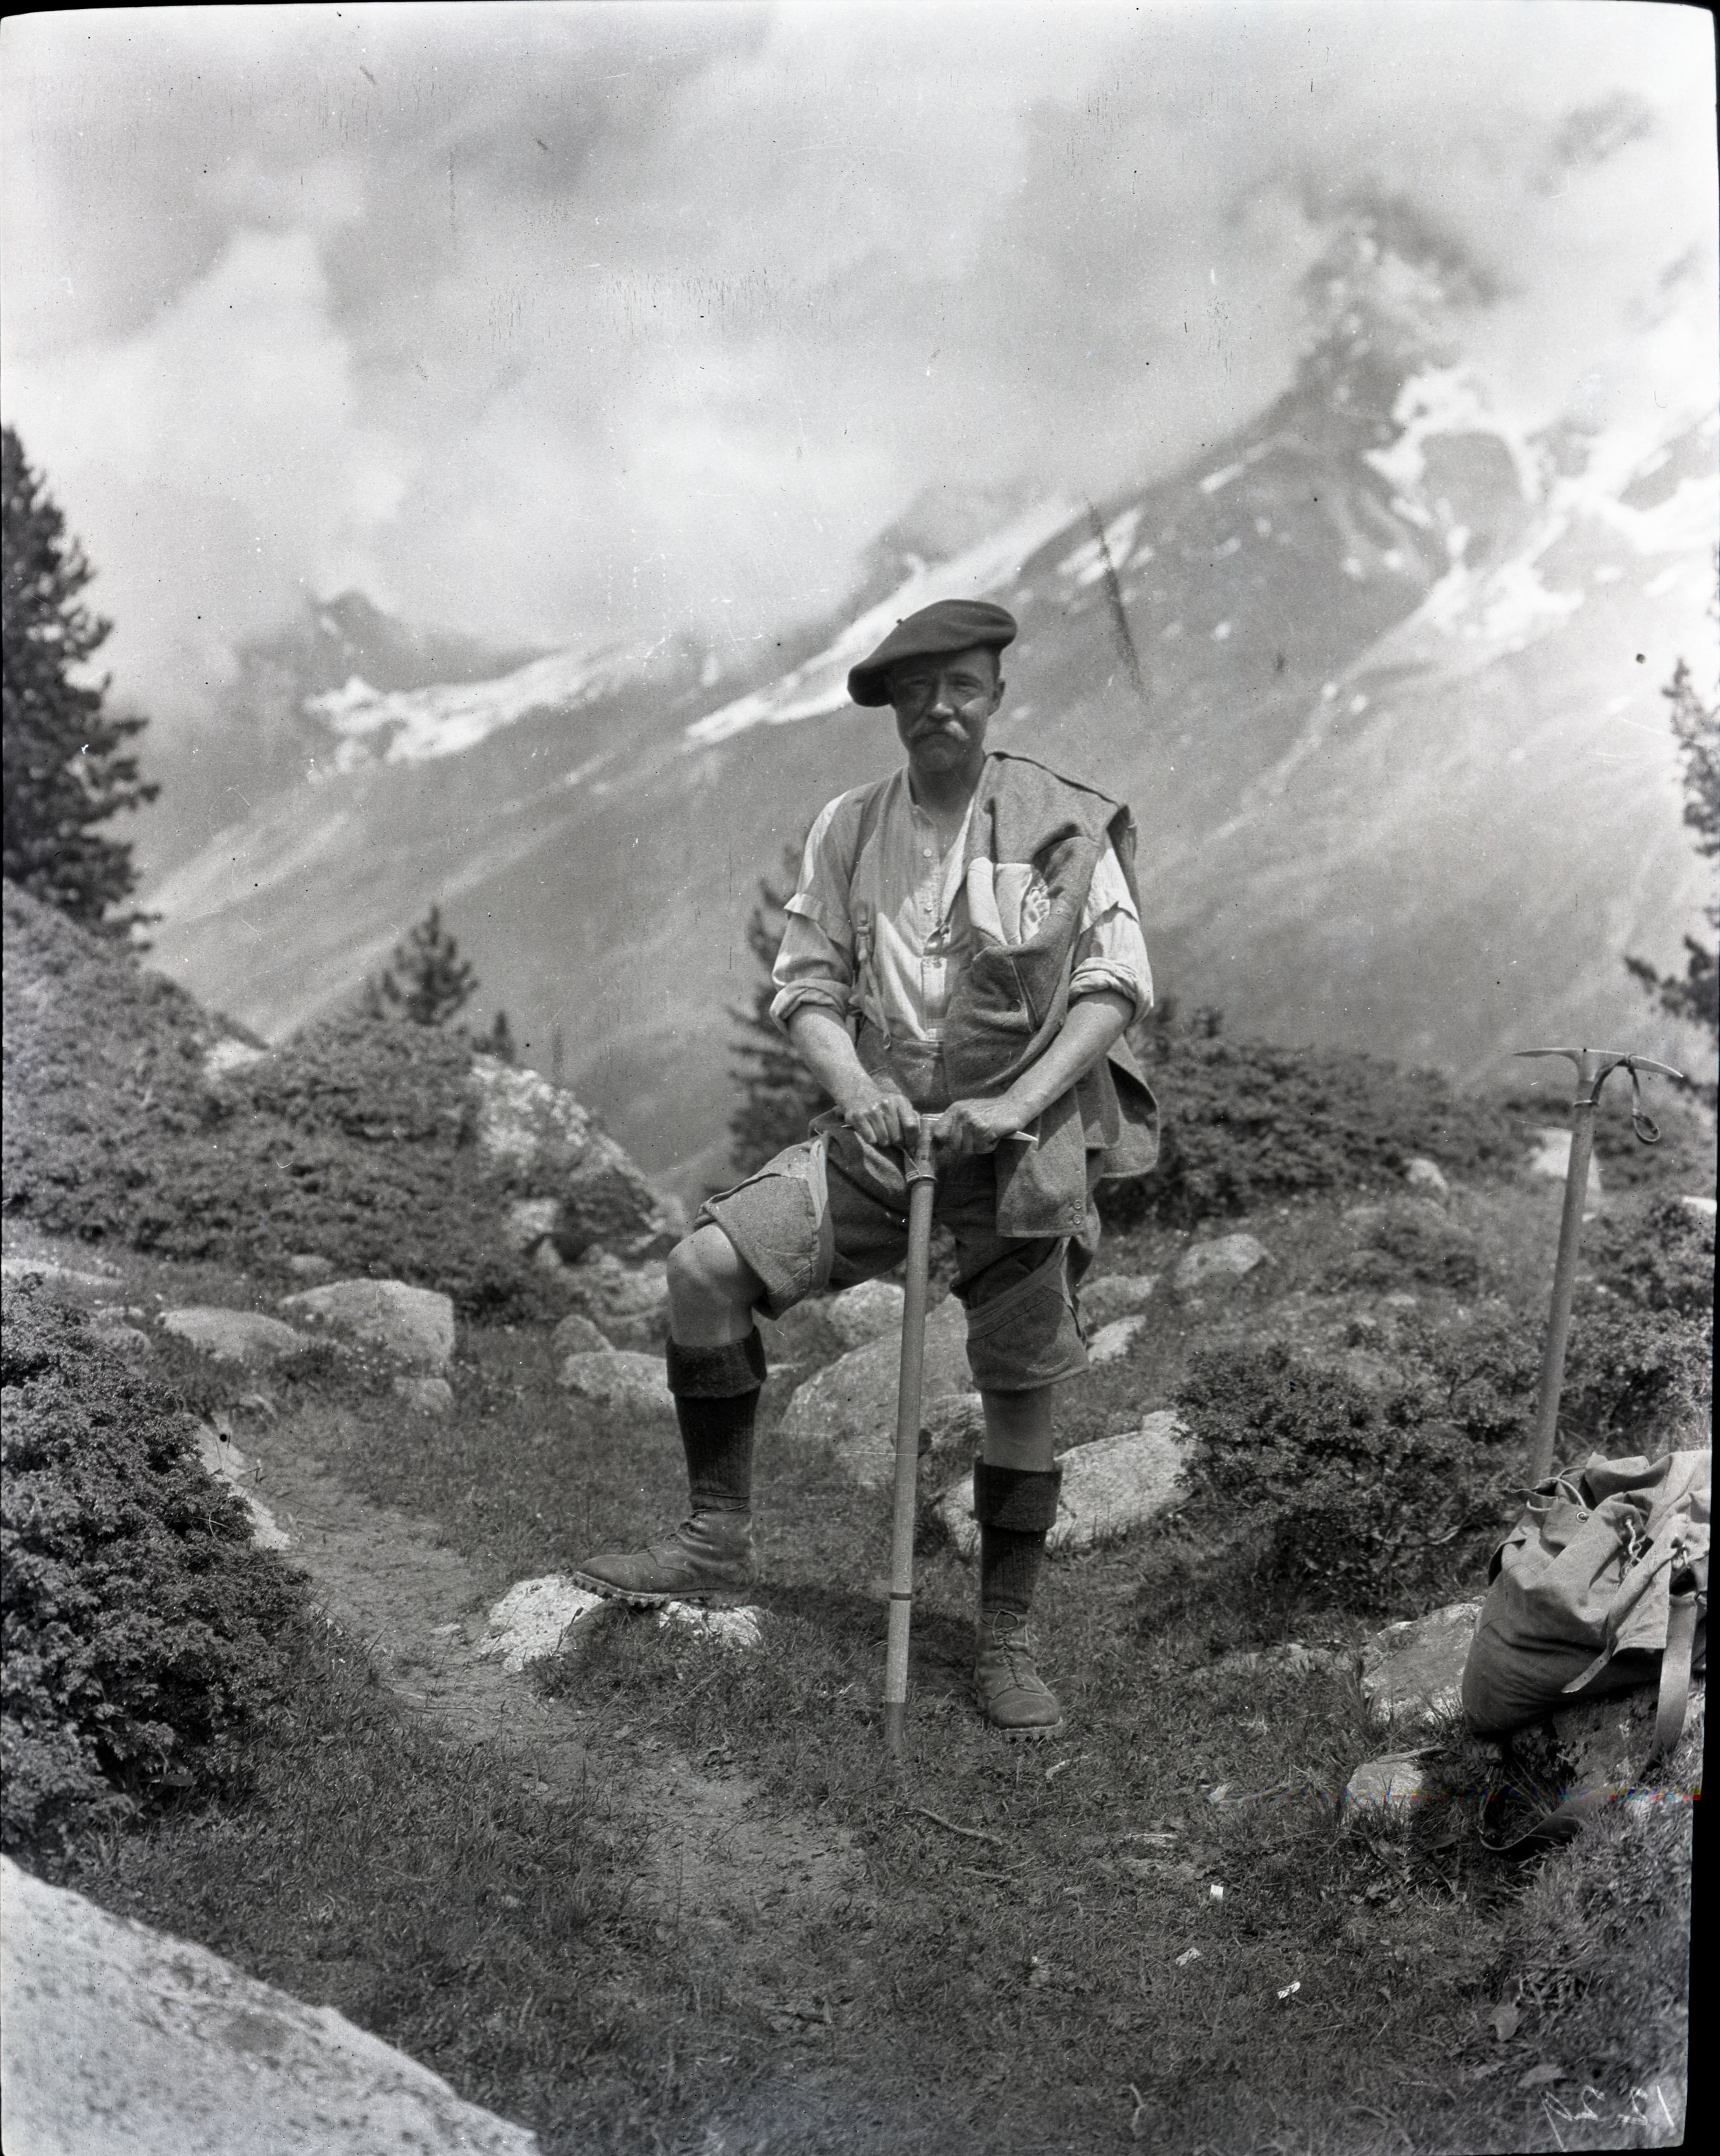
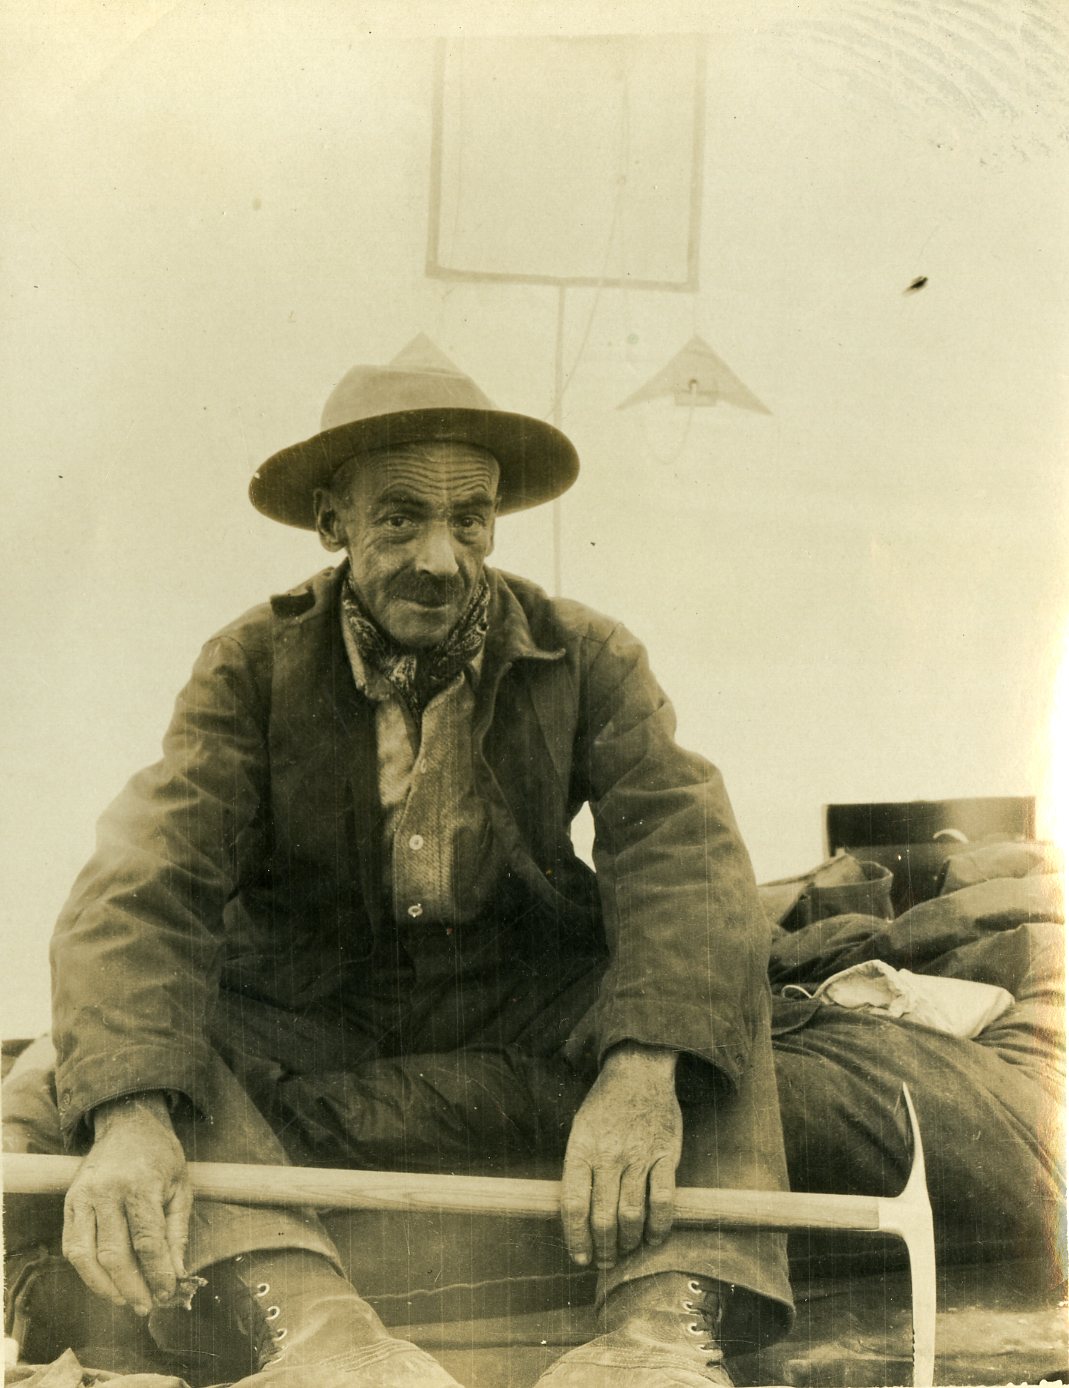
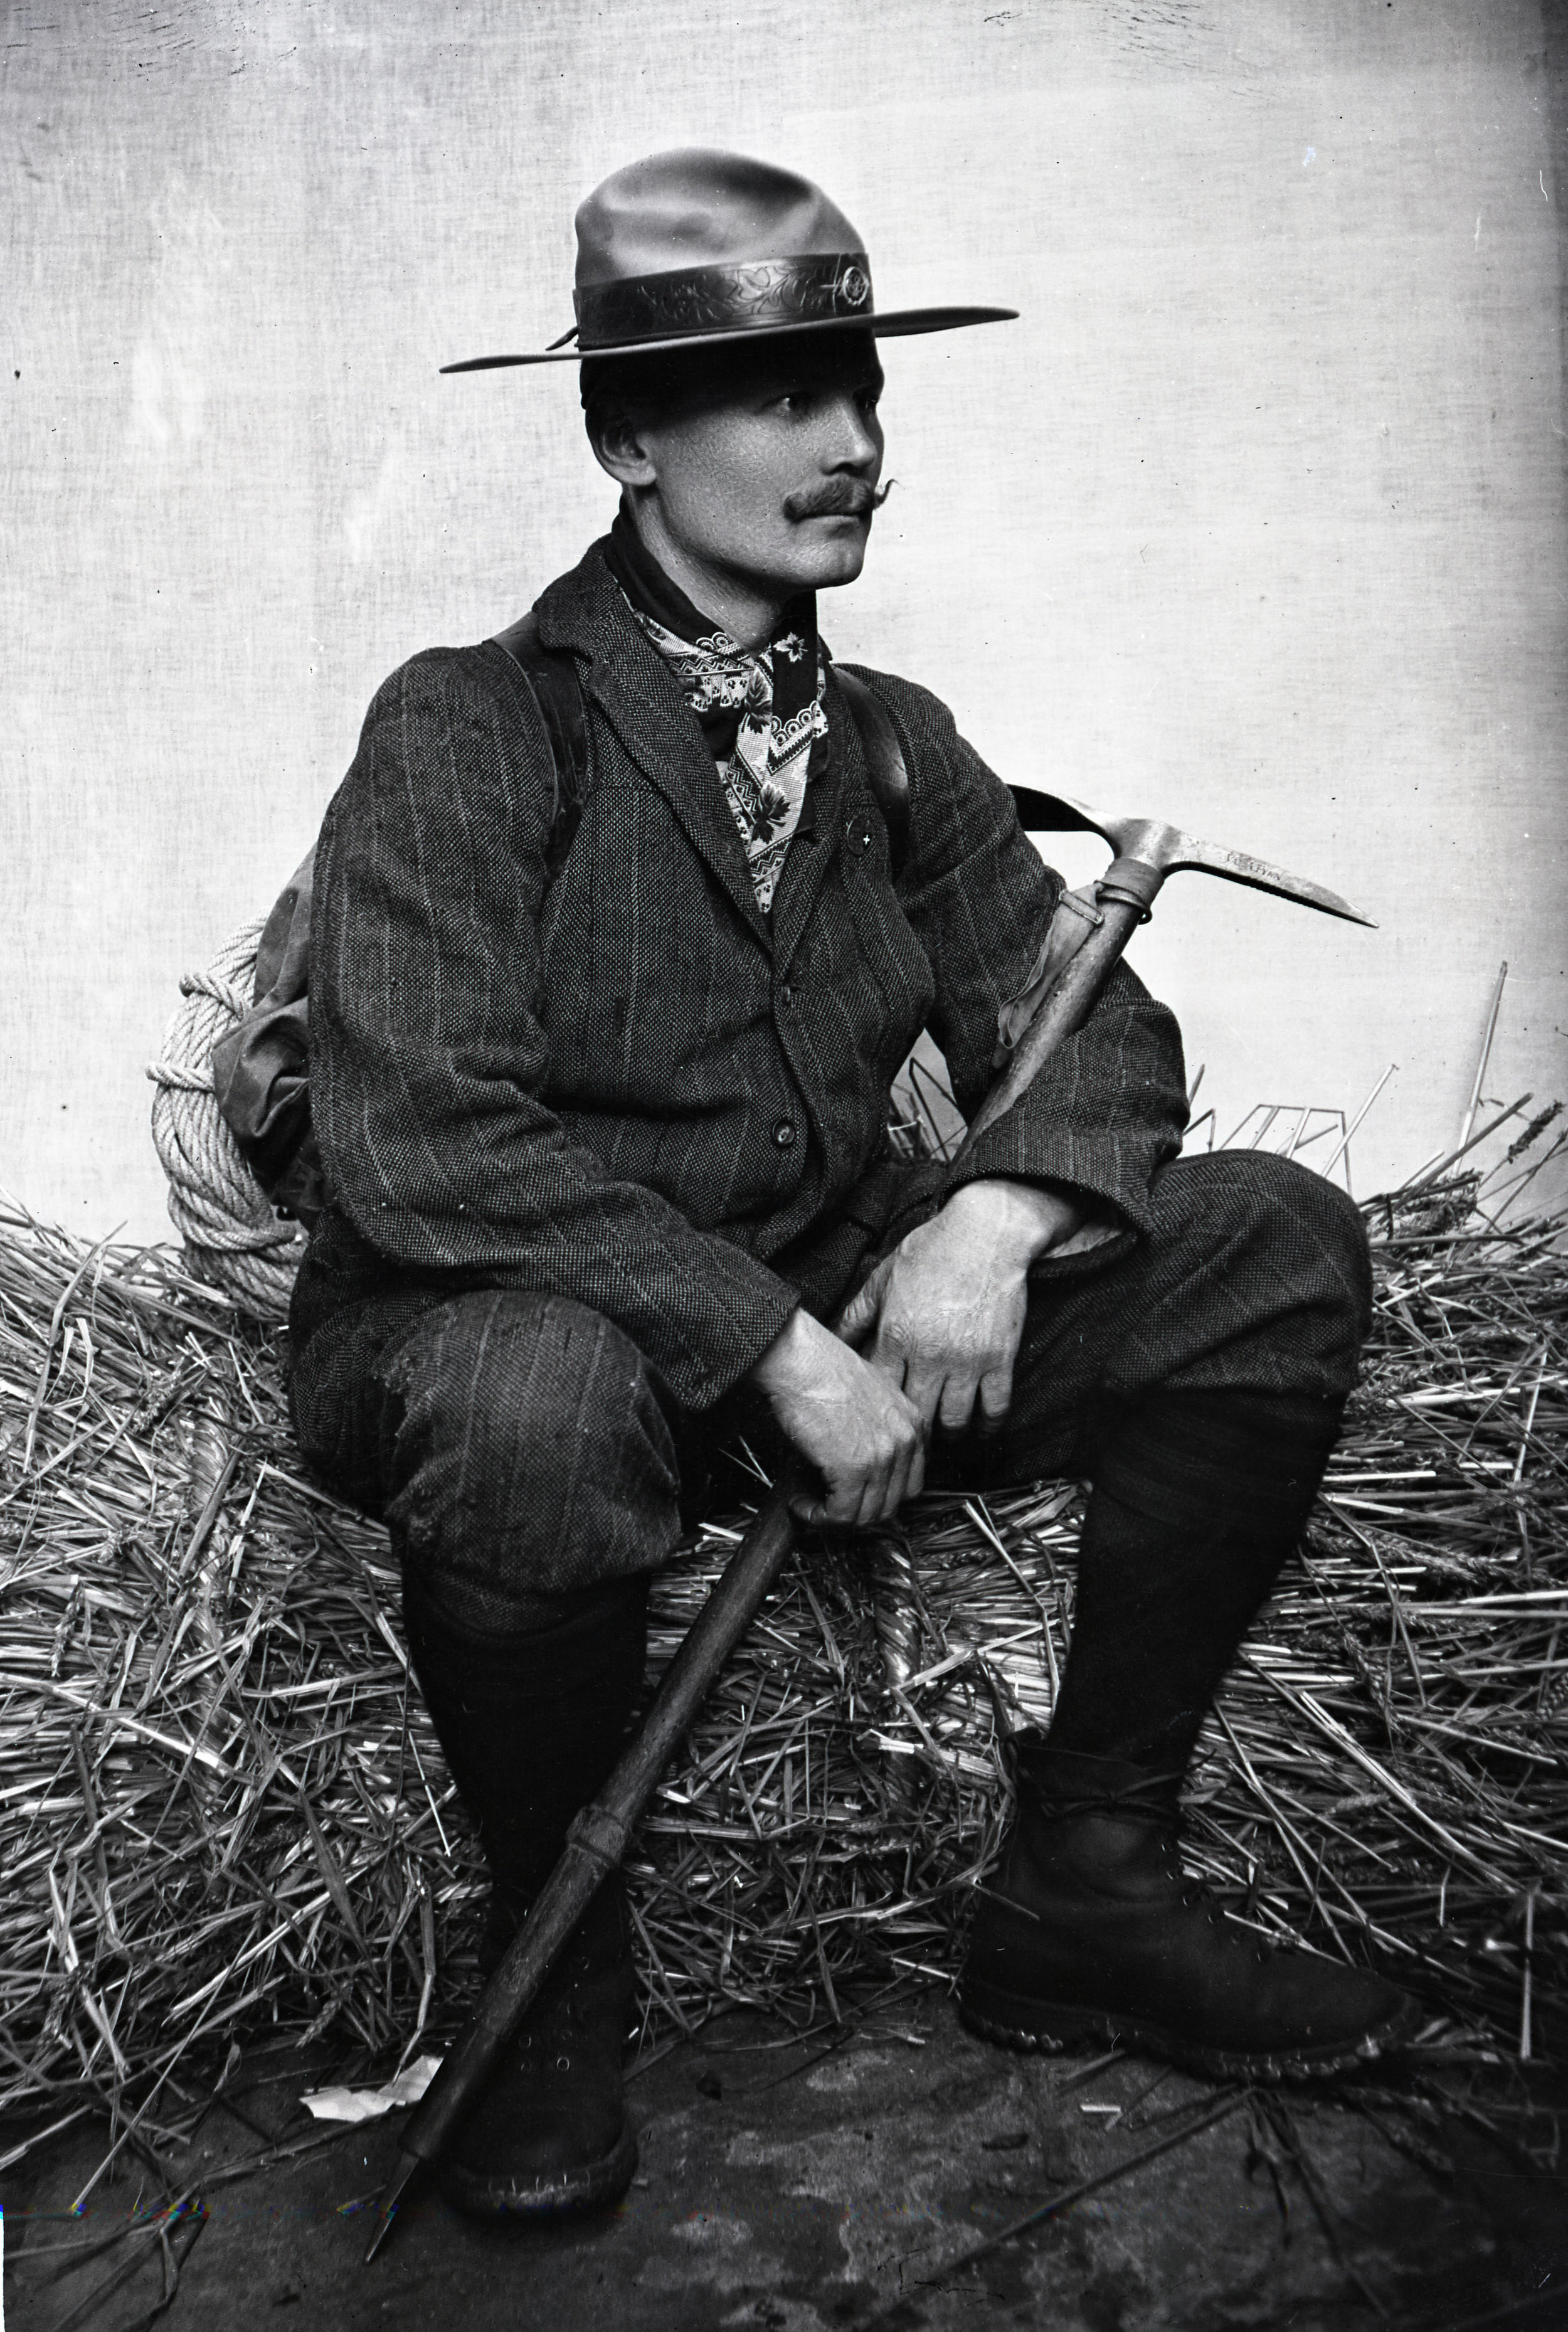
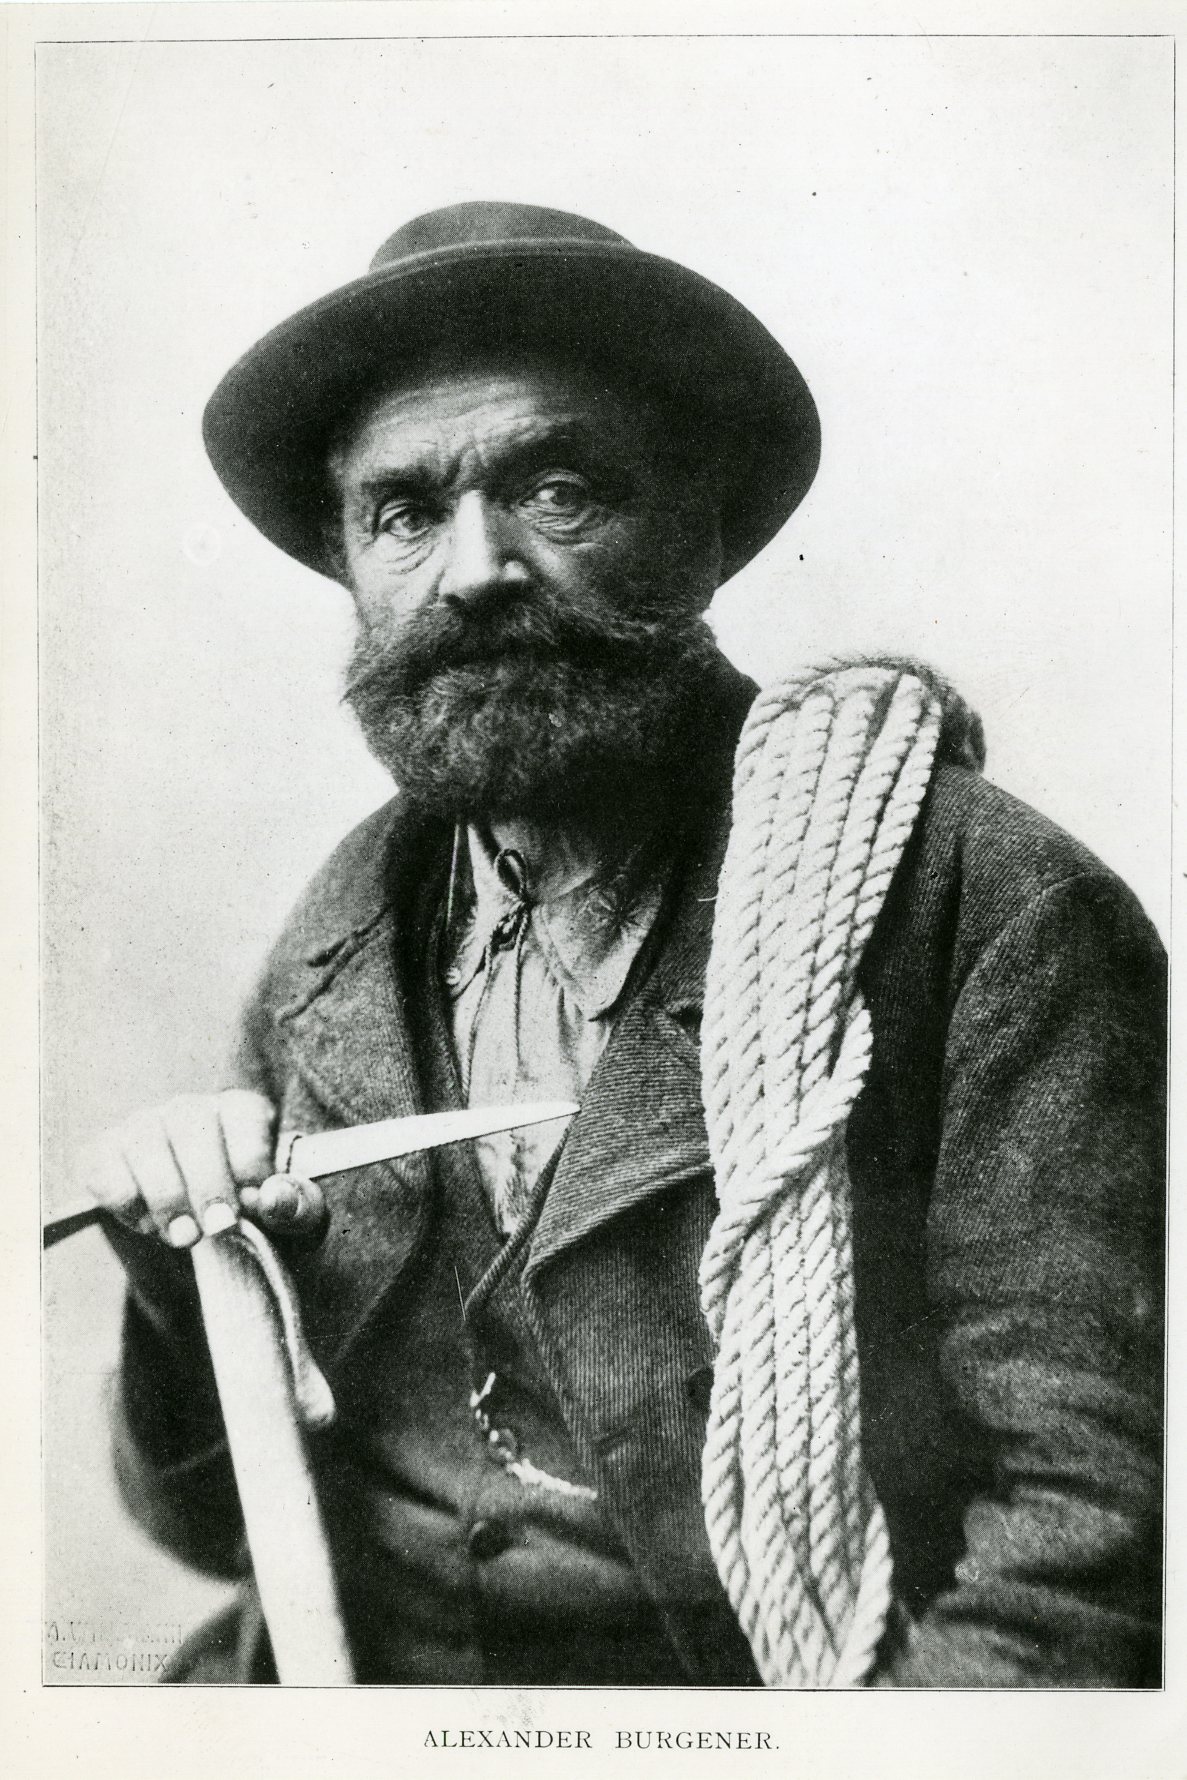
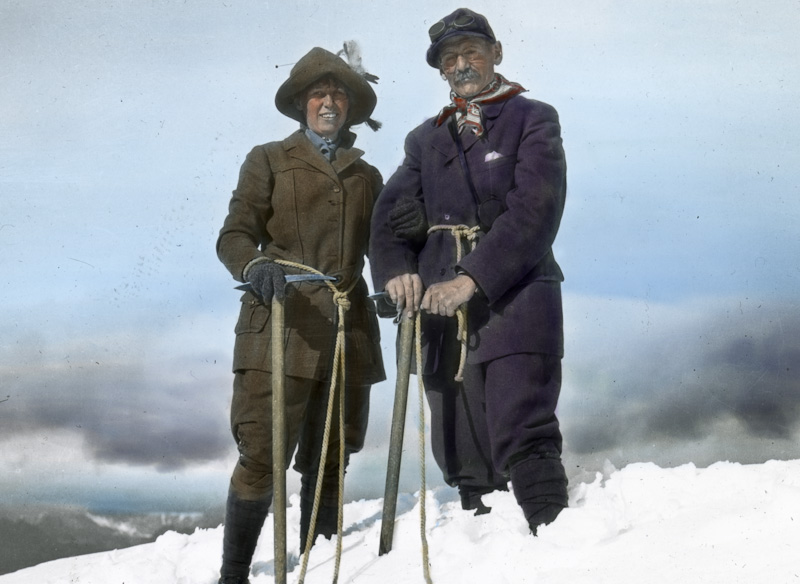
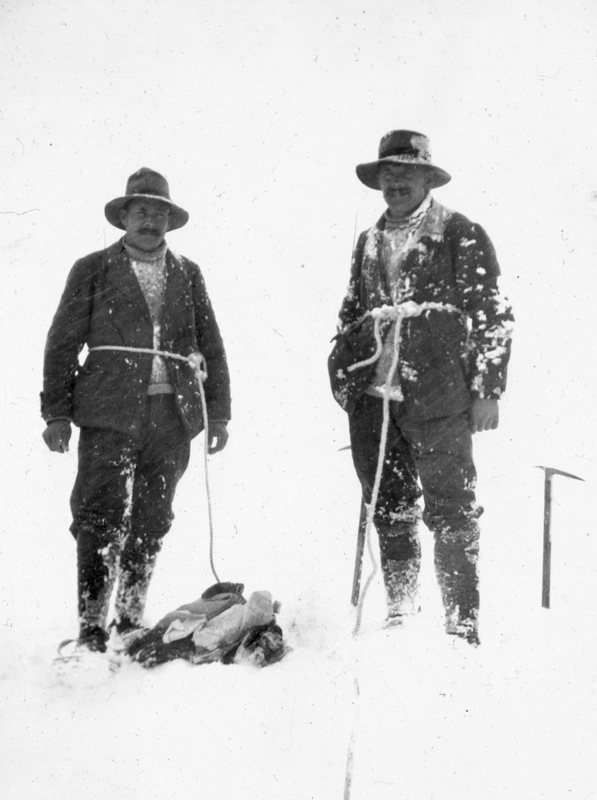
For centuries scientists have been trying to determine if there was a correlation between great explorers and great mustaches. Recently, the American Alpine Club Library was able to assist researchers from the Institute of Modern Mustaches (IMM) as they set out to try to establish if such correlation exists and discover how mustaches may enhance exploratory potential in humans. The library was able to assist in this research by providing access to our extensive historical resources of journals, books, diaries, photographs and lantern slides. Earlier this month the IMM shared some preliminary findings with us and in honor of “Movember” we would like to share those findings and some of the photographs and lantern slides that were used for this research.

This photograph from 1925 is an example of the variety of mustaches that exist in nature.

Mustaches have adorned the faces of terrestrial and nautical explorers for centuries. Many sailors have stated that a good mustache can enhance dead reckoning abilities; while others when sporting a full mustache felt so confident that they wouldn't even bother to bring their sextant along for the voyage.

While examining our collection, Dr. Schnurrbart, head researcher at the IMM, was quick to realize that many mustachioed mountaineers in our photos were accompanied by an ice axe and set out to test a theory that the two items, mustaches and ice axes, enhanced mountaineering performance. "After a series of tests, we began to notice that subjects with a mustache and using a piolet outperformed their counterparts by more than the sum advantage of only a mustache or a piolet. There appears to be some currently unexplainable phenomenon in which they work in tandem to increase mental performance and decrease physical fatigue," noted Dr. Schnurrbart.

Early analysis of the data gathered seems to support the idea that mustaches improve outdoor effectiveness. "What we have seen thus far is that the mustachioed explorer has consistently out performed his/her non-mustachioed counterpart or at the very least performed better than their pre-expedition preparations would have led us to believe they were capable of," said Dr. Schnurrbart.

The above chart is a preliminary dataset from the Institute of Modern Mustaches that charts the amount of significant exploratory achievements accomplished over the past two centuries. This includes but not limited to polar, nautical and alpine achievements.

Surveys and interviews conducted by the IMM revealed that climbers and alpinists also felt more comfortable when being belayed by a mustachioed belayer. One interviewee commented, "When my belayer has a mustache I feel like I can really push my limits, you know? I'm not thinking about what happens if I come off the wall because I know my belayer has me."

Dr. Schnurrbart is excited about their early findings but was quick to add, "We are still very early in our research. Though the results seem to support our hypothesis that mustaches have a positive effect on performance in the outdoors there are still many variables to test. Tweed for example was very prevalent when many of humankind's greatest exploratory achievements took place. So that's something we must look into."

***Disclaimer: the above study is fictional and was created as a backdrop to share some of our photos, lantern slides, and nitrate film negatives with you. To the AAC Library's knowledge there is no correlation between having a mustache and outdoor performance. Do not trust someone to be a good belayer just because they have a mustache. 

By Eric Rueth

Latest Educational Video: Cleaning an Anchor in Single Pitch

Screen Shot 2017-04-14 at 9.38.46 AM.png

Like all climbing AAC education resources, cleaning an anchor in a single pitch setting has some simple principles that will help climbers find a technical solution to most common anchor-cleaning scenarios. Our most recent Know the Ropes video reminds climbers that anchor-cleaning should ideally be a principle-based procedure because

  • The hardware on the tops of cliffs can vary wildly

  • The stances vary quite a bit

  • The tools climbers have available can vary too. 

These principles will guide viewers to appreciate how safety systems work, how to be more efficient, and how to communicate effectively when cleaning. That kind of perspective helps us analyze our decision making and solve problems in adverse/unexpected conditions.

Sketchbooks & Diaries

Check out this selection of 19th century sketchbooks and diaries found in the AAC Library's Archives and in the Central Asia Library. See more photos on Flickr.

Sketches made in the Himaleh 1848 by Charles Horne. This sketchbook can be found in the Central Asia Library. Charles Horne (1823-1871) was employed in the Bengal Civil Service. He worked in the region, studied, and wrote articles on various aspects of the life of the people, which appeared in such publications such as the Journal of the Royal Asiatic Society. Most of the sketches were done in the region of Garhwal.  Sketches include scenery, shrines, rope bridges, local people, botany, birds, etc. Also artifacts such as prayer wheels.  It is a thorough documentation of life in the mountains at that time. 


Summer Tour in the Grisons and Italian Valleys of the Bernina, 1862

A souvenir from Mrs. Henry Freshfield's summer tour, most of the sketches found in this little book are by a Mrs. C. Galton. They were pasted into this book, which might be a draft version of Mrs. Freshfield's book of the same name. This item was collected for the AAC Library by Past President J. Monroe Thorington. To read the book, you can access it online here.


Sketches made on trip to Mt. St. Elias, June-Sept. 1888

Descended from William Williams, a signer of the Declaration of Independence, this Williams donated many items such as this sketchbook, a diary and a privately published book to the AAC Library. Read his In Memoriam in the 1947 AAJ here.


Henry George Newcombe Tibet Diary, 1869.

This is another treasure that can be found in the Central Asia Library. This is the journal of a 4-month shooting expedition into Tibet in 1869, undertaken by three young British army officers, Henry George Newcombe (1846-1895) and his companions, Tillotson and Evans. In addition to Newcombe's observations, are illustrations, consisting of 3 maps, 53 watercolors and many vignettes within the text.


Sketchbook of Pfarrer Friedrich Drechsel 1895

The sketches range in date from 1890-1909. It contains sketches of mountain and village scenes in turn of the century Bavaria. The book was donated by Karl Drechsel to J. Monroe Thorington (Drechsel's former pupil) in 1927. Thorington donated the sketchbook in 1949 to the AAC.


To see more of the sketchbooks and diaries,

take a look at our Flickr page.

Four Mountain Clubs Unite for Climbing Education and Public Policy


We're proud to be joining forces with the Colorado Mountain Club, the Mazamas, and The Mountaineers to promote improvements in climbing safety, coordinate stewardship and advocate for climbing areas in the United States. The four organizations have formally agreed to a working partnership to develop and implement shared standards for climbing and related mountain sports. The standards, lead by the AAC, would apply to volunteer instructors and remain consistent across the country. 

The partners represent four of the largest and longest-standing organizations dedicated to conserving mountain environments, providing quality outdoor education, and advocating for climbers throughout America. 

“We all care about introducing the next generation to the great outdoors and we have a responsibility to do it safely and effectively,” AAC CEO Phil Powers said. “This partnership, with four prominent U.S. mountain clubs, promotes the AAC’s vision of a united community of competent climbers and healthy climbing landscapes. In the vertical world, combinations of seemingly insignificant errors add up quickly—competence matters.”

“We have the opportunity to extend the impacts of our organizations by working together,” The Mountaineers CEO Tom Vogl said.


February 13, 2017, Golden, CO—The American Alpine Club, Colorado Mountain Club, the Mazamas, and The Mountaineers are joining forces to promote improvements in climbing safety, coordinate stewardship and advocate for climbing areas in the United States.

The four organizations have formally agreed to a working partnership to develop and implement shared standards for climbing and related mountain sports. The standards would apply to volunteer instructors and remain consistent across the country.

The partners represent four of the largest and longest-standing organizations dedicated to conserving mountain environments, providing quality outdoor education, and advocating for climbers throughout America. As the United States’ representative to the UIAA, the American Alpine Club will be leading and facilitating the work, and will ensure that these new standards are internationally recognized by the global climbing community.

“We all care about introducing the next generation to the great outdoors and we have a responsibility to do it safely and effectively,” American Alpine Club CEO Phil Powers said. “This partnership, with four prominent U.S. mountain clubs, promotes the AAC’s vision of a united community of competent climbers and healthy climbing landscapes. In the vertical world, combinations of seemingly insignificant errors add up quickly—competence matters.”

In the past decade the popularity of climbing in the U.S. has increased dramatically, creating a demand for quality climbing instruction. “These standards aim to ensure that the entire climbing community benefits from better training and will ultimately make climbing more accessible to everyone,” Mazamas Executive Director Lee Davis said.

“The Colorado Mountain Club is thrilled to be formally partnering with other influential mountain clubs to assist in the development and dissemination of new mountain skills training standards in America,” CMC Executive Director Scott Robson said. “By coordinating our efforts nationally, we raise the bar in regards to the quality of education that organizations like the CMC provide and we look forward to the positive impact these standards will have on our members and all of those who recreate in the mountains for years to come.”

“We have the opportunity to extend the impacts of our organizations by working together,” The Mountaineers CEO Tom Vogl said.

In the future, the partner organizations plan to examine ways to collaborate on issues of public policy, technology, membership, benefits and services, and other items of shared interest.


About The American Alpine Club:

The American Alpine Club is a 501(c)(3) charitable organization whose vision is a united community of competent climbers and healthy climbing landscapes. Together with our members, the AAC advocates for American climbers domestically and around the world; provides grants and volunteer opportunities to protect and conserve the places we climb; hosts local and national climbing festivals and events; publishes two of the world's most sought-after climbing annuals, the American Alpine Journal and Accidents in North American Mountaineering; cares for the world's leading climbing library and country's leading mountaineering museum; manages the Hueco Rock Ranch, New River Gorge Campground, Samuel F. Pryor Shawangunk Gateway Campground, and Grand Teton Climbers' Ranch as part of a larger lodging network for climbers; and annually gives $100,000+ toward climbing, conservation, and research grants that fund adventurers who travel the world. Learn about additional programs and become a member at americanalpineclub.org.


About the Colorado Mountain Club:

The Colorado Mountain Club is the state’s leading organization dedicated to adventure, recreation, conservation and education. Founded in 1912, the CMC acts as a gateway to the mountains for novices and experts alike, offering an array of year-round activities, events and schools centered on outdoor recreation. The Club comprises 13 regional groups across the state to serve the local needs of its members and partners. To ensure the continued enjoyment of Colorado’s pristine places, the CMC also leads efforts to protect wild and public lands with its conservation and stewardship programs. The Club publishes a quarterly magazine, Trail & Timberline, and operates a press with 50 current titles. No other organization in the Intermountain West employs such a strong or broad approach to connecting people with the Rocky Mountain landscape.


About the Mazamas:

The Mazamas promotes mountaineering, responsible recreation, and conservation through outdoor education, youth outreach, and advocacy programs. Founded on the summit of Mt. Hood, and headquartered in Portland, Oregon, the Mazamas has been working to represent and support everyone who loves to play in and protect the mountains of the Pacific Northwest for more than 120 years. The Mazamas operate one of the largest centralized mountaineering training schools in the country, graduating more than 500 people per year with basic to intermediate level climbing skills. The Mazamas also have a robust grants program that distributes more than $50,000 per year through conservation, research, and expedition grants. Members enjoy priority access to programs, domestic rescue insurance, and the opportunity to apply to our larger grants, including the $10,000 annual Bob Wilson Expedition Grant. Additional programs include classes in outdoor leadership, expedition planning, nordic skiing, ski mountaineering, wilderness first aid, and a variety of outdoor skill building courses. You can learn more about the Mazamas and start your adventure here: mazamas.org


About the Mountaineers:

The Mountaineers is an organization dedicated to helping people explore, conserve, learn about and enjoy the lands and waters of the Pacific Northwest and beyond. Founded in 1906, the 12,000-member Mountaineers community offers thousands of volunteer-led courses, activities, and events to connect young and old, novice and veteran, to the power and wonder of the natural world. The Mountaineers’ advocacy program is Washington’s leading voice for protecting the wild places where we play. Mountaineers Books expands passion for the outdoors internationally through award-winning publications, including instructional guides, adventure narratives, and conservation photography. Learn more at www.mountaineers.org.

The Masterpoint, The Shelf, The Components: Anchor Anatomy in Action

The Masterpoint

The masterpoint of an anchor is aptly named. It is designed to be the working focal point for anchoring, belaying, and a number of auxiliary tasks that might happen while rock climbing. Much like the Master Bedroom of a house, the masterpoint is where the residents of the anchor want to be. The Masterpoint offers the most capacious, the most secure, and the most versatile operational/organizational platform available.

Recognizing and utilizing a masterpoint is often so routine for practiced climbers, it is hard to imagine connecting to an anchor in any other way. However, alternative connection options (like the anchor shelf or components) often bewilder and confuse newer climbers.  Without clear direction one way or the other, it is easy to imagine an uninformed anchor resident choosing to reside in the broom closet rather than the master bedroom.

In these sections and illustrations, we will explore why the master point is the MASTER point, variations on what a masterpoint can look like, and why and how the anchor shelf and components can be valuable connections too. Lastly, we'll examine some special cases anchors which may lack a shelf, or in some cases the actual location of the shelf might be confusing.

What is the Masterpoint?

The masterpoint is the connection point of an anchor where all the values of the anchor are optimized and consolidated. We know that the core principles in all anchor constructions have been consistently applied in climbing applications.  Those values are: Strength, Redundancy, Load Distribution, Simplicity, and Limited Extension. So, the masterpoint is the connection point where all those values are optimized and consolidated, where they all come together. Let’s look at some examples:

96


Normal
0


false
false
false

EN-US
X-NONE
X-NONE


 <w:LatentStyles DefLockedState="false" DefUnhideWhenUsed="false"
DefSemiHidden="false" DefQFormat="false" DefPriority="99"
LatentStyleCount…

The Ponytail Anchor is common.  Using a 4’ Nylon sling it creates all the values climbers have come to expect from an anchor.  It is redundant, it distributes load evenly to the components, it is strong, and it is easy to build and take apart.

The Masterpoint is where all those values come together.

96


Normal
0


false
false
false

EN-US
X-NONE
X-NONE


 <w:LatentStyles DefLockedState="false" DefUnhideWhenUsed="false"
DefSemiHidden="false" DefQFormat="false" DefPriority="99"
LatentStyleCount…

Similarly, a simple ponytail anchor with a cordellette provides a masterpoint with the effective strength of four strands of 7mm nylon cord.

96


Normal
0


false
false
false

EN-US
X-NONE
X-NONE


 <w:LatentStyles DefLockedState="false" DefUnhideWhenUsed="false"
DefSemiHidden="false" DefQFormat="false" DefPriority="99"
LatentStyleCount…

The three piece anchor that is so common in trad climbing also provides a working masterpoint.  Here, a 7mm nylon cord effectively produces a 21mm masterpoint and combines all the values needed for an effective anchor: strength, redundancy, load distribution, and simplicity.

96


Normal
0


false
false
false

EN-US
X-NONE
X-NONE


 <w:LatentStyles DefLockedState="false" DefUnhideWhenUsed="false"
DefSemiHidden="false" DefQFormat="false" DefPriority="99"
LatentStyleCount…

An 11mm static rope can be used to combine components in the terrain that may be far apart from each other. 

96


Normal
0


false
false
false

EN-US
X-NONE
X-NONE


 <w:LatentStyles DefLockedState="false" DefUnhideWhenUsed="false"
DefSemiHidden="false" DefQFormat="false" DefPriority="99"
LatentStyleCount…

Once tied off, the anchor builder has to select a knot that combines the strength of the components, and retains all the values of an effective anchor.  Here, a BHK is an ideal choice.  It creates a redundant masterpoint.

96


Normal
0


false
false
false

EN-US
X-NONE
X-NONE


 <w:LatentStyles DefLockedState="false" DefUnhideWhenUsed="false"
DefSemiHidden="false" DefQFormat="false" DefPriority="99"
LatentStyleCount…

The quad is a self-adjusting anchor system, and it is commonly applied to anchors where the direction of load changes direction.

The effective masterpoint uses three of the four strands in the nadir of anchors arc.  The fourth strand captures any carabiners or connections if one of the components were to fail.

96


Normal
0


false
false
false

EN-US
X-NONE
X-NONE


 <w:LatentStyles DefLockedState="false" DefUnhideWhenUsed="false"
DefSemiHidden="false" DefQFormat="false" DefPriority="99"
LatentStyleCount…

Similar to the quad, a 4’ nylon sling is also commonly used to create a self-adjusting anchor.

Here the masterpoint is inside the Magic X connection point, combining the effective strength of two isolated strands of the nylon sling.  The masterpoint is both strong and redundant, but the two overhand knots can be difficult to untie after heavy loads are applied to the anchor.

What is the Shelf?

The shelf is an auxiliary attachment point that has almost the same values as the Masterpoint.  Imagine it as a finished attic, relative to a Master Bedroom.  A finished attic has many of the amenities of the Master Bedroom, but it would be weird to move in to the attic and leave the Master Bedroom empty.  It would also be weird to sleep in the Master Bedroom, but dress in the attic.  In other words, the shelf is a good place to put something that might not otherwise be functional in the masterpoint.  For argument’s sake, the shelf should also present an attachment point that has redundancy, strength, and distributes load to the components.  As a result, some anchors don’t even have a shelf.  Let’s looks at some examples:

96


Normal
0


false
false
false

EN-US
X-NONE
X-NONE


 <w:LatentStyles DefLockedState="false" DefUnhideWhenUsed="false"
DefSemiHidden="false" DefQFormat="false" DefPriority="99"
LatentStyleCount…

The shelf of the anchor has the same essential properties as the masterpoint.

For the ponytail anchor with 4’ nylon sling, the shelf clips both legs of anchor above the Masterpoint

96


Normal
0


false
false
false

EN-US
X-NONE
X-NONE


 <w:LatentStyles DefLockedState="false" DefUnhideWhenUsed="false"
DefSemiHidden="false" DefQFormat="false" DefPriority="99"
LatentStyleCount…

For the cordellette ponytail anchor, there are four strands of 7mm nylon in the masterpoint.  To create that same kind of connection point, the shelf must clip both legs of the anchor above the masterpoint. 

That means that two stands of each leg effectively creates the anchor’s shelf.

96


Normal
0


false
false
false

EN-US
X-NONE
X-NONE


 <w:LatentStyles DefLockedState="false" DefUnhideWhenUsed="false"
DefSemiHidden="false" DefQFormat="false" DefPriority="99"
LatentStyleCount…

With three of four piece anchors, the shelf clips into each leg, loading three strands, just like the masterpoint.

What are the components on an anchor?

The components are the things that connect the anchor to the rock, snow, or ice.  Components can be something as simple as a tree or large vegetation. It could be a piece of removable protection, like a cam or a nut. Or, it could be a fixed anchor, like a bolt. Usually an anchor combines the strength of its components to create a masterpoint, and therefore no single component every really duplicates the values that are found at the masterpoint. A component is like a cabinet or closet, relative to the master bedroom. It would be weird to do anything more than storage in a space like that. In some cases, especially in climbing, it might be dangerous to do anything important on a single component. 

Let’s watch the masterpoint, the shelf, and the components at work. Look at how the master bedroom, the attic, and the closet are used to categorize the importance of the space according to things the climbing team places there.

The belayer is anchored to the masterpoint because the masterpoint is the master bedroom.

The belayer is anchored to the masterpoint because the masterpoint is the master bedroom.

There is no need to use the shelf because the masterpoint can hold both anchored belayer and accommodate the belay device.&nbsp; But, when the belayer starts storing things that are less vital, the shelf starts to present itself as a valuable auxili…

There is no need to use the shelf because the masterpoint can hold both anchored belayer and accommodate the belay device.  But, when the belayer starts storing things that are less vital, the shelf starts to present itself as a valuable auxiliary attachment point.

If the climbing teams needs an auxiliary attachment point that has the same values as the masterpoint, the shelf is always available. &nbsp;The backpack, for example, is not a primary resident of the anchor, but it might be heavy and have vital equi…


If the climbing teams needs an auxiliary attachment point that has the same values as the masterpoint, the shelf is always available.  The backpack, for example, is not a primary resident of the anchor, but it might be heavy and have vital equipment inside.

Finally, if there is an object that just needs to be stored somewhere for a moment, something non-vital where the load-bearing properties and the security of the attachment are irrelevant, a single component acts like cabinet or a closet.&nbsp; It s…

Finally, if there is an object that just needs to be stored somewhere for a moment, something non-vital where the load-bearing properties and the security of the attachment are irrelevant, a single component acts like cabinet or a closet.  It stores something small, temporarily.


Tricks, Traps, and Conundrums with Masterpoints and Shelves

Many anchors don’t have a shelf and it takes a clear headed understanding about what a masterpoint and shelf are, and what they are for, to sort out which anchors have a shelf and which do not. Let’s have a look at a few examples.

Many Toprope anchors that are built with a static rope effectively do not have a shelf.

Many Toprope anchors that are built with a static rope effectively do not have a shelf.

Looking closer, it is clear that clipping above the BHK on this anchor does not have the same material redundancy as the BHK itself.

Looking closer, it is clear that clipping above the BHK on this anchor does not have the same material redundancy as the BHK itself.

Similarly, when the cordellette is untied and the anchor is configured by working the cordellette from end to end, the shelf cannot have the same qualities as the masterpoint.

Similarly, when the cordellette is untied and the anchor is configured by working the cordellette from end to end, the shelf cannot have the same qualities as the masterpoint.

This anchor effectively has no shelf.

This anchor effectively has no shelf.

A monolithic anchor easily deceives the eye when a climber tries to clip the shelf in the same manner as they may be accustomed to while using three piece anchors.

A monolithic anchor easily deceives the eye when a climber tries to clip the shelf in the same manner as they may be accustomed to while using three piece anchors.

The climber accustomed to simply grabbing two strands may not be clipping the shelf. &nbsp;It might be a false shelf.

The climber accustomed to simply grabbing two strands may not be clipping the shelf.  It might be a false shelf.

In profile, it becomes clear that the false shelf is only connecting to one of the two strands.

In profile, it becomes clear that the false shelf is only connecting to one of the two strands.

The actual shelf on a monolithic anchor looks like this.

The actual shelf on a monolithic anchor looks like this.

Self Adjusting anchors like the Magic X with Load Limiting Knots or the Quad, don’t really have a shelf.&nbsp; The Magic X only offers one point that boasts material redundancy and loads the components equally through a range of motion.

Self Adjusting anchors like the Magic X with Load Limiting Knots or the Quad, don’t really have a shelf.  The Magic X only offers one point that boasts material redundancy and loads the components equally through a range of motion.

The Quad, by comparison, offers four strands of material that hang between the load-limiting knots.&nbsp; Which means that there are few options to designate a masterpoint. Using three strands as the effective masterpoint offers optimal strength (lo…

The Quad, by comparison, offers four strands of material that hang between the load-limiting knots.  Which means that there are few options to designate a masterpoint. Using three strands as the effective masterpoint offers optimal strength (loading three strand of cordellette at all times) and the remaining strand creates redundancy behind the load limiting knots.  But, clipping three strands effectively negates the opportunity to use an anchor shelf.  There is no other point on the anchor that has the same self-adjustment and load-bearing strength as those three strands of cordellette.

Instead, clipping two stands of the Quad offers two connection points that have identical strength, self-adjustment, and redundancy properties.

Instead, clipping two stands of the Quad offers two connection points that have identical strength, self-adjustment, and redundancy properties.

A sport climbing anchor, commonly just a pairing of quickdraws, also has a masterpoint that is difficult to identify.

A sport climbing anchor, commonly just a pairing of quickdraws, also has a masterpoint that is difficult to identify.

Clipping into both carabiners right alongside the rope is effectively the masterpoint of a sport anchor. &nbsp;Luckily, sport climbing rarely necessitates the use of a masterpoint.

Clipping into both carabiners right alongside the rope is effectively the masterpoint of a sport anchor.  Luckily, sport climbing rarely necessitates the use of a masterpoint.


A new year, a new name!

This is a big year for Accidents in North American Climbing.
You read that right: We’ve updated the name of Accidents to reflect the evolving nature of modern climbing.
 
Nearly two-thirds of the incidents covered in Accidents each year involve rock climbing instead of mountaineering. And the great majority of new climbers and new AAC members—the ones who will benefit most from this book’s educational lessons—are primarily rock climbers. As the name suggests, Accidents in North American Climbing is a resource for ALL climbers.
 
That’s not all that’s new in Accidents. For the first time in the book’s nearly 70-year history, we’ll be publishing in full color this year. Thanks to our dedicated and growing team of volunteer regional editors, we have more reports than ever. And the new Sharp End podcast, based on the stories in the pages of Accidents, is growing by leaps and bounds.
 
Get involved! Encourage your climbing partners to read Accidents in North American Climbing. (Current AAC members will receive the 2016 edition this August.) And if you value our work, consider supporting Accidents with a donation

AAC's Gold Standard Curriculum: Belaying

Photo: AAC member Drew Smith

Photo: AAC member Drew Smith

Introduction

American climbers currently learn to belay from professional climbing instructors and guides, from formal and informal mentors, and an increasing number learn to climb in indoor/artificial climbing structures and facilities. While there is general competence with belay related skills and techniques, an underlying belay-related accident/incident rate underscores the lack of uniformity among American belayers. While certain belay techniques, tools, and principles seem to predominate, a national adherence/advocacy for a single set of guiding fundamentals, best practices, and standards does not exist.

The following curriculum is designed to not only define the content used to teach belay education programs for the American Alpine Club, but eventually consolidate and reform American belaying entirely.

Overview

  • Belaying Equipment

  • Attaching to the Climbing Rope

  • Fundamental Principles of Belay

  • The Belay System

  • Belaying a Top Rope

  • Belaying a Lead Climber

  • Use of Ground Anchors

  • Appendix 1: Third-Party Reviewers, Testers, Endorsements, and Certifications

  • Appendix 2: Additional Equipment and Ropework

Belaying Equipment

All of the equipment used to implement this curriculum should be designed, tested, and manufactured for climbing-specific applications by a reputable manufacturer. Any one of a handful of options are available in the United States, and unfamiliar or foreign manufacturers can be cross-referenced with several third-party organizations that confirm and endorse the strength, durability, and integrity of all the equipment mentioned in this curriculum (see appendix 1).

Harnesses

The Edelrid Solaris is a modern, all-arounder.

The Edelrid Solaris is a modern, all-arounder.

All harnesses used for rock climbing should be tested and designed specifically for that purpose. A modern climbing harness should consist of the following components, at a minimum:

  • Waist belt

  • Tie-in points *

  • Belay loop *

  • Buckles

The Black Diamond Vario Speed has a single belay and tie-in point.

The Black Diamond Vario Speed has a single belay and tie-in point.

*Some harnesses have the same point for tying in and belaying.

There are a few consequential variations in harness design: Harnesses with a single belay and tie-in point are oriented horizontally on the waist belt. As a result, the attachment of a belay device will have a left or right orientation that should be consistent with the belayer’s dominant hand.

Harnesses with two hard points are usually connected by a vertically oriented belay loop. As a result, the tie-in occupies a separate reinforced path than any carabiner that may be clipped to the belay loop. The vertical belay loop also results in a belay device orientation that is centered on the belayer’s body, negating the relevance of their specifically dominant hand.

Belay Devices

Unlike the terrain or body belay techniques used historically in rock climbing, a modern belay device introduces a more consistent and functional supply of friction to a belay system. When combined with an adequate counter-weight or a load-bearing anchor, a belay device can retard or halt the movement of a climbing rope, thereby arresting falls, creating comfortable lowers, and otherwise securing a climber in a climbing environment.

It is important to note that no belay device effectively secures a climber without a correct setup, effective and correct use, and/or an adequate counterweight or anchor.

While many different models, colors, and styles exist, they all fall into two major categories:

  • Plate/Aperture/Tube Devices

  • Assisted Braking Devices (Learn more about Assisted Braking Devices here.)

Locking Carabiners

Since the connection of a belay device to a counterweight or anchor is vitally important, ensuring the safety of a climber, a secure and reliable connection is a prudent practice.

An Edelrid HMS Bulletproof screwgate carabiner.

An Edelrid HMS Bulletproof screwgate carabiner.

Historically, a single carabiner with a carefully monitored locking mechanism has proved adequate. However, since the locking carabiner is a vital critical link in the climbing system, the security of its locking mechanism must be supplemented with a thorough understanding of the strengths and weakness of the unit, vigilant supervision during use, and careful inspection that precedes any belay sequence.

Parts of a Locking Carabiner

Basket/Basin. The larger side of the carabiner can accommodate bulky ropes, hitches, or tools.

An Edelrid HMS Bulletproof Twist FG carabiner with triple-action gate and belay loop keeper.

An Edelrid HMS Bulletproof Twist FG carabiner with triple-action gate and belay loop keeper.

Locking Mechanism. The locking mechanism keeps the carabiner’s gate from opening unintentionally. The different styles can be characterized by the number of physical movements it takes to open a locked carabiner. Screwgate closures require two physical movements, unscrewing the locking mechanism and then opening the gate; it is a two step locking mechanism. Other styles often require three steps.

Long and short axis. The long axis is designed to be loaded. The short axis is not. Locking carabiners are designed to load the long axis. Horizontal loads (loading the carabiner along its short axis) or tri-axial loads (loading the carabiner in three directions) can decrease the strength of the carabiner significantly and may compromise the overall climbing safety system.

Climbing Ropes

Climbing ropes are the most iconic tools in rock climbing. They are manufactured in dozens of varieties, but the ropes most important to this curriculum should be those specifically designed and tested for single strand rock climbing applications. The most relevant variations in climbing ropes are length, diameter, elongation, and middle indications.

Length. Most of the climbing and belaying done indoors involves a rope that is redirected from the top anchor so that both ends of the rope will reach the ground. In such an arrangement, the climbing rope should be twice as long as the climb. Indoors, these lengths are usually specifically cut to accommodate the length of the climbs in the facility. Outdoors, climbers usually purchase pre-cut lengths, typically sold in 60m and 70m options.

Diameter. The rope’s diameter has logical consequences for different climbing applications. Wide ropes are more durable but heavier, so they tend to be more popular indoors, where ropes do not need to be carried by climbers. Outdoors, climbers have a greater appetite for skinnier ropes, because they are lighter. However, as the rope diameter decreases, so does the overall durability.

A Sterling Helix 9.5mm dynamic climbing rope with bi-color patter to indicate the middle.

A Sterling Helix 9.5mm dynamic climbing rope with bi-color patter to indicate the middle.

Elongation. Climbing ropes stretch to absorb the energy of a falling climber and reduce the impact force sustained by the climber’s body, the belayer’s body, and the anchor/top piece. But, the amount of stretch can vary. Stretchy ropes are beneficial when lead climbers are taking falls, but less elongation is valuable for toproping, when climber’s prefer not to lose too much progress on the climb each time they fall.

Middle Indication. In many climbing applications, it is important to be able to quickly find the middle of the rope. The middle can either be indicated by a marking, inked or dyed onto the rope, or the sheath of rope may change pattern or color at the mid-point.

Attaching to the climbing rope

Attaching the climbing rope to a climber’s harness is a routine task in any climbing context. Indoors, it is common for the climber to tie in to one end of the rope, while the other end of the rope is simply managed. Outdoors, it is common for the climber to tie in to one end of the rope, while the belayer ties in to the other end of the same rope.

In both cases, the figure 8 follow through is one of several different options for attaching the rope to the climber, but it is the option that tends to dominate because it easy to teach, easy to learn, easily recognizable when tied correctly, while also being a secure and strong knot. This curriculum will emphasize tying the figure 8 follow through in a standardized manner, and it will propose the knot as the definitive attachment technique for American climbing.

Tying the Figure 8 Follow Through

When tying the figure 8 follow through, it is important to remember what sets the knot apart from all other options. It has a natural symmetry, and therefore an opportunity to create uniformity in the climbing system. Certain gestures create uniformity, so that the knot looks the same every time it is used:

  • The symmetry of the knot is based on having all strands parallel to each other.

  • The gap between the knot and the waist belt is the same size as the belay loop.

  • The knot has a 6 inch tail. No longer no shorter.

Step 1: Tie the Figure 8

Tie the figure 8 knot first; the knot is tied by wrapping a tail of rope around a loop and then passing the tail into the loop.

Each time, try to perfect the amount of tail. Different rope diameters will require slightly different amounts of tail to complete the next steps, but 12-18 inches is usually adequate.

Step 2: Pass the tail of the rope through the harness

Pass the tail of the rope through both tie in points. Try to avoid passing the tail through the belay loop in the process. Pull the knot next to harness to begin the next step.

Step 3: Complete the follow through by retracing the original Figure 8 with the tail

Use the original Figure 8 as a road map and retrace each turn of the knot with the tail. It will be helpful to start on the outside of the knot. Each time the knot is tied, make an effort to keep all the strands parallel. There will be fewer steps to complete if the knot is simply well-dressed in the first place.

Step 4: Make any gestures needed to standardize the knot

The figure eight follow through should be tied with all strands parallel to each other. It should have a 6” tail, and the gap between the knot and the waist belt should be the same size as the belay loop.

The figure 8 follow through. Find a visual step-by-step from Climbing Magazine by clicking the image.

The figure 8 follow through. Find a visual step-by-step from Climbing Magazine by clicking the image.

Fundamental Principles of Belay

Belaying has a long history. Innovated primarily in nautical applications, the earliest known belay techniques logically transferred to mountaineering, where climbers needed to a tool to secure each other during mountain travel. The fundamental principles that optimized the effectiveness of those early belay techniques have not changed. In fact, it is hard to imagine modern belaying without the standards and principles that preceded it.

The earliest belayers learned that in addition to the fundamental principles of belay they also needed to be attentive, vigilant, and take their responsibility to secure the climber very seriously. Today, that same attentiveness, vigilance, and seriousness should also characterize modern belaying.

anam-13201214178-1495803924.jpg

Principle #1: A brake hand must be maintained at all times.

The earliest belayers quickly learned that relinquishing a firm grip on the brake strand of a belay system creates an opportunity for catastrophe. If the climber falls in the instance that brake strand is not being maintained, the accelerating fall and rapid movement of the rope is almost impossible to arrest. Accordingly, one hand must be holding the brake strand of the rope at all times.

Principle #2: Hand transitions should happen in the position of maximum friction.

Modern belay tools, and the body and terrain techniques that preceded them, use friction to enhance the grip strength of the belayer. The friction of a belay tool dissipates the amount of mass the belayer needs to hold, and then the belayer’s bodyweight or the anchor is used to arrest the climber’s fall. As a result, there are points in the belay cycle where there is a maximum amount of friction and a minimum of friction. In the sequence of belaying, a belayer will need to continually move slack through the belay system, so there is a continual sequence in the which the rope is moved the system, and then the brake hands adjust their position on the rope in order to move slack again. The time when the hands transition is one of the most vulnerable moments in the belay cycle, and during that time the rope should rest in a position of maximum friction while the hands reset.

Principle #3: The hands and limbs should be positioned ergonomically.

Pulling on the rope, pulling slack through a belay system, resting in the brake position, and sustaining a fall, all require belayer to use their bodies and joints in a repetitive and sometimes strenuous way. It is important that hands and limbs take advantage of the natural ergonomics of the belay system so that stamina, reactivity, and grip strength are optimized.

Tertiary Principles Specific to Rock Climbing

Back up belay(er)s are a valuable addition to any belay system. Another set of hands, another set of eyes, and a measure of redundancy are great ways to enhance the security of a belay. But, another person has not historically been a part of belaying. When available though, and especially when belayers are still learning, it can be a valuable principle to adopt.

Belayer’s grip strength and the amount of friction applied by a belay tool can be instantly negated if the belayer’s body mass does not provide an adequate counterweight to a climber. When a climber weighs more than 40% of a belayer’s body weight, it will start to be difficult for the belayer to avoid displacement. In these scenarios, adequate use of a ground anchor (for ballast) or friction on the rope system (through twists, wrapping an anchor bar, an adequate number of directionals, or the inherent friction of the rope running over the terrain) will be needed.

Climbers will need belayers to continually move slack out of the belay system, but they will also need belayers to pull all the stretch out of the rope at times, when the climber wants to rest on a tight rope for example. Due to this circumstance, belayers must become adept at not only belaying slack but belaying stretch as well. Belaying requires enough strength to pull latent elasticity out of the belay system so that the climber can rest without elongating the rope an inordinate amount.

Read more about the fundamentals of belaying and different belay techniques here.

The Belay System

When a climber understands the fundamental principles of belay, the belay system can be mastered. The belay system has four essential phases: The setup, communication and double checks, belaying and lowering, and termination.

The Setup

To setup a belay system, the climber and belayer will need to manage both ends of the rope; either by tying in with a figure 8 follow through or knotting the end of the rope. The belayer will need to select an appropriate belay tool, set it up correctly on the rope, and determine the need for a ground anchor. If an anchor is needed, that must also be set up.

Communication and Double Checks

A climber and a belayer are co-dependent. They must work as a team. So precise communication and double checks are an imperative part of their teamwork. The following communications should be learned and recited on every climb/belay:

On Belay, [Name of Belayer]?” The belayer begins a vigilant, attentive, and serious administration of the belay system.

The climber displays their tie-in, harness, helmet, and climbing rope, while inspecting the belayer’s harness, belay setup, helmet, and ground anchor. The belayer checks the climber. When all these double checks are affirmed, the belayer can confidently continue to communicate.

Belay on, [Name of Climber].”

Climbing, [Name of Belayer].”

Climb On, [Name of Climber].” The climber begins climbing.

Got You, [Name of climber].” The belayer pulls all latent elasticity so that the climber can lean back and put weight on the rope.

Ready to Lower, [Name of Belayer].” When the rope is tight, the climber leans back and relinquishes all body weight to the rope.

Lowering, [Name of Climber].” When the climber is ready to lower, the belayer lowers the climber gently and smoothly to the ground.

Off Belay, [Name of Belayer].”

Belay Off, [Name of Climber].” If the climber is safe, firmly footed, and secure, there is no longer a need for belay, and the belay system can be deconstructed.

Conditional Communication

Slack, [Name of Belayer].” The belayer provides one arm length of slack. If the climber requires more slack, they will request more.

Up rope, [Name of belayer].” If the climber needs the belayer to move slack out of the belay, the “up rope” communication is given. In this circumstance the climber should also stop climbing until the slack is removed from the system.

Tension, [Name of belayer].” The belayer pulls all latent elasticity so that the climber can lean back and put weight on the rope. Most commonly, this is so that the climber can rest.

Rock!” If any object is falling, all those who observe the falling object call “Rock!”

To learn more about climber communication, check out this article.

When Double Checking

When the belayer and climber communicate, it is important to understand that the initial communication, “On Belay, [Name of Climber]?” is intentionally rendered in the form of a question. The climber is asking if the belay system is ready. Before the belayer can accurately and affirmatively reply, double checks are vital. The belayer must check the climber, and the setup of the belay system. The most vital items to double check are:

Buckles. Before leaving the ground, both the climber and belayer should demonstrate to each other that the buckles on their harnesses and helmets are secure (double-backed if appropriate) and tight.

Abdomen Fit (Harness Fit). A climber could fall out of a loose harness. Both the climber and belayer should inspect each other’s harnesses for proper fit. It is important that the harness is situated above the pelvis and that it is adequately tightened.

Rope. It is important to ensure that the rope is ready to use before the climber leaves the ground. Unwanted twists should be untwisted. When lots of ropes are set near each other, it is important to confirm that the climber and belayer are set up on the same rope. Both ends of the rope should be managed.

Belay Device. All belay devices have specific orientations that must be set up correctly. ABD’s should be loaded correctly, and plate/aperture/tube devices should be oriented so that the braking motion does not twist the belay loop.

Carabiner. The locking mechanism of a belay carabiner contributes to proper function and strength of the carabiner. If a belayer fails to lock the carabiner, it could create a dangerous situation when the climber loads the belay system. At the beginning of a climb, the belayer should demonstrate to the climber that the carabiner is locked by attempting to press the gate in.

Knot. The figure 8 follow through is used to directly connect the rope to a harness. If tied incorrectly, the result could be devastating. It is the climber and belayer’s responsibility to ensure that the climber has a properly tied knot which passes through both tie in points of the harness.

Belaying and Lowering

Once the belay system has been setup, the system has been double checked, and the climber and the belayer have communicated their roles clearly and unambiguously, the actual belaying, climbing, and eventually lowering is the next phase of the belay system.

A climber that is secured by a top rope from above will create slack, and the belay system should constantly remove slack. Additionally, when a climber wants to rest on the rope, when a fall is anticipated, or prior to lowering, belayers also need to remove any latent elasticity from the rope system.

A lead climber will need a steady supply of rope to clip the rope into incremental protection. While the fundamental principles of belay remain unchanged for this context, it is fundamentally different than top rope belaying in two ways. First, belaying a lead climber involves giving slack, not taking in slack. But, the belayer must be precise in the amount of slack given. The lead climber should have just enough slack to move and clip the rope, unencumbered. There should be no more or less slack given than the amount needed to accomplish this task. Second, a lead belayer sustains a higher impact force when a lead climber falls; they are often displaced by the dynamic forces of the lead climber’s fall. Such displacement cannot compromise the integrity of the belay. The fundamental principles must be adhered to, even when acting as a dynamic counterweight.

In most contexts, a climber will need to be eventually lowered from a climb. When lowering, the climber completely surrenders their body weight to the belay system, and the belayer is entirely responsible for delivering the climber safely to the ground. If the climber does not lean back entirely, the belayer cannot provide an effective lower.

Termination

Once the climber and the belayer are either safely anchored or safely situated on the ground, the final phase of the belay system is termination. It is important that the belayer remain vigilant, attentive, and serious until the belay system is terminated. When the climber is either safely anchored or firmly footed, the “Off Belay, [Name of Belayer]” command assures the belayer that the climber no longer requires the safety of the rope.

The belayer can respond, “Belay Off, [Name of Climber].” The only time a belay system should be terminated is when it is no longer needed. If a climber terminates a belay system, they should no longer require belaying, they should be safely situated on the ground, or they should be anchored.

Celebrating a successful climb. Photo: AAC Member Ron Funderburke.

Celebrating a successful climb. Photo: AAC Member Ron Funderburke.

Belaying a Top Rope

When the belayer is positioned at the bottom of a climb, an appropriate belay technique must adhere to the fundamental principles of belay. While there are a few acceptable techniques for doing so, a common and effective technique is popularly known as Pull-Brake-Under-Slide, or P.B.U.S.

P.B.U.S.

Pull-Brake-Under-Slide is the natural application of the fundamental principles of belay to a plate/aperture/tube device. In fact, when that tool was first innovated, it was the first time that belayers were forced to make a hand transition behind their belay tool. It was the first time that their hand positions changed from palm up to palm down.

PBUS has the added benefit of being easy to instruct, easy to belay latent elasticity, easy to accommodate an effective backup belay, easily transferable to other tools like an Assisted Braking Device.

As the acronym suggests, there are four steps. The belayer simultaneously pulls slack toward the belay device with the guide hand and through the device with the brake hand. If this movement is not coordinated, the rope will be difficult to move, or the plate/aperture/tube will pinch or grab, making the movement of the rope cumbersome.

Then, the belayer quickly moves the brake hand and brake strand to the brake position; the brake hand never relinquishes its grip from the rope. Next, the guide hand can pinch the rope under/behind the brake hand. The pinch provides enough resistance so that the brake had can slide forward again, never having relinquished its grip. These steps are constantly repeated as slack or elasticity are created by the climber’s progress. All four steps should constitute a terminal progression. In other words, a belayer should never pause in the middle of the sequence. If the climber is standing still, the belayer’s brake hand should be on the rope, in the braking plane, ready to initiate all four steps.

When lowering, both the guide hand and the brake hand should clasp the brake strand, so that lowering offers the climber the security of both hands. The fundamental principles of belay apply when lower too. So, a belayer’s transitioning hands should be in the braking plane while lowering.

Using an ABD

While PBUS is a perfectly applicable belay technique when using an ABD (e.g. Petzl GriGri or Edelrid MegaJul), it is important to remember that the braking mechanics of an ABD are fundamentally different. The braking cam or extra grabbing of an ABD will grip the rope tightly, with a deceptive amount of reliability, when all the latent elasticity is removed from the belay system. Belayers can easily be confused by the notion of brake position or braking plane, because the device will appear be doing all the braking, irrespective of the position of the brake strand or even the brake hand. But, this kind of confusion is a deception and misapprehension of the ABD. The fundamental principles of belay also apply to an ABD. Accordingly, the PBUS technique is still a good one. The advantage of an ABD is that when it is used correctly, it is easier to pull all the latent elasticity out of the belay system. The ABD’s braking mechanism will make it more difficult for increments of slack to slip back toward the climber, so a tight and reassuring belay can always be offered.

When lowering, however, the braking mechanism must be deactivated. Usually, the guide hand opens the braking mechanism while the brake hand makes all of its transitions with a firm grip, in the position of maximum friction.

Belaying a Lead Climber

Belaying a lead climber requires a different belay technique than belaying a toprope. Both the plate/aperture/tube style device and the ABD are serviceable options, but they both require special attention when belaying a leader. In both cases, the fundamental principles of belay are applicable.

Using a Plate/Aperture/Tube

When belaying a leader, PBUS will not be a helpful belay technique, because of the need to steadily give slack to a lead climber. For lead belaying, the belayer should slide the brake hand back, sequestering a quantity of slack to be given to the leader. Then, the brake hand pushes slack toward the device while the guide hand feeds that slack to the climber. As a result, the lead belay is effected in arm length (or shorter) increments. If the leader is climbing at a rate that exceeds this arm-length increment, the belayer will not be able to provide an adequate supply of slack AND adhere to the fundamental principles of belay.

When a leader falls, even the strongest belayer, with the strongest grip, will allow some rope to slip through the belay device. This slippage is unavoidable when using a plate/aperture/tube device. As a result, lead belayers learn to grab to the brake strand with both hands when the leader falls. Doing so immediately arrests any further slippage of the belay system.

Using an ABD

When belaying a leader with an ABD, the braking cam, which was such an asset in the toprope belay, now poses a unique challenge to a belayer who often needs to supply slack readily, quickly, and in large amounts. When a lead climber is moving slowly and smoothly, without long clips or the need for large amounts of slack, the exact same technique deployed for a Plate/Aperture/Tube device will work, especially if the rope is smaller and smoother. But, it is common that lead climbers move quickly in certain sections; they make dynamic and leaping moves; they clip overhead from good holds. So, a lead belayer must learn to apply the fundamental principles of belay with a multi-tasking brake hand.

Learning to provide an attentive and vigilant brake hand, while asking single fingers to also stabilize the ABD and deactivate the braking cam, is a complex motor skill. It takes practice and care. But, when done properly large amounts of slack can be offered quickly and nimbly, while the brake hand faithfully grips the brake strand.

The multi-tasking brake must be able to grip the rope firmly, which is easy for most. Firm grips are used to catch falls and most users know how to grip tightly. But, the brake hand must also be able to grip the rope lightly. When gripping lightly, the brake hand is loose enough to slide rope, but never so loose as to release its vital connection. With a loosely gripped brake hand, the forefinger cups under the ABD, holding the ABD in a rigid position, while the thumb squeezes the cam, restricting the cam’s range of motion. The guide hand then flings slack to the climber at an appropriate rate.

The multi-tasking brake hand should take every opportunity to return to default to a dedicated position on the brake strand when the climber is not moving. Or, if the climber resumes moving more smoothly, a traditional lead belay technique can be reinstated.

Ground Anchors

Ground anchors provide ballast when there is a large weight discrepancy between a climber and a belayer. They are also valuable tools for stabilizing a novice belayer. In both cases, the rapid or violent displacement of the belayer can jeopardize the belay system. At the very least, an unexpected displacement makes it difficult for the belayer to focus on the fundamental principles of belay. So, ground anchors are something that any belayer may need, on occasion.

There a three parts to ground anchoring: the anchor, the connections, and the connector. For all three parts, there are a number of variations, but the essential role of each part is the same. The anchor provides enough mass to ballast the belayer; so a clump of backpacks, another person, a free weight, a living tree, or an arrangement of bolted floor anchors might suffice. Connections are the materials that connect the belayer to the anchor. Sometimes slings are used, sometimes PAS or daisy chains, sometimes chain link, sometimes the climbing rope itself. Lastly the connector is the tool or knot that connects the belayer or the anchor to the connection. Carabiners, quicklinks, or a series of knots or hitches are all common connectors.

Three common ground anchor arrangements are:

Using another person wearing a climbing harness as an anchor. The climbing rope with a figure 8 follow through connects the rope to the belayer and a clove hitch with locking carabiner connects the rope to the anchor.

Using floor bolt as an anchor, a PAS as a connection, and locking carabiners to connect the PAS to the belayer and the anchor.

Using a sandbag as a ground anchor, a 48” sling as a connection, and locking carabiners as connectors.

In all three cases the connection should be rigged such that line between the belayer and the top anchor is straight, in-line, and tight. Otherwise displacement can still occur. The position of the ground anchor is least disruptive when it is positioned on the belayer’s brake hand side.

Appendix 1: Third Party Reviewers, Testers, Endorsements, and Certifications

Different organizations ensure consistency in the safety standards and manufacturing processes of all the equipment related to belaying. Any climber and belay team should look for the following endorsements and certifications to guarantee that equipment used in a belay system is appropriate for climbing applications.

CEN. The CEN is the European Committee for Standardization. A product must receive approval by this committee before it can be sold in the European Union (EU). Climbing equipment will have a CE stamp, which indicates that the product meets the minimum requirement of the EU Personal Protective Equipment Directive. The CEN works directly with the UIAA to determine the strength and manufacturing requirements for PPE.

UIAA_Logo_vertical_color.jpg

UIAA. The UIAA (International Climbing and Mountaineering Federation) existed before the CEN was created. Climbers and mountaineers themselves develop the UIAA standards. The UIAA collaborates with CEN to create a consistency of standards. In some cases the UIAA calls for more testing than the CEN, which can makes their standards slightly more strict.  Equipment that has been approved by the UIAA has been appropriately embossed.

3-Sigma. 3-Sigma is a statistical testing standard that is used by climbing equipment manufactures to ensure consistent quality. In order to arrive at a 3-sigma rating, the standard deviation is taken from strength testing results, multiplied by 3 and then subtracted from the average. This process ensures that 99.87 percent of the products put on the market will be above the actual product rating. You will not find a 3-sigma stamp on PPE although many PPE manufactures use this process to ensure safety and quality of their products.

ISO. ISO is a non-governmental, international organization that works with manufacturers to develop approaches to consistency in product manufacturing. The ISO 9000 series in part applies to climbing related activities. Rather than actually rating the product, ISO instead works to ensure a consistent manufacturing process. If a company is compliant with ISO it means that every single “x” style carabiner will be identical when they reach the market. You won’t find an ISO stamp on PPE although many climbing equipment manufactures comply with ISO to ensure consistency of their products.

Appendix 2: Additional Equipment and Ropework

Helmets

A high number of climbing related accidents and deaths are due to falling debris. It is extremely important to use climbing helmets to minimize this risk. Climbing helmets are specifically designed to protect the skull by absorbing the force of falling debris (such as rocks, ice, or dropped equipment). They were originally designed much like the hard hats that you see construction workers use. The climbing helmet has since evolved to become lighter, stronger, and more efficient. In indoor climbing, most of the risk of falling debris has been mitigated, even though objects are routinely dropped, holds break and fall, and climbers can easily impact each other is some circumstances. Nevertheless, the choice to not wear a helmet inside seems common and accident rates due to falling debris are low.

Outdoors, however, falling debris is more unpredictable and difficult to manage. The size of things that fall can also be catastrophically large. Accordingly, helmet use outside is strongly advised and recommended in this curriculum.

Extra Grabbing Plate/Aperture/Tube Devices

There are a number of plate/aperture/tube devices available that give very reliable lead belays even with an inconsistent application of the fundamental principles of belay.

Devices like the Mammut Alpine SMART or the Edelrid MegaJul can be wise additions to a lead belayer’s repertoire. However, a quick perusal of the manufacturers suggested use confirms that even these extra grabbing and reliable tools are still held to the same fundamental principles of belay that apply to all other belay methods. While devices of this kind may one day reform the fundamental principles of belay, Mammut and Edelrid currently make it quite clear they have not yet done so. See the manufacturer’s suggested use for specific instructions.

Clove Hitch

The clove hitch is an excellent hitch for attaching a climbing rope to a ground anchor.

Girth Hitch

The girth hitch is a common way to attach a sling or PAS to a belayer’s harness. While the girth hitch has severe penalties due to it effect on material strength, slings and PAS are strong enough to sustain the destructive effects of the girth hitch. Usually, however, the use of a locking carabiner can be substituted for a girth hitch, making the carabiner a less consequential option.